We have only recently purchased a Form 1+ (typical that the two comes out weeks later) after the initial prints of example parts to test the machine which all came out fine we moved on to printing parts that we would expect to be printing for our customers. I have has issues from the start with this regarding the finish i was getting at the 0.1 setting but after speaking to the support guys I have cleaned all the mirrors and managed to print a part that was pretty much spot on (one minor mark), for some reason though every time I try to print this part on the 0.025 setting the build fails, is anyone able to tell em why this is as its becoming very stressful and my boss is losing all faith in this machine.
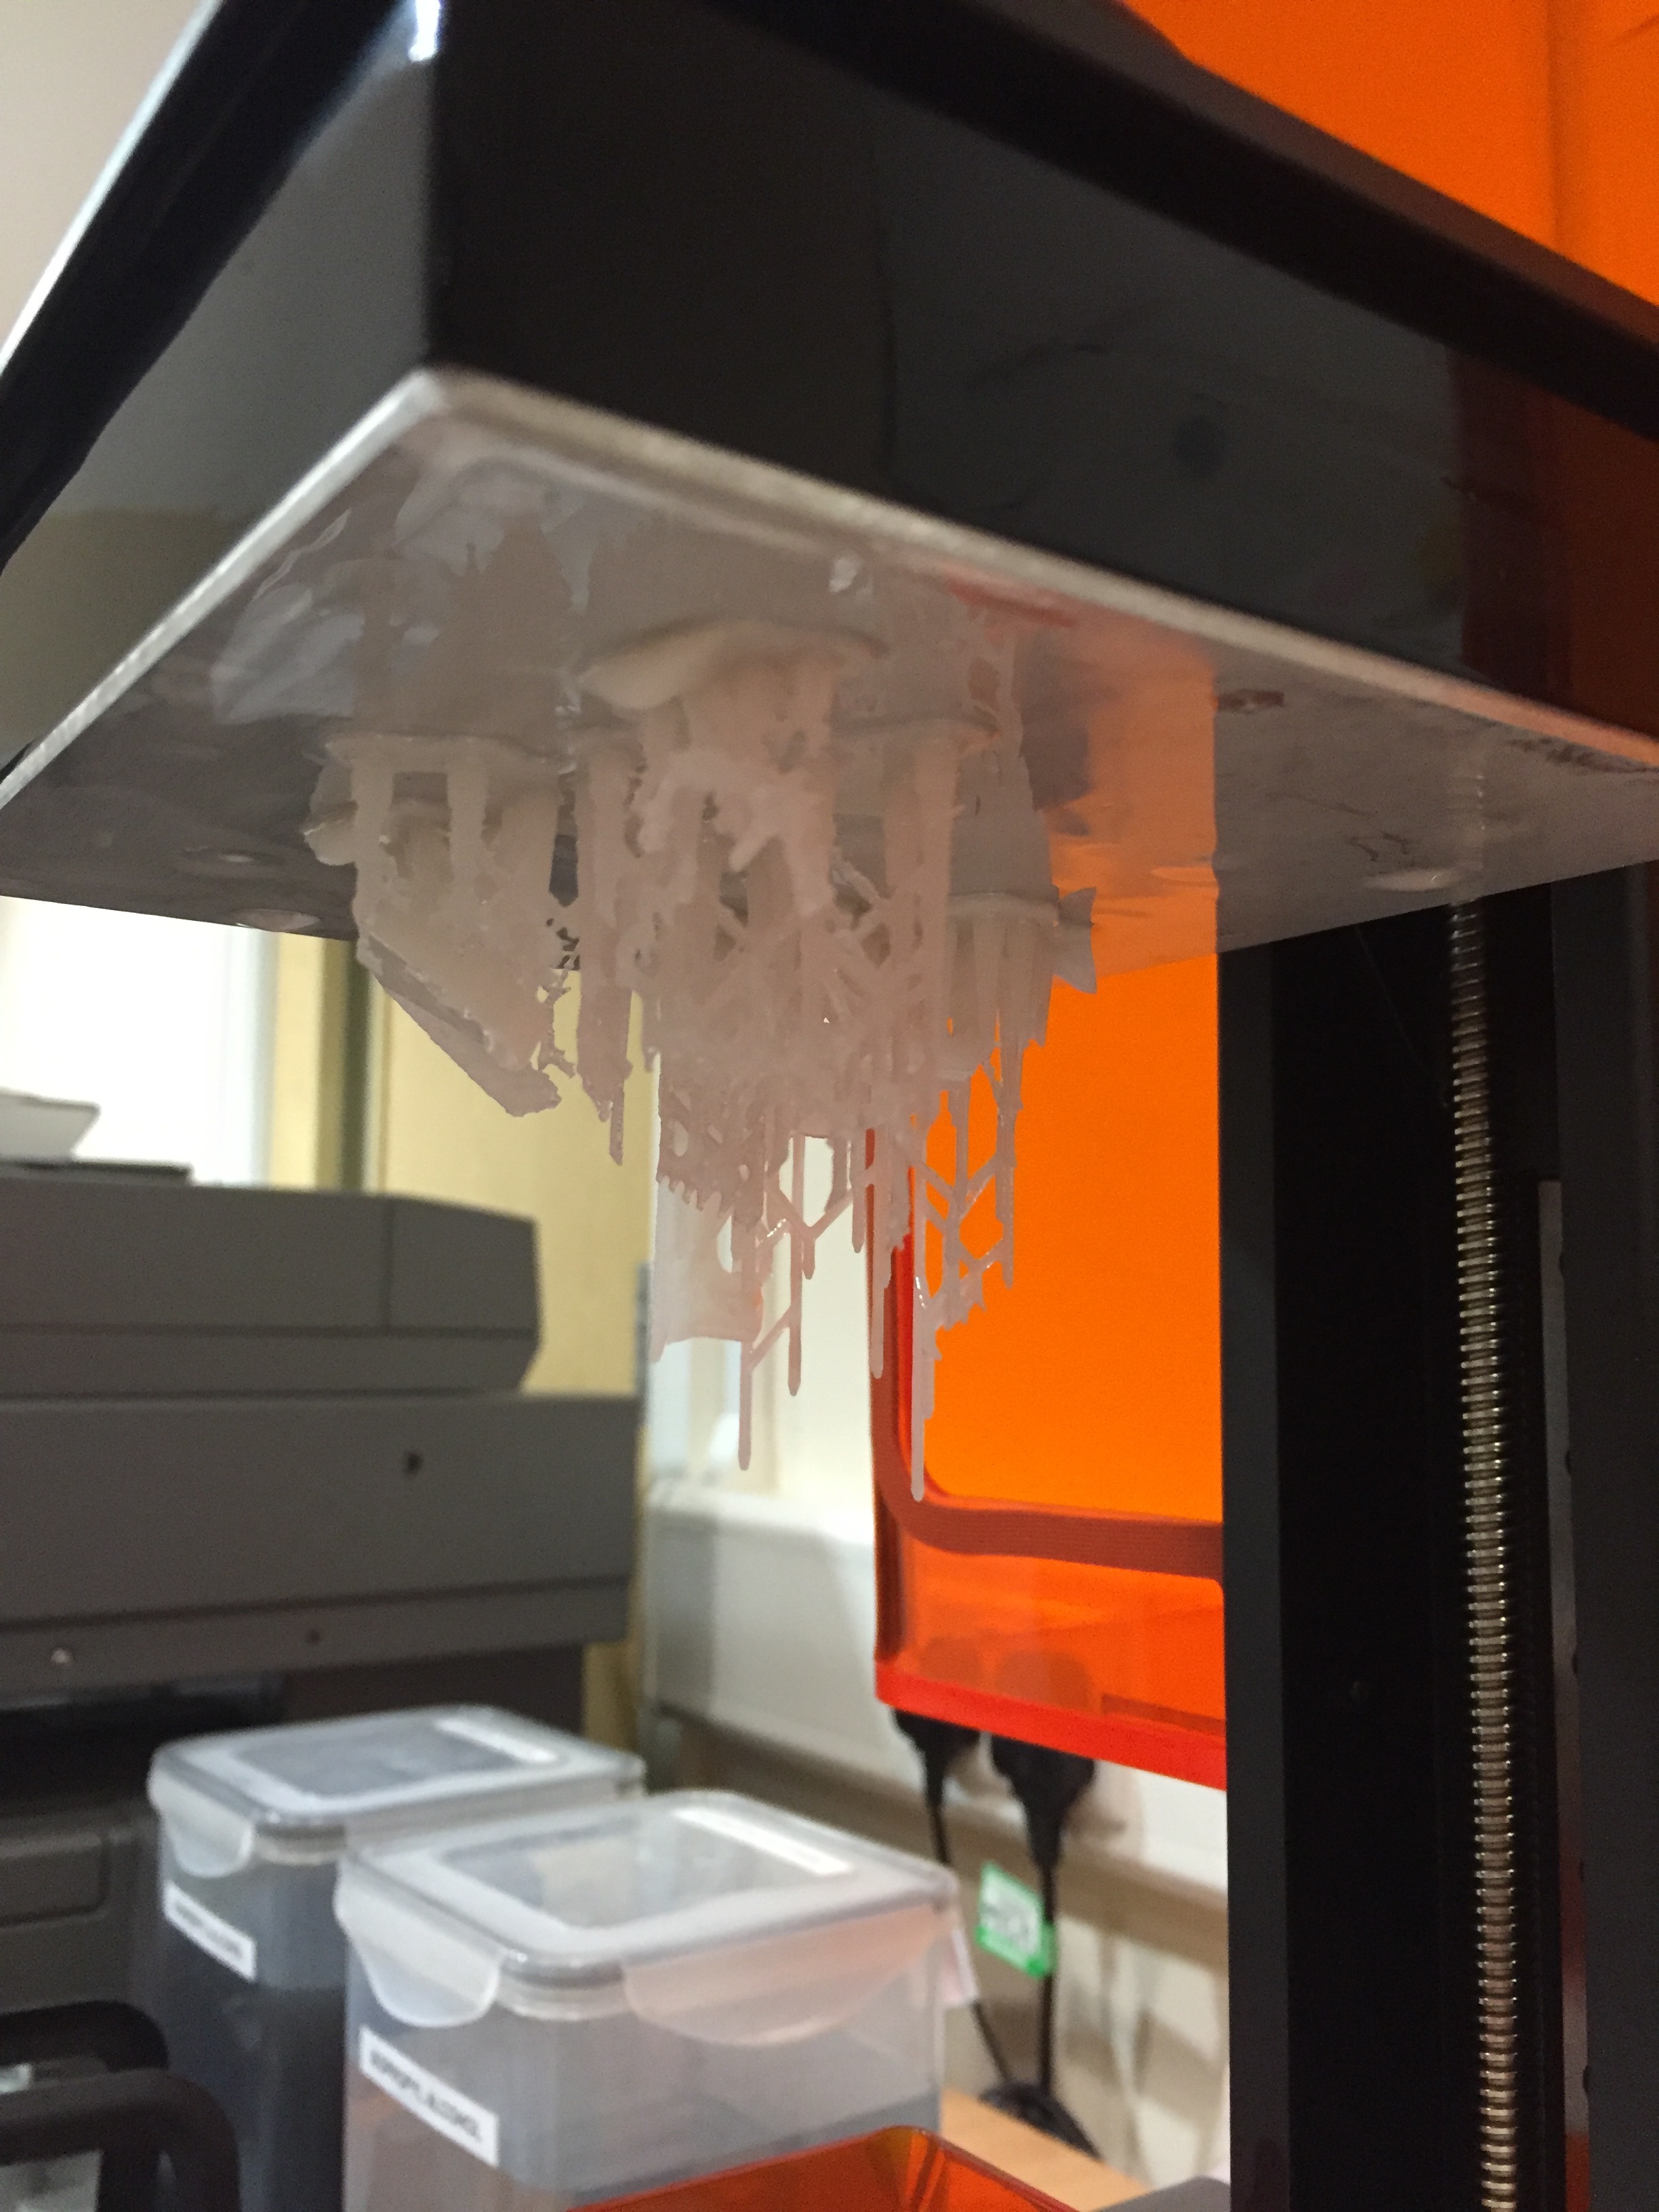
Below is an image of the part in the software, printed at 0.1 and printed at 0.025.
Any help is greatly appreciated.
Thanks,
Simon
I hate to say it, but do you really need the 0.025 setting? As far as I’m concerned it’s merely a “yeah it can do it but it’s not needed” setting as the prints at even the lowest setting are very good.
If I am going to do a 0.025 print then I always have to take my preparation to the extreme. I leave the resin tank empty for at least a few hours before hand to allow it to properly oxygenate (is that a word?), filter the resin as it’s going into the tank through a paint filter from the bottle, thoroughly clean the build platform several times etc etc
Basically it’s a pain in the arse of a setting and looking at your parts I think anyone would struggle to tell the difference between the 3 settings if you handed them all 3.
Gary,
When we ran the print at the 0.1 setting the finish was not seen good enough that we could supply it to the customer, also as the machine is new we wanted to see what the machine was capable of. Saying is it really needed is not really helping us, we have been filtering our resin and making sure that the build platform is clean each time we have tried the 0.025 setting and the fact the supports are always built says to em that the issue is not to do with the build platform.
Surely this is not a case of why are we trying to print at 0.025 but why is the print failing?
Simon
Sorry if I came across negatively Simon. I always tend to stay away from the 0.025 setting if I can.
Do you expose the PDMS in the bottom of the tank to air for an extended period of time? Do you give the resin a good shake to make sure the pigment hasn’t settled? Looking at the failed print I would say that your mirrors and optical path are fine as there are no flakes on the surfaces so it is most likely a case of either an issue with the PDMS or the resin itself.
The only time I use 0.025 is if I intend to use the print as a master for molding, or if it’s a display piece, otherwise 0.05 is fine, one you get several coats of paint on it any layer lines are obscured - printing thin is an obvious way to minimise visible layers as well (thicket prints create more stress so the layer lines become more obvious).
From what I see to print that at .025 you need more supports. Higher resolution means more peeling which means more stress. Try adding a few supports across the flat section (they should be easy to sand down when done) Also check to be sure that your tank is not fogging and your resin is properly mixed sometimes the white pigments tend to separate and lay at the bottom of the tank so you really need to “stir” them back in if it has sat too long.
Tom
1 Like
Thanks guys in answer to some of your questions:
- The tank either has resin in it or it has the lid on between builds so is not exposed between builds.
- The resin is given a good shake if it comes from the bottle or if it is already in the tank then it is strained and then placed back into the tank and then a comb/scraper ran through it multiple times.
- Gary you are correct since we have cleaned the mirrors there are no more flakes etc.
Jason we were trying to use the 0.025 setting to create some display pieces to show to customers when they come in,
I have been trying to get away with using the support setting at 0.5 as we are hoping to do as little sanding on the parts as possible, I find once you start sanding the part you then need to sand all of it which can be tricky on certain shapes. From what you have all said i think it is worth trying the print again at 0.025 but leaving the support setting at 0.1 or can i still use 0.5 and just add supports myself?
Simon
Simon, check out my gallery at www.formwurx.co.uk - only 1 model on there is printed at 0.025, I’ll let you work out which one!
I think we may have a winner! From what I can understand you don’t seem to be allowing the PDMS or silicon layer in the bottom of the tank access to the air. There was a thread that discussed this a while back but essentially the PDMS in the bottom of the tank needs to have access to air to allow it to give you the non stick property. Now this is an issue with our printers as the PDMS doesn’t have access to the air during the printing process and the oxygen in the PDMS gets depleted. I believe this one of the reasons the new form 2 has a scraper run across the tank.
Drain a tank completely of resin and leave it to sit in the open air without the lid on (preferably somewhere dark so any small drops of resin don’t set). Then try filling it with resin for a print.
Gary, How long would you recommend having the tray in the dark for? Does this not run risk of the tank becoming contaminated with dust etc. It seems odd to me that this would only be an issue on the 0.025 setting.
Jason your models look great but the issue we have is that we do not plan on painting any parts we would like to supply them to the customer as they come from the machines as it is mainly for prototype work, thanks for the advice though much appreciated.
Simon, I’d say an hour just to be sure. The lid doesn’t have to be completely removed. I generally just put mine on top but off set to let air in. There is an issue with dust of course but sadly that’s a battle that never ends with the form 1+  It’s probably a bit of an issue at the larger layer sizes but because your printer isn’t printing as many layers, it doesn’t manifest itself in the same way as the print is quicker.
Give it a go and see what happens.
The .025 parts require a lot more effort to print properly and won’t have much of a benefit in print quality. You will have more failures than is normal. This setting is best for very small parts (like jewelry).
For me dropping from 0.1mm to .05mm is a fairly large quality improvement that results in mostly smooth surfaces.
If you want to print at .025 I would suggest a few things in addition to the posts above. Try keeping the part reasonably close to the hinge side of the build platform. Try rotating the model in the top view (this has an effect sometimes). If you have a flat section that needs a better surface finish print that section vertical. Any vertical section will be reasonably smooth regardless of the print resolution (layer height).
Fred,
Thanks for the response, maybe its worth not using the 0.025 setting then unless really needed. We are only trying to use it to see what the machine was capable of, we were having issues with the finish for ages but after cleaning the mirrors this seems to have gone now so maybe the 0.05 setting will be good enough.
I am still trying a 0.025 print as we speak with more supports so i will see how it goes and then run a 0.05 tomorrow morning.
Simon
@Simon_Miller
Also something you should definitely do.
Increase the base thickness to maximum.
Increase the height above base to at least 8.00 mm. Or at least as high as possible within the build space.
This will allow for a bit more flex from the supports and decrease the peel stresses. This is extremely important on larger parts, IMHO.
Can try to give the model a different orientation?
Thanks for the info guys, I tried to print the part again last night on the 0.025 setting with more supports, I also added the butterfly example to the same build. They both failed miserably.
At this point I thought well ok maybe it is just this setting so I tried printing the original part again but this time at the 0.05 setting, again this failed.
I am now going to try the box again on the 0.05 setting on a different orientation, this is getting very frustrating as it doesn’t feel like I am trying to print an overly complicated part.
Any advice?
Simon
The part looks very thin in the middle, I can see the cabinet through it. Try thickening that area up.
Edward,
The part is thin you are correct but there was no issue printing this at 0.1, we cannot really thicken this up as this means the part will not be the size the customer would have needed (this is not for a customer right now this is just us testing it)
Simon
I would try printing the part vertically and oriented parallel to the front of the machine. This will lessen the tendency for the part to twist during printing. It may help but you’ll have one side that will require some extra finish sanding.
Some prints can be very frustrating. Once you get a better feel for how to orient the print and eliminate some problems things will get better.