We just just published a short blog tutorial on using hydrographic dipping to color prints with digital graphics. A lot of 3D models have color maps, and the potential to color 3D prints automatically is very exciting.
There’s a lot more to learn about how to make successful hydrographic printed parts - this is just a start, and far from perfect. We’d love to see your results if you experiment and improve on this process! Here are a few more resources to get you started:
Hi
I’m new here but am interested in replicating this project. Trouble is I’m also new to Blender and have been trying to learn enough to follow. It would be great if the Blender Workflow section could be elaborated on for newbies like me, maybe with screen shots to show what windows/views to be in at each point and even with an example of how I would load my own collision and film objects. I don’t even get whether the workflow given is what to do if I use the supplied .blend file or what to do without the .blend file! I’d be grateful for any guidance.
Many thanks
Great work! At the end of the article you mention:
Could you use the peel motor to adjust the tank’s X location in your jury-rigged Form 2? (Or tilt in a Form 1 + OpenFL to shift the film around?). Would moving that much mass create too much surface ripple? If it worked, that would leave just one dimension of adjustment required in either your gantry or tank holder.
Are you envisioning X/Y tweaking (e.g. in a CoreXY printer) would be done manually or by some kind of optical feedback as in Zheng’s experiment?
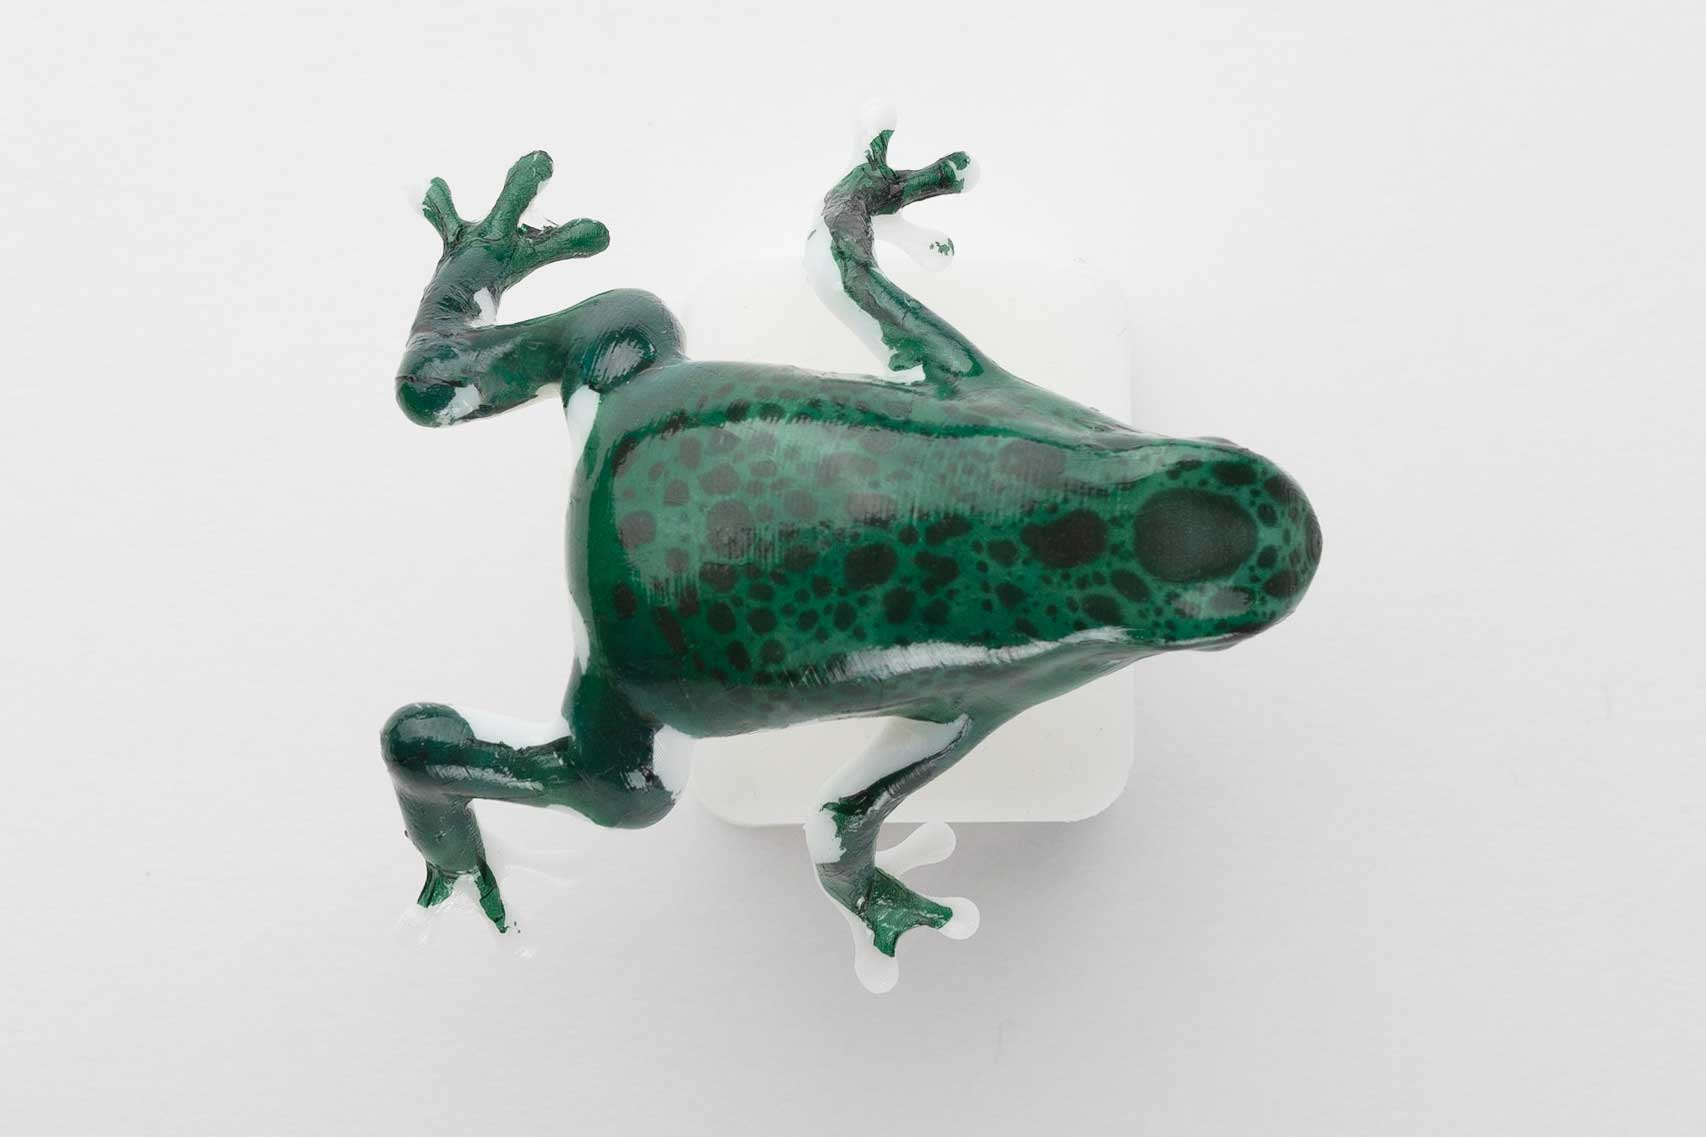
Could we get some more photos of other attempts? I know spraying the activator causes some fading and would like to know how brilliant you can get the colors to be.
Also curious if anyone here has ever tried to create any sort of “robot airbrush” for texturing 3D prints.