Tested, working directly without need to change your mechanical calibration.
Just open the machine, get the SD card, Open it in a browser, Edit user.ini and set the offset accordingly
MOAI PDMS: 7.2mm
FORM1+ PDMS: 8.3mm
MOAI FEP: 12.8mm
So if you are using a form1 vat as the reference level you should edit the values to -4.5 for the MOAI FEP and +1.1 for the MOAI PDMS
Positive Values Make the Plate go lower, Negative make it go higher
I mechanically levelled mine to use Moai PDMS vats for that reason i’m using -5.6 on the photo album below

for more info check
the photo album
5 Likes
So did you have to cut some notches in the back wall of the MOAI tank to provide clearance for the arm?
Yes, indeed i had to.
It’s a small evil I can live with and easy to perform mod, so far this is the less intrusive form of using any of the Moai/Form vats without having to mod the machine or your working calibrations 
I am redoing the Moai FEP Vat from their source Step Files and will share here on this post soon. I will talk to Moai too to ask them to incorporate the mods into their vats so it is direct compatble with the Form1+
1 Like
Very cool. So now that we have alternatives for resin and tanks, the only ting that remains is to find sources for repair parts. Some we already know we can get, others not so much.
it would be interesting to see if some of the parts that go into the MOAI could be used on the Form 1+, specifically, the laser and the galvos.
yes we can rebuild a form1 as a moai-form-kanstein. I am talking to Mark Peng, the CEO of Peopoly to see if i can convince him to make a drop in kit for the form1+
if you know of a cheap for parts F1 on europe let me know, if i can get my hands on a dead form for cheap i can do a step-by-step refurbish with Moai parts for the sake of the community.
Btw i sucessfully calibrated Peopoly Nex Resin to use with F1 and a moai Fep Vat.
Resin calibrated Profiles can be found here, I also forked the original OpenFL repo under a new Organization, activated the issues on the forked repo so we can use it as development and added a community-resins folder that anyone can contribute to.
@ALL > Drop me a message with your github nick if you want to contribute to the project, so i can add you to the repo team
3 Likes
I looked at your various tests using the Peopoly resin, and frankly I’m not impressed with the results.
From the looks of it, the test you did at 13mW and 18mW gave the better results, but even then, they are not all that good. The interior should have both the stairs and the double helix, and you should be able to read the writing at the top of the tower clearly. I think I know why you’re getting that line at about the 5mm height, because you’re printing directly onto the platform, but it shouldn’t be that pronounced.
Instead of using OpenFl, have you tried using one of the existing FormLabs Profiles (eg. Grey v1 or Grey v3)?
yes, overcuring
dunno if u noticed but i started with the stock clear resin settings. that should be less power than grey, also I’m using FEP and not PDMS
This is how the resin looks printed in the Moai, ignore the failure on the base since i neglected to tighthen the plate
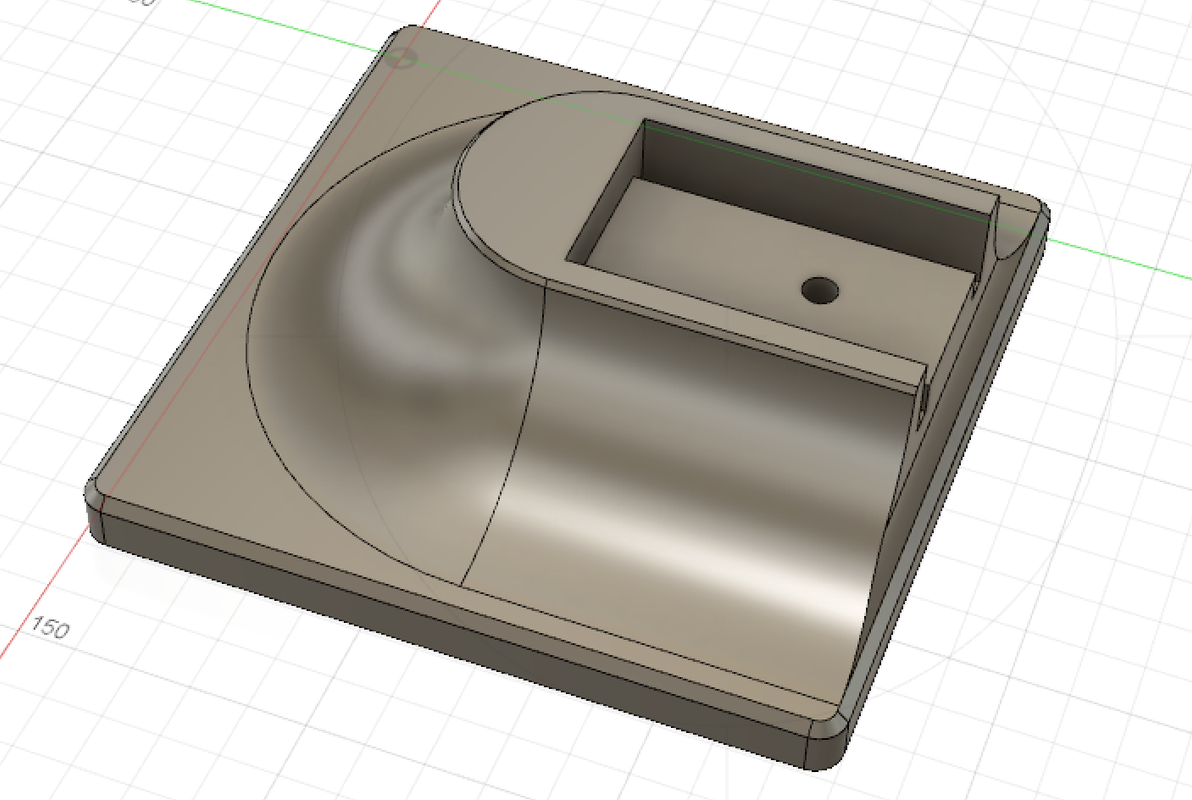
I have this base design for an adjustable build plate. I have a prototype almost done but shy a piece of aluminum that I need to pick up. If there is a way I can upload a step file the model has reference parts of the F1+ including stock tank and pdms height that others may have better solutions or can modify my design.
I don’t want to dump out a useless obj as you would lose the solids that can be easily edited.
I am designing a build plate that is easy to make, and will release the models next week. It will use a 1/8-5x5" piece of aluminum that is on eBay for $3.
1 Like
My Form 1+ has no User.ini file on the SD card. Why not?
do you have a thinguiverse account I would put the stl and the step files there or in grabcad. but preferably in thingy since that way people can fork your design and keep proper kudos for source.
I will be collating a list of open source solutions and files for the form1 in the newly created github organization OpenSourceManufacturing
i will link your file and silvers and all other sources we can find.
everyone is welcome to join the group and help with the collection and curation of content, just pm me your githib nick and I will add u guys to the organization admins
I think it is only created the first time u use the preform printer tune settings
let me chime in for a second on some of these designs like @KenCitron or @rsilvers.
While they look nice and slick, they do have one disadvantage that the FormLabs one does not:
Their top surface will be submerged under the resin, and as the platform keeps moving up with the build, they will not drain properly, Ken’s design more so than RSilver’s.
FormLabs has vertical walls that are submerged, none of the top surface does. The vertical sides will drain naturally during the build, even though there still is a bit of resin sticking to the walls. But it’s easy to clean and there is very little wasted resin.
A flat top surface or or one with a very shallow slope that ends up submerged in the resin, will not. So resin will pool on top requiring you to manually drain and/or clean that surface every time, wasting time and resin.
So, take my 2 cents for what they’re worth, and maybe do a bit of re-design.
They will collect resin on top but not that much as the build plate rises there will be less and less resin on top. I have mine as open as possible so you can run the scraper blade over it to swipe off any excess…
I would suggest washing the build plate in ipa if it is going to be stored for a long period of use.
The adjustment range has more than enough to work with imported tanks like the Peoploy as well as user filled PDMS making the PDMS level less critical.
Lastly the open design allows for more resin in the tank since the tank displaces less material. this means bigger and more prints per fill.
There are some tweaks needed but my goal was to offer up a fairly easy solution that users can print and make on their own. If someone has a MakerBot or similar FDM they could modify and print the entire top in one shot. I have the top in 3 parts so it fit in the F1+ build platform and I then cast them in urethane so they are solvent resistant. If it works well enough I will job out the one piece version to and fdm printer.
Thing Universe has to be one of the most over engineered sites making it useless to post anything.
Here are the files at sat on my Onedrive:
https://1drv.ms/u/s!AjccxQu5QhueiQ_R2zYpPKQ5AaqG
I can make mine with vertical sides if that is really better. My way has two advantages. One is a lot less FDM material. I started with more of an exact copy of the Form Labs one and it was $7 in PLA to print it. Also, this more minimal design allows more resin in the vat before over-flow.
So what does everyone think? I can do it either way.
I am happy to report that I added a user.ini file, and the printer saw it and made use of it.
1 Like
i think u should look at the peopoly moai easy plate. its similar solution to what tye photon uses and was designed to maximize the resin volume on vat specially when using a fepvat like moai
you can post on grabcad too it allows to read step files on their 3d web viewer
i have some there miself
if u cast this in urethane add some aluminum filling around 10% by weight to the A component it will add heat resistance ability to your cast and better strenght
