Hello Everyone,
I am diamond setter ad use outside casting company
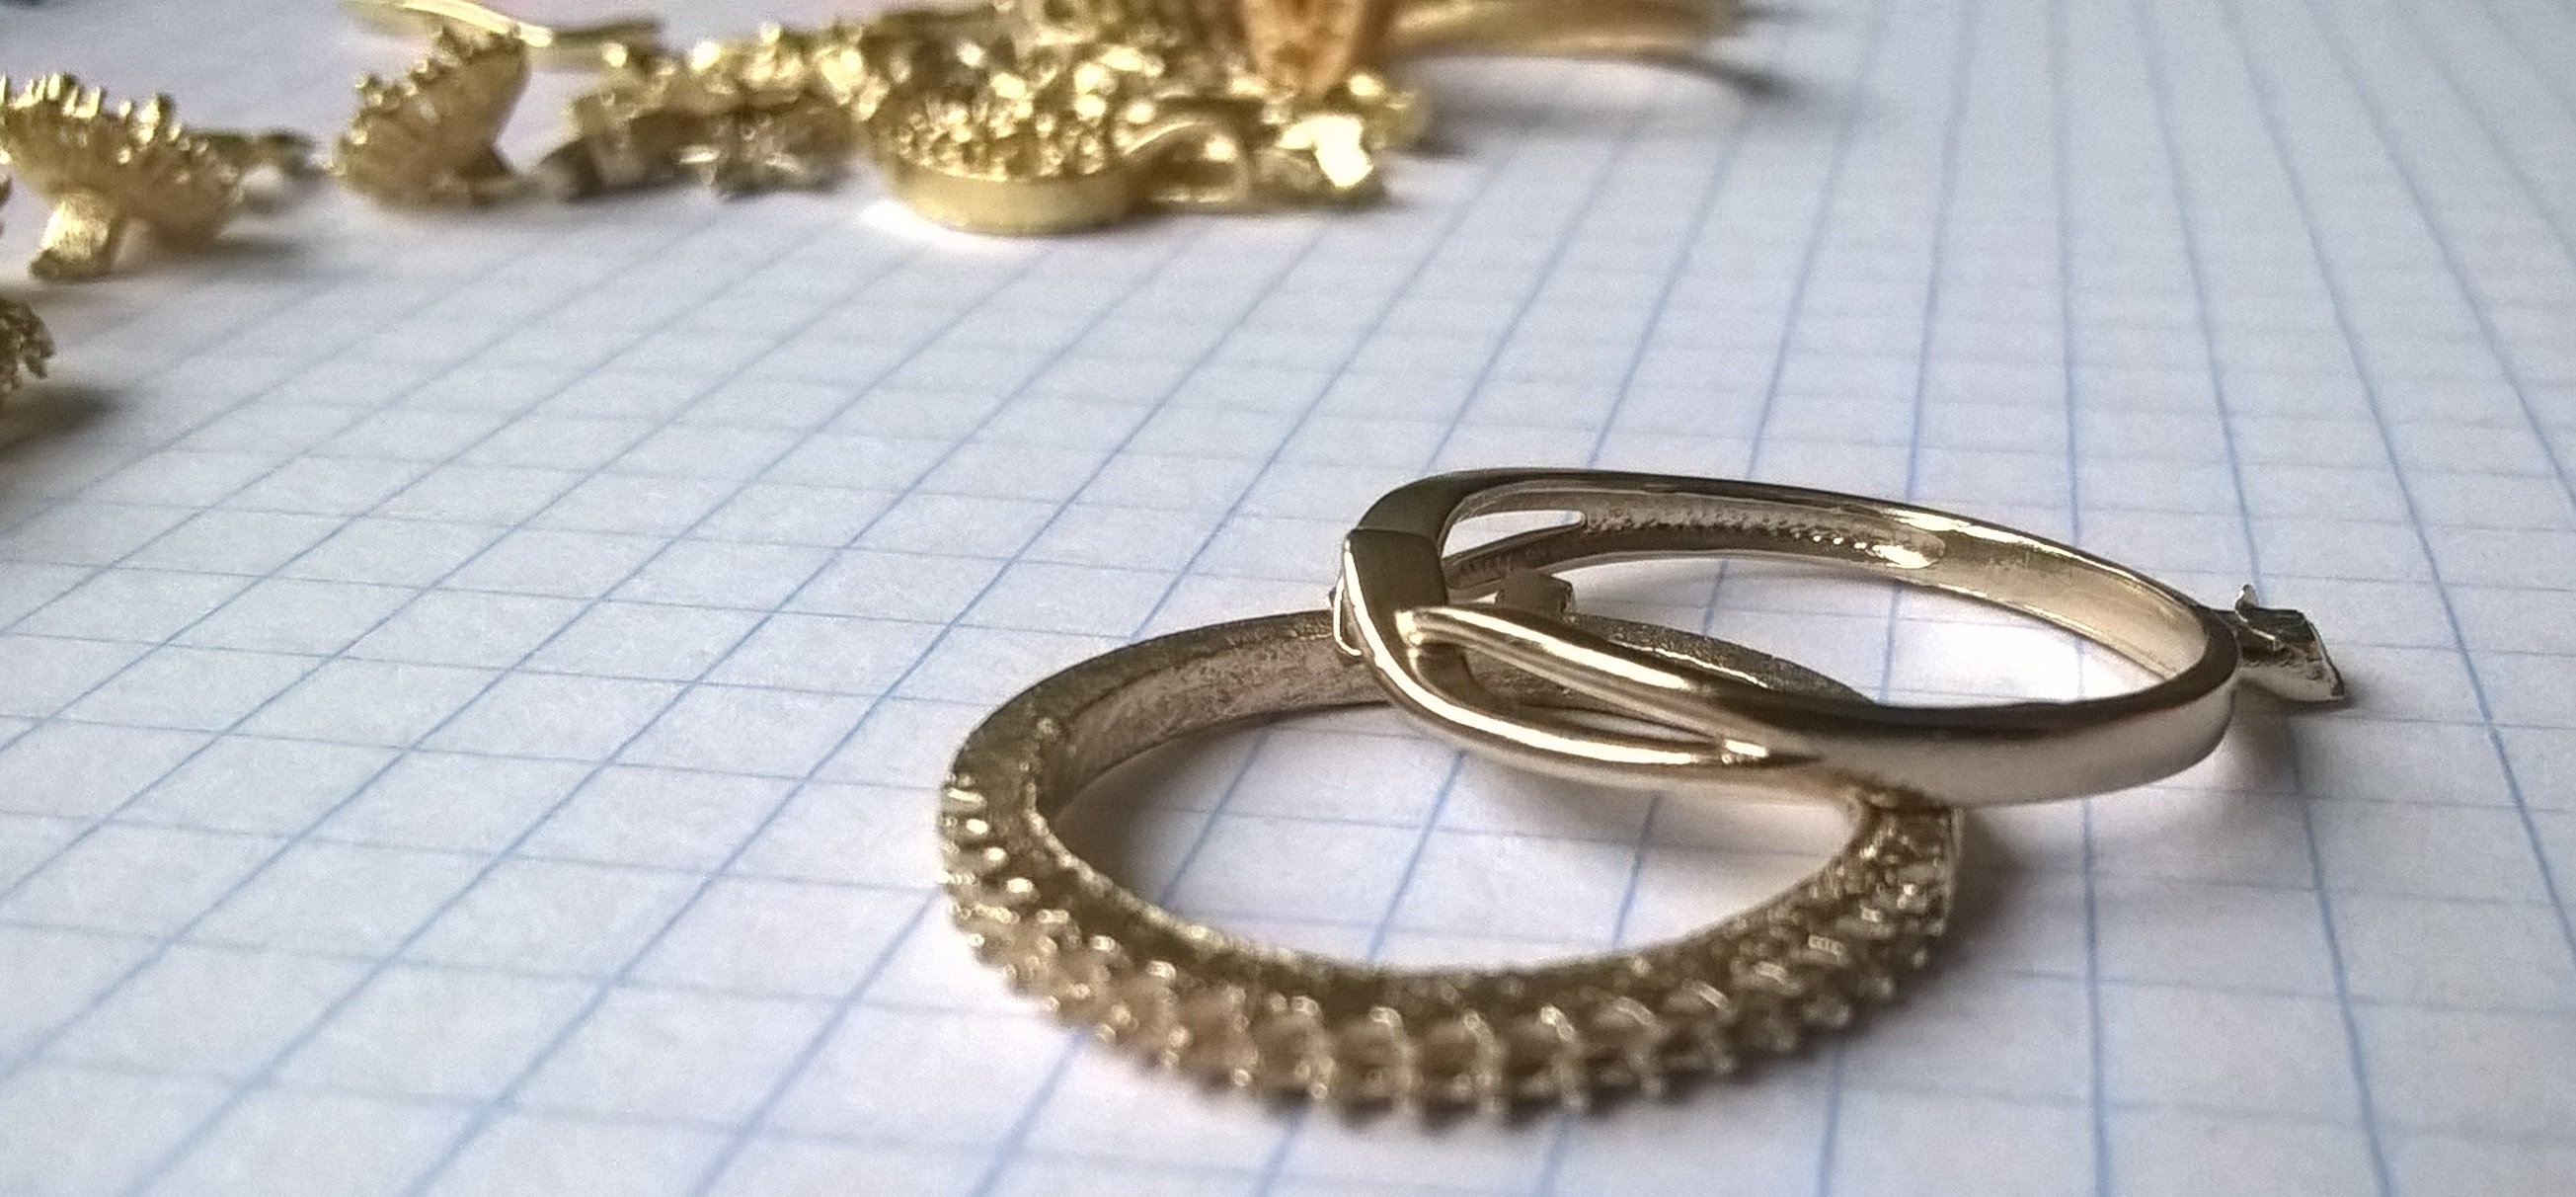
here would like to share with last casting of 14k gold
3 days on the sun and 25 microns accuracy
Previous castings in Pt 950 and 14k gold were nice.
This is after repair service. I am hppy that form1+ prints
Prints came out very well.
Jjust from the bottom of each item, the laser burned too much just a little bit- can it be adjustable? not to overcure?
Please advice how to prepare the resins better for casting. Have bought already that nail curing box
I am happy that all the prongs are casted,.
When resin becomes harder ( or just better somehow) , so the surface becomes smoother.
This is a theory I want to apply
Some areas will be very difficult to polish but possible
Some items are ideal for melting Anyway will cast until receive proper quality
Would like to receive more smooth surface afetr casting. I think everyone wants it.
Please advice what to do
I am a newbie, and getting ready to purchase a Form 2. I received a sample from another company that uses similar technology, but with seemingly flawless surfaces.
I’m concerned about the quality of the prints from the Form 2…I’m seeing striations and wondering if this is just “normal” for the technology? How much post-casting polishing is required to eliminate these surface flaws? I saw the work of the Golden Casting Company (I think) and would like to know how one might achieve such a flawless surface, and preferably with minimal post-casting work.
Is a little bit of striation just acceptable? How is everyone finishing pieces after casting? Any help and insight appreciated…in new and uncharted territory.
I like them all! Where all these made with the Form 1+? Maybe the curing needs to be done not by exposing to sunlight, but using a UV chamber with the proper wavelength… I’m too new to this technology to offer more advice on curing.
I like the imperfections myself because it gives the impression of ‘hand made’, even when the design hasn’t been initially sculpted. That is the look I’m going for with the pieces I design. In many cases, I actually incorporate the surface (like hammered metal for example) into the design so the final piece looks rather ancient. The sample I received from Formlabs in castable resin was pretty flawless, and I only assumed that the cast piece would be just as flawless too.
@gabrielguzman
thank you that you like them all. I like the imperfections myself because it gives the impression of ‘hand made’,
this is nice point of view. haha, really goood
Curing is my main point of hardening the material before casting. Agree.
Tomorrow i start from beginning the process.
yesterday received the curing chamber. Will see the results of port-curing after new casting soon.
@katkramer
small stripes on the surface are normal. Bubbles after casting - not normal.
Flawless surface after casting is perfect. Easy to polish. This is what we want to achieve.
Maxim, do you have any “ideal” castings that you can show that have not been polished…showing what might be the best quality that can be achieved? Many thanks in advance.
All 3d printers leave striations in the surface. The size of the striations depends on the resolution of the printer. Generally the higher the resolution the finer the surface detail. Two factors then come into play. Cost and Time. The finer the resolution the higher the cost of the machine and the finer the resolution the longer it takes to print.
So its a trade off. You trade time and cost against surface quality. I know companies with very expensive machines capable of very high resolution surfaces that never use them at their high resolution settings because it takes too long to get a print and it is quicker to print at medium resolution and finish the surface by hand,
To finish my models after casting I use needle files, very fine emery sticks, fine wet and dry paper around 1200 grit followed by buffing with tripoli, and rouge on a polishing machine. you can also use ceramic beads in a tumbler.
Big companies also use electrostatic polishing and chemical surface finishes such as Cyanide Bombing but these processes are less suitable for small workshops due to the cost and health and safety required.
Thanks so much. Would the ceramic beads in a tumbler replace the hand finishing, do you think? My situation is that I’m prototyping for silver jewelry…I could make an RTV mold from resin or cast directly from the castable resin, making a master that I would then use to create an RTV mold. I don’t know what would be the best route. I have some tight tolerances in the design…it’s a rather mechanical piece of jewelry, so I don’t want to do a lot of heavy finishing if possible.
I’ve found a new distributor of Formlabs here in Austin, and have shared a couple of models with him. He’s going to print one in resin and a couple in castable resin at 25 microns.
I did see some samples with the Form 1 that showed some detail was lost at 25 microns…the surface was smoother but some prongs fused with other prongs.
At the moment I am not very satisfied witj the casting results, I think it’s perhaps since I didn’t leave my models more than two hours in the UV chamber.
I’m making another test where I’ve left the models for more then 9 hours and hope for a successful casting result.
The surfaces on these casings look very much like those produced when the metal is poured at the wrong temperature, specifically when the metal is too hot. It might be a good idea to talk to your caster about the burnout cycle he is using.
@billb
Talked to the caster but they don’t want to change the process especially for me.
Maybe you are right,
Will try to talk. thanks
or i try other casting companies. Smaller companies with individual attitude.
@Hillzzz
agree with your finishing process.
at the end I use ceramic process. It is very good.
Polishing takes 2 steps and lasts ~~ 36 hours depends on the items desired to finish - how big and complicated, if chain or casting material, small or big etc. need to divide for sequences. They need to be equally balanced.
I heard about bombing, but don’t know this area.
@ katkrame
finishing of difficult areas - you can try electropolishing.
Purchased a line yesterday, will try on Tuesday. Will post pics if succesfull.
It is for gold mainly.
About silver polishing- needed cyanide solution. - I am not familiar with it, so nowadays so I just leave it.
Does anyone tried any coating solution on resin after post-curing?
Some thin 0,01 mm layer which can be burnout in oven.
Maybe it helps somehow.
@MaximLobovsky
Maybe FormLabs Team can innovate a resin adding with some atoms
and during post-curing process these atoms will go outside “connected” of surface (similar to coating).
It provides smoother leak out the resin from inside and keep outside of surface in proper condition.
It would be great if it works
(I am dreamer now)
Ceramic chip tumbling in my opinion will not replace hand finishing because with hand finishing you can choose to use hard felt mops for polishing flat surfaces and things like Water of Ayr Stone for smoothing and flat areas stay flat and sharp edges stay sharp. With ceramic chips the service gets uniformly ground where the chips can reach so a shallow dent in the surface will get ground at the same rate as the rest of the object and will still be there when the process is finished. sharp edges get a little rounded prongs get worn down and so on. That can be acceptable and much commercial jewellery is made this way. But if your making a virtuoso craft piece then I would hand finish.
Hi the silver ring shows clear evidence of porosity. this is caused by an incorrect mould temperature, or metal poured at too high a temperature or bad spruing. As far as I can tell from the photo this is not the fault of the resin. Its just a very poor casting.
Try lower metal temperatures and a bigger sprue. if that does not work try a lower mould temperature.
Luckily I have a casting setup and will be doing the first cast of any piece myself. I’m familiar with porosity and heating the melting too much, so thanks for that tip. I have found a local distributor who will be printing my pieces this week, so I’ll get a chance to cast next week some time with some first prototypes.
For those of you who are already working with the Form, what’s your best recommendation for removing the supports? Are you using a bur or anything to ground down the support contacts, or just casting as-is and polishing post-cast?
@Hillzzz
Yes porosity is obvious on the surface. (Items are in white and yellow gold 14k. just wanted to check if there is any difference)
The point is that gold sprues are smooth, just the resin part has porosity.
please see picture below
Any advice how many degrees C lower temp is required for succesful resin casting?
so i could talk to casters to make some separate tests.
PeterG
I have posted what I do with the prints but I don’t think anyone had tried it because I have not seen
any feed back on the posts. I can see you have done many prints so making a test on one would not hurt.
Here it is:
Spray lacquer on the surface of the mode before you send it to be cast…
1) If not cured the resin causes a reaction when it becomes in contact with casting investment.
The lacquer builds a barrier between the resin and casting investment.
 2)  It will  help with the striations on the print..  Spray from a distance of 8-12 inch so it is spread evenly
       On your pictures you don't  have high detailed areas like micro prongs  so the lacquer  should work.
@Evert_Gonzalez I have read your advice 3 days ago.
Discussed about that idea, BUT there are many kinds of lacquers. You mean like hair spray?
I am willing to do a test if you could be so kind to confirm. Soft hair spray is OK?
Today I am printing some jewellery parts, and will post-cure in UV chamber as MaximLobovski advised to do.
Will send to casting next week.
Tomorrow can print some more and can try to spray that lacquer, than send again to casting company.
Yes of course, I can show the test results afer lacquer.
I am using Rust-oleum Lacquer right now. I have also used Minwax Lacquer.
I believe any spray lacquer should work.
You can get it at Home Depot.
Make sure you get clear laquer
there are three reasons why the sprue might be Ok but the ring not.
1 Poor Spruing. The sprue is too long or does not provide sufficient flow into the ring. Always aim for a short sprue and a nice smooth join with the item. The thickness of the sprue should match the thickest part of the item and you should attach the sprue to the thickest part of the object. I would not have sprues the stars in the way you have done in the photo.
Next resin attacking the investment during burn out. This is a problem with some investment powders. Two that work are Omega Plus from Goldstar powders and Plasticast.
Last overheating the metal or having too high a mould temperature or both.