Hi -
I am testing some prints with Tough 1500 V2 as I often find myself needing to print directly on the platform as apposed to using supports. This is mostly when I print enclosures with large flat surfaces and square corners etc.
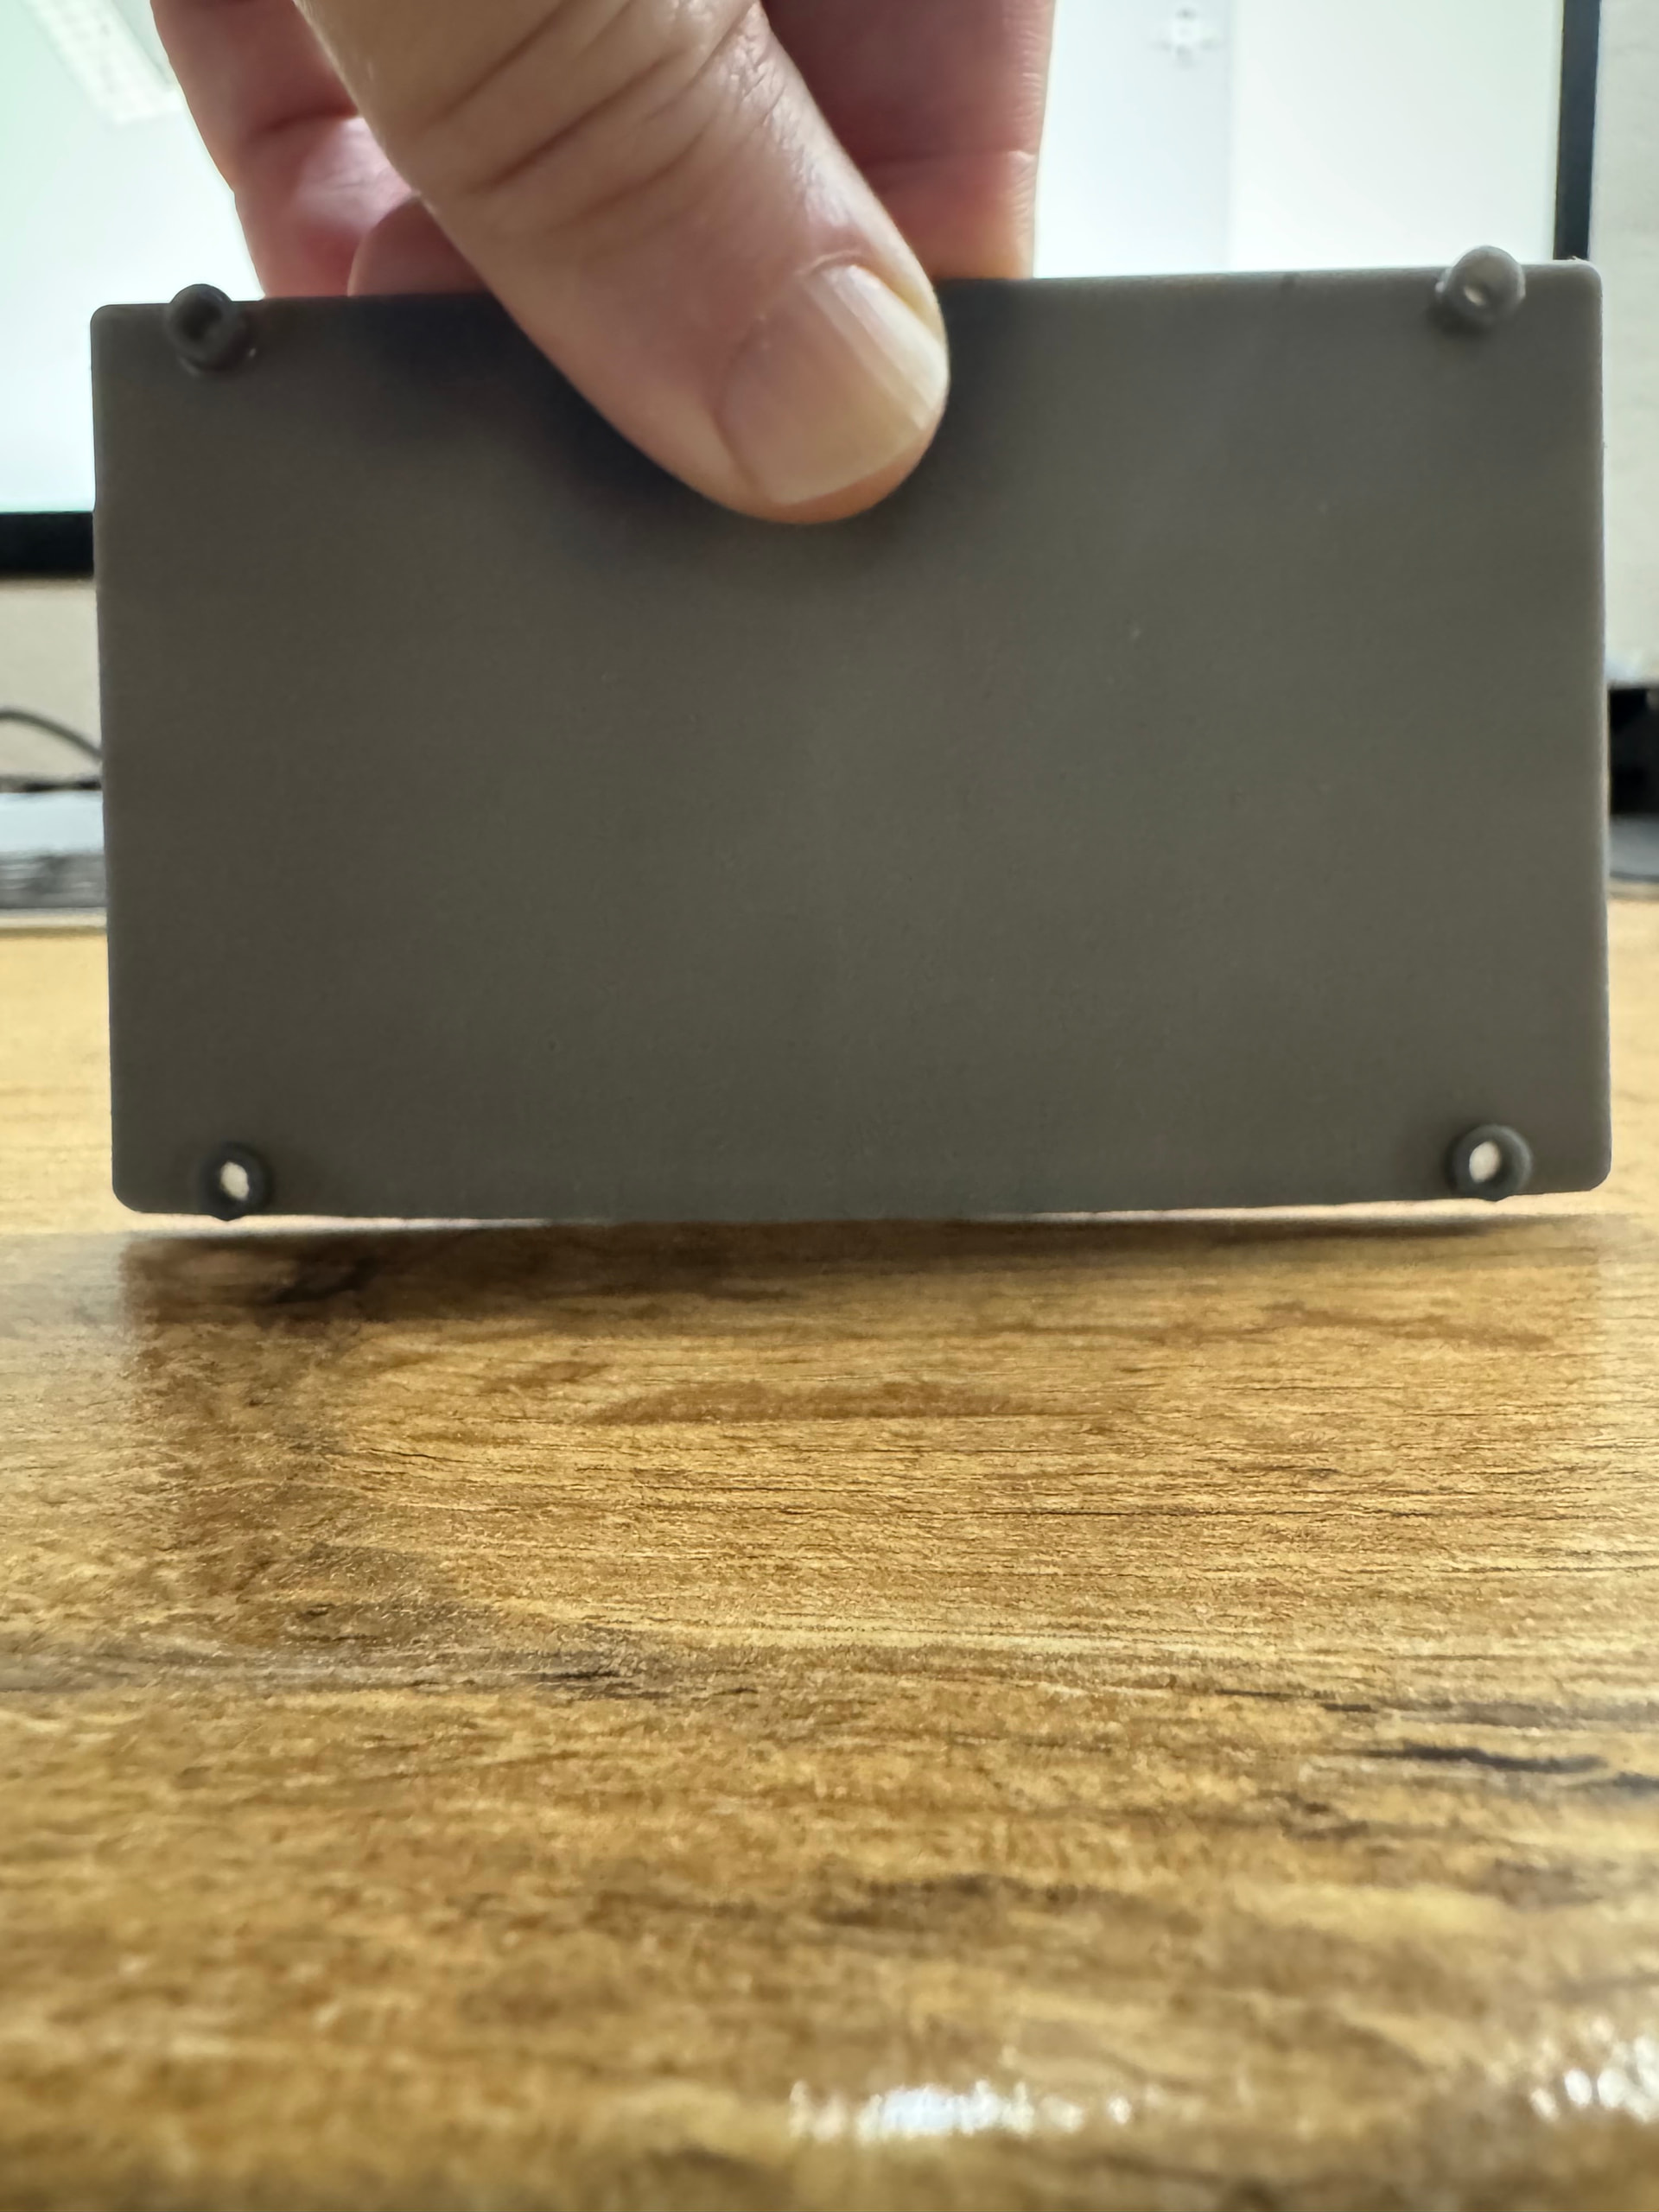
I was going to print some sample cubes for testing, but though I might as well go for broke and print functional parts while I am at it. The part below is for my office chair as the pneumatic cylinder decided to give way and it kept declining. I designed and printed this part to keep it up and hold in at the height I prefer.
I created a custom profile for the Tough 1500 V2 only amending the “early layer exposure and offset” settings to the following:
The print seems to have come out ok, I can see no obvious elephants foot and it came off the platform very easily. There is a 0.25mm discrepancy in actual print height and the designed part though. I will look into this, do more prints and post my findings.
I printed the same part on my UM as well using Polypropylene a while back. The part lasted about 3 months before breaking. I am eager to see how the part printed using Tough 1500 V2 holds up. It was a lot easier to fit this one as apposed to the polypropylene part due to it being more ‘flexible’.
3 Likes
How is your part holding up after 3 months? Also did you find a solution for the 0.25mm difference?
Hi @Mr_Solissa
I will give you some honest feedback - I am not the biggest Form4 fan at the moment so you can believe me when I say Tough1500 V2 is amazing! This part is still holding up…. I sometimes forget that I have this part in place and jump and the chair. It has not been damaged in any way!
I just wish I could find a way to print square things square and prints multiple pars that must make a n assembly that actually fit. So far this has eluded me.
With regards to the 0.25mm…. the way around this is to either:
- adjust the early layer offset settings so that the early layers are not compressed as much
- increase part by 0.25mm to accomodate for the early layer compression
If you adjust the early layer settings, I suggest doing this incrementally and print small test cube eg. 10 x 10 x 10mm and measure. Higher the values, the less compression. Just note that at some point, the print will no longer stick to the platform, at which point you will then have to adjust backwards. You might reach the desired results before that point though.
1 Like
Good news on the Tough V2, I’ve been only using it for a month now and I’n quite impressed with how much the parts can take. But also curious how parts would behave/hold up in the long run.
What do you mean with printing square parts square? Do you mean you have issues with parts warping?
I’ll apply the second solution, it’s easyer to add the extra length in CAD when keeping a 3D-print DFMA in mind. Thank you for the input.
Hi -
This is good news. I like the Tough V2…. so far the better resin of the lot. I have not really used the other more expensive ones like Rigid as they are VERY expensive here.
Square parts I mean like enclosures. There is always one or two sides sagging towards the touch points. The only solution that works for me is printing on the platform. I am still to see someone orienting a part with square (our perpendicular) sides at the angles recommended and it actually comes out as intended.
This is made worse when you have two parts than need to fit.
3 Likes
Hi @Mr_Solissa -
Here is a good example of what I mean. I had to print this part yesterday. It forms part of an assembly with some inserts and aluminum enclosure that was manufactured with CNC. I printed the parts I needed and then printed two (that I know would fail) but to be able to show the results.
I Printed two versions: One at 45 degree tilted only on one axis and the the second tilted at 30degrees on two axis. The “better” results was from the one tilted on one axis. Here is the result:
You can clearly see the “drooping” side which was attached to the supports. I have spent a lot of time and resin (and so have many others) and there is just no wat that we have been able to find to get this done aside from printing directly on the platform “face down”.
This was printed with Standard Grey V5 with the default settings. I did use 1.2 for support in a quick effort to minimize the drooping side. Now, printing this with Tough 1500 V2 face down on the platform is simply not possible. My experience is that without any sort of support it will warp A LOT when curing.
Did not mean to make this sound like a rant…. just honest feedback 
Regards
Friedl.
3 Likes
@Friedl_1977 I’m sorry to hear that you’ve experienced warping during printing with Tough 1500 V2. Printing flat to the build platform is a good option, but as you said, it can make things more difficult if you’re assembling parts that have to fit together. My next suggestion would be to place more supports. I’d also suggest opening a new support case for this issue. Our agents would be happy to help walk you through the best options for your parts.
1 Like
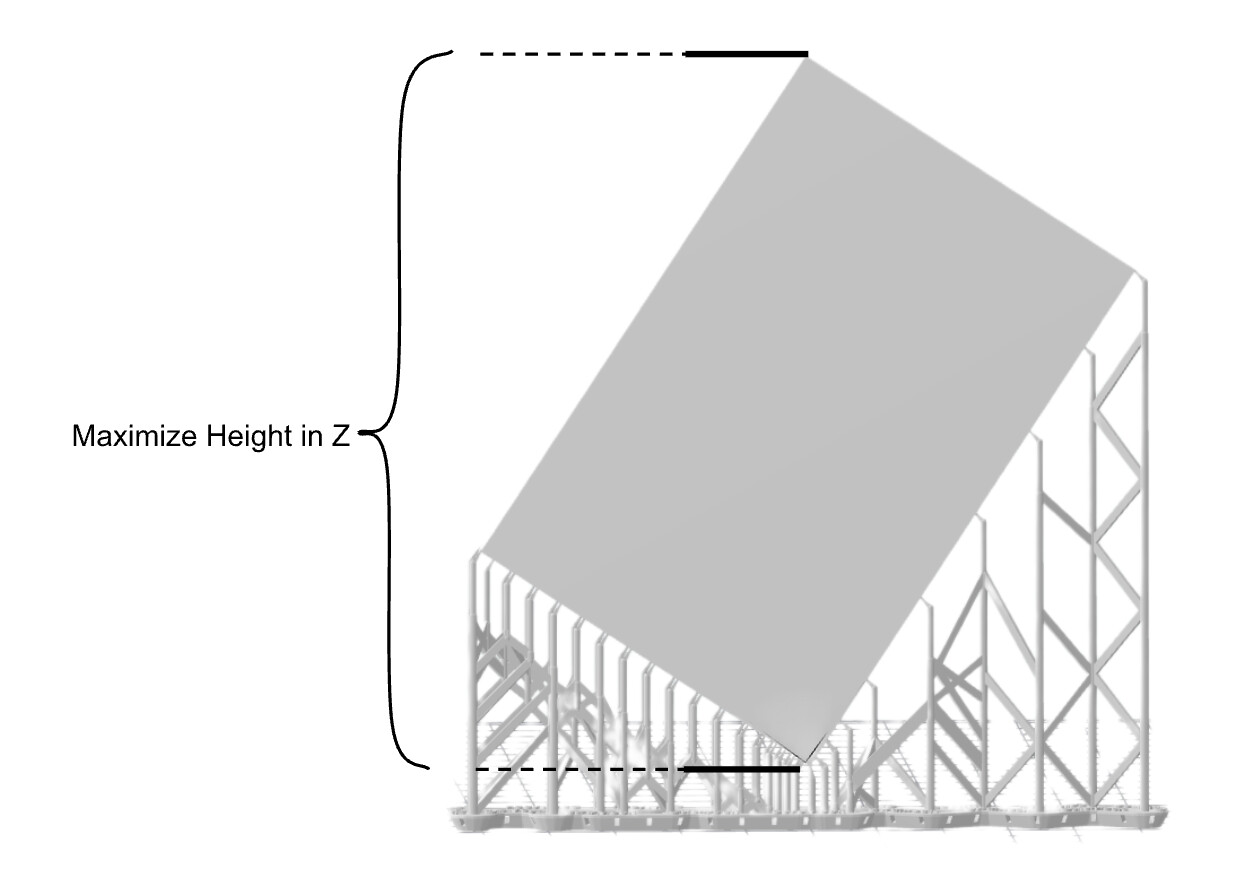
Hi @Friedl_1977, one of our Print Process Engineers provided some general insight regarding optimal orientation:
The type of part you are printing should be oriented up/down at ~45 degrees to minimize near horizontal edges vs edge lengths. As this is not an obvious orientation to many, he inluded a picture with a mock part:
You can further improve on this orientation by leaning the part back a bit. This helps because supports all in a line cause problems. By tilting it, you create a much more structurally sound shape. Parts like this also usually have features on one side, and by pointing these features up they won’t need support / won’t be cantilevered overhangs. See the illustration by our Print Process Engineer below:
When printing face-down on the build platform, warping can be avoided if the part is cured while it is constrained in the desired shape, i.e. cured on the build platform or secured between two plates of glass or similar aids.
As with any tool, there are best practices to achieve the best outcomes. Let us know if there are more questions on this. Our Support team is also able to assist with tips on orientation of specific parts, like @jessbuck mentioned above.
3 Likes
I print on of off the platform, what I do notice with the Tough 1500 V2 is that it’s very flexible before curing and sometimes it will bend the part when using the flex plate, especially because the V2 sticks really good to the platform. This can bend the part out of shape.
Also I’m wondering if upgrading to the Cure V2 would improve on the warping, do you stick the parts in the cure when it’s cold or do you pre-heat it?
Hi -
If you test some Early layer settings, you can get it to a point where it comes off very easily and not warp when removing. This takes sake trial an error though as would think it might differ between printers. At least this is how I solved that part of the problem.
I have tried several ways. I have tried curing at as low as 50C even, which does reduce the warping but not sure if it cures 100%. It still warps though. I am at an impasse to be honest. I really wanted to invest more into my setup (get a second wash and the new cure station) but at this point I am not prepared to spend more on a system that I have not been able to get the desired results from. This might be due to my inability to comprehend Resin Printing techniques other it might actually be a hardware issue as I have bene struggling with severe layer lines as well from the get go. That said and given that I spend almost the cost of a new Bambu labs printer each time I buy resin and parts ending up in the bin 7/10 times (due to warping, not fitting or inconsistency), I might actually end up going back tot FDM and buy a desktop CNC machine.
the 3/10 parts that do work out are nice though… but still there is some post processing that needs to happen and I am not sure whether it is worth the effort for me, as I end up outsourcing the final prints anyway.
@Friedl_1977 We’re sorry to hear you haven’t been getting the results you expected. As mentioned, please don’t hesitate to open a case with our support team for guidance on how to set up your print for best results - the team is happy to help with tips for the specific parts you’re printing.
Hello @Friedl_1977!!
Honestly, these geometric tolerances (flatness, perpendicularity, etc.) are truly challenging to achieve with 3D printing… You mentioned that when you print directly on the build plate, the part deforms a lot. This has always been my preferred orientation whenever possible, as all the dimensions tend to come out well.
Even though you’ve already stated it’s not an option due to the deformation, I would suggest trying the direct-on-the-plate orientation again. However, before curing, try to fixture the part during the curing process. Basically, if you cure the part while preventing deformation, it’s very likely that the result will be superior. Perhaps even consider curing the assembled and fixtured part, forcing the flatness.
I hope this can be a viable option. I’ve done this before, and (sometimes) it helps quite a bit.
1 Like
Hi @JoaoMarcos
Let me elaborate as I might have generalized it bit
When printing with Standard resins, printing in the build plate works well once I fine tuned the Early layer settings a bit. However, when printing flat parts like the one in this post, they then to warp along the longer axis.
When printing with Tough resin, this is even more challenging unless your design allows you to print support structures eg. ribs alongside the perimeter. The 70C heat while curing causes the part to warp very badly.
That said, I also understand that my expectations might be higher than some, but if I need to have a flat and square part, it needs to be that
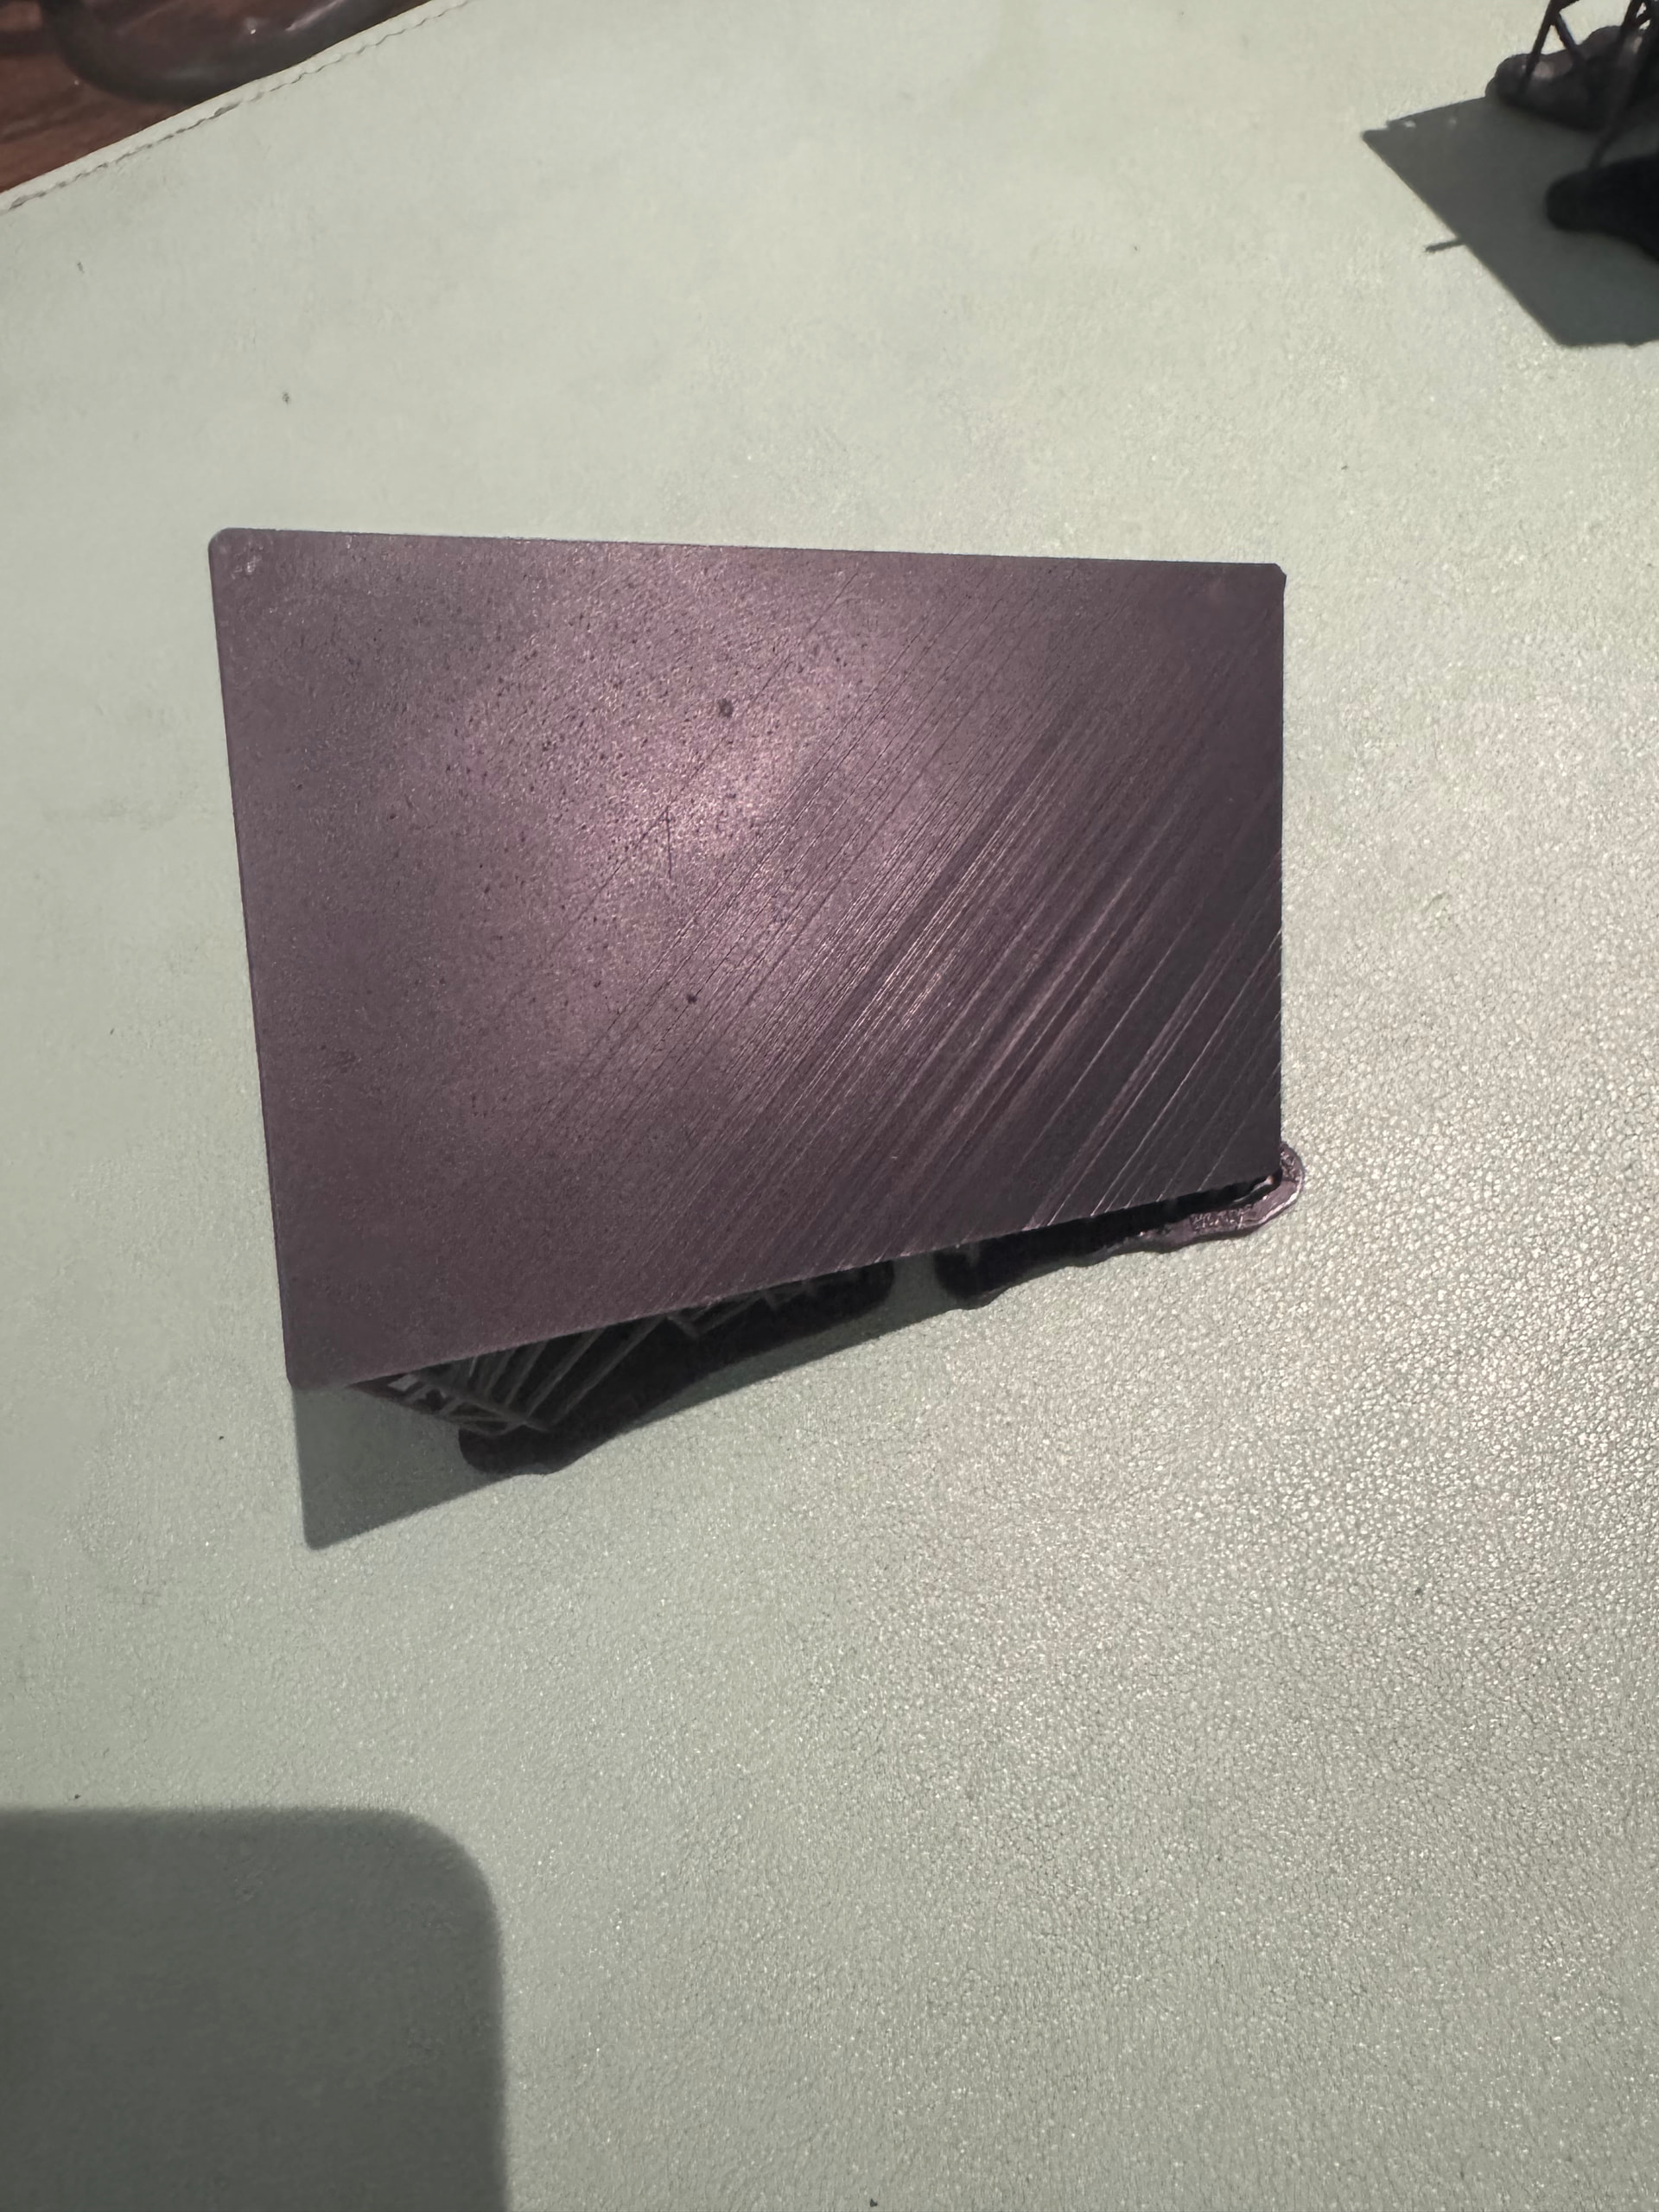
Here are more photos to show different warping experienced.
These were printed on the build plate but after curing the warped.
I then printed the same part as in the pictures flat on the build platform again but added a “frame” around the perimeter. Initially it worked but the next day it had some “wave” pattern warping on the top side. This might be due to the 1.5mm height of the large flat area. It might to too thin?
I have seen some suggestions curing the part while on the plate, is this what you mean? If fix it on place on something else. While this is tempting, I think this will be a lot of work when printing batches?
This is an interesting idea. I will try this will with a multi part print soon and post my findings here.
1 Like
Hi @Sophia_M
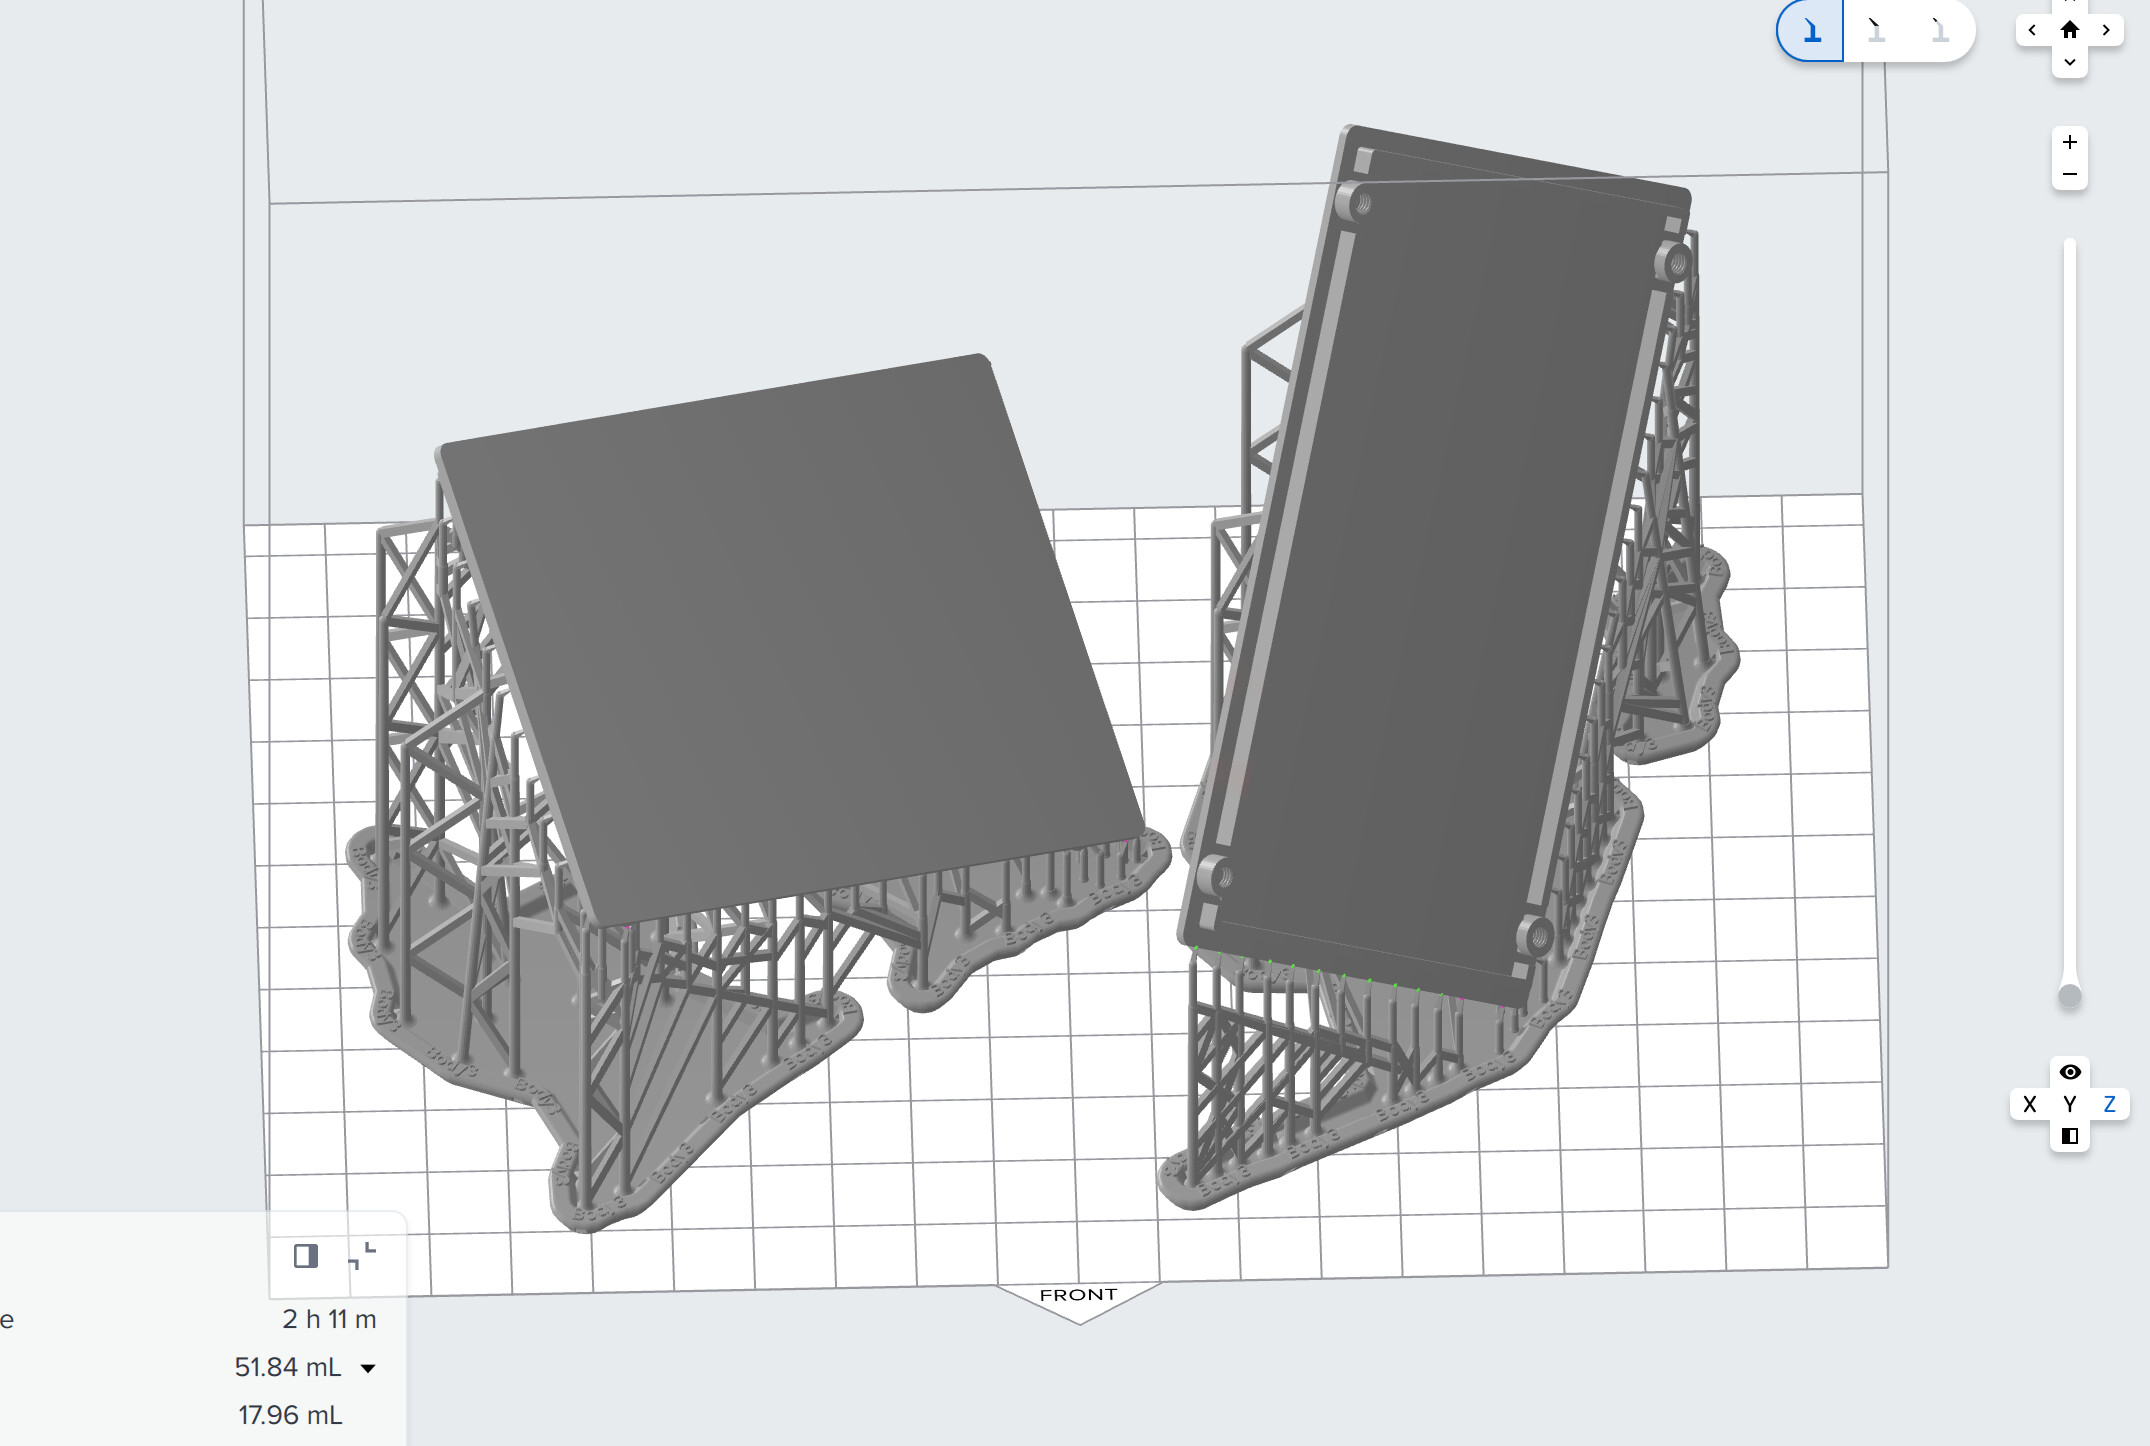
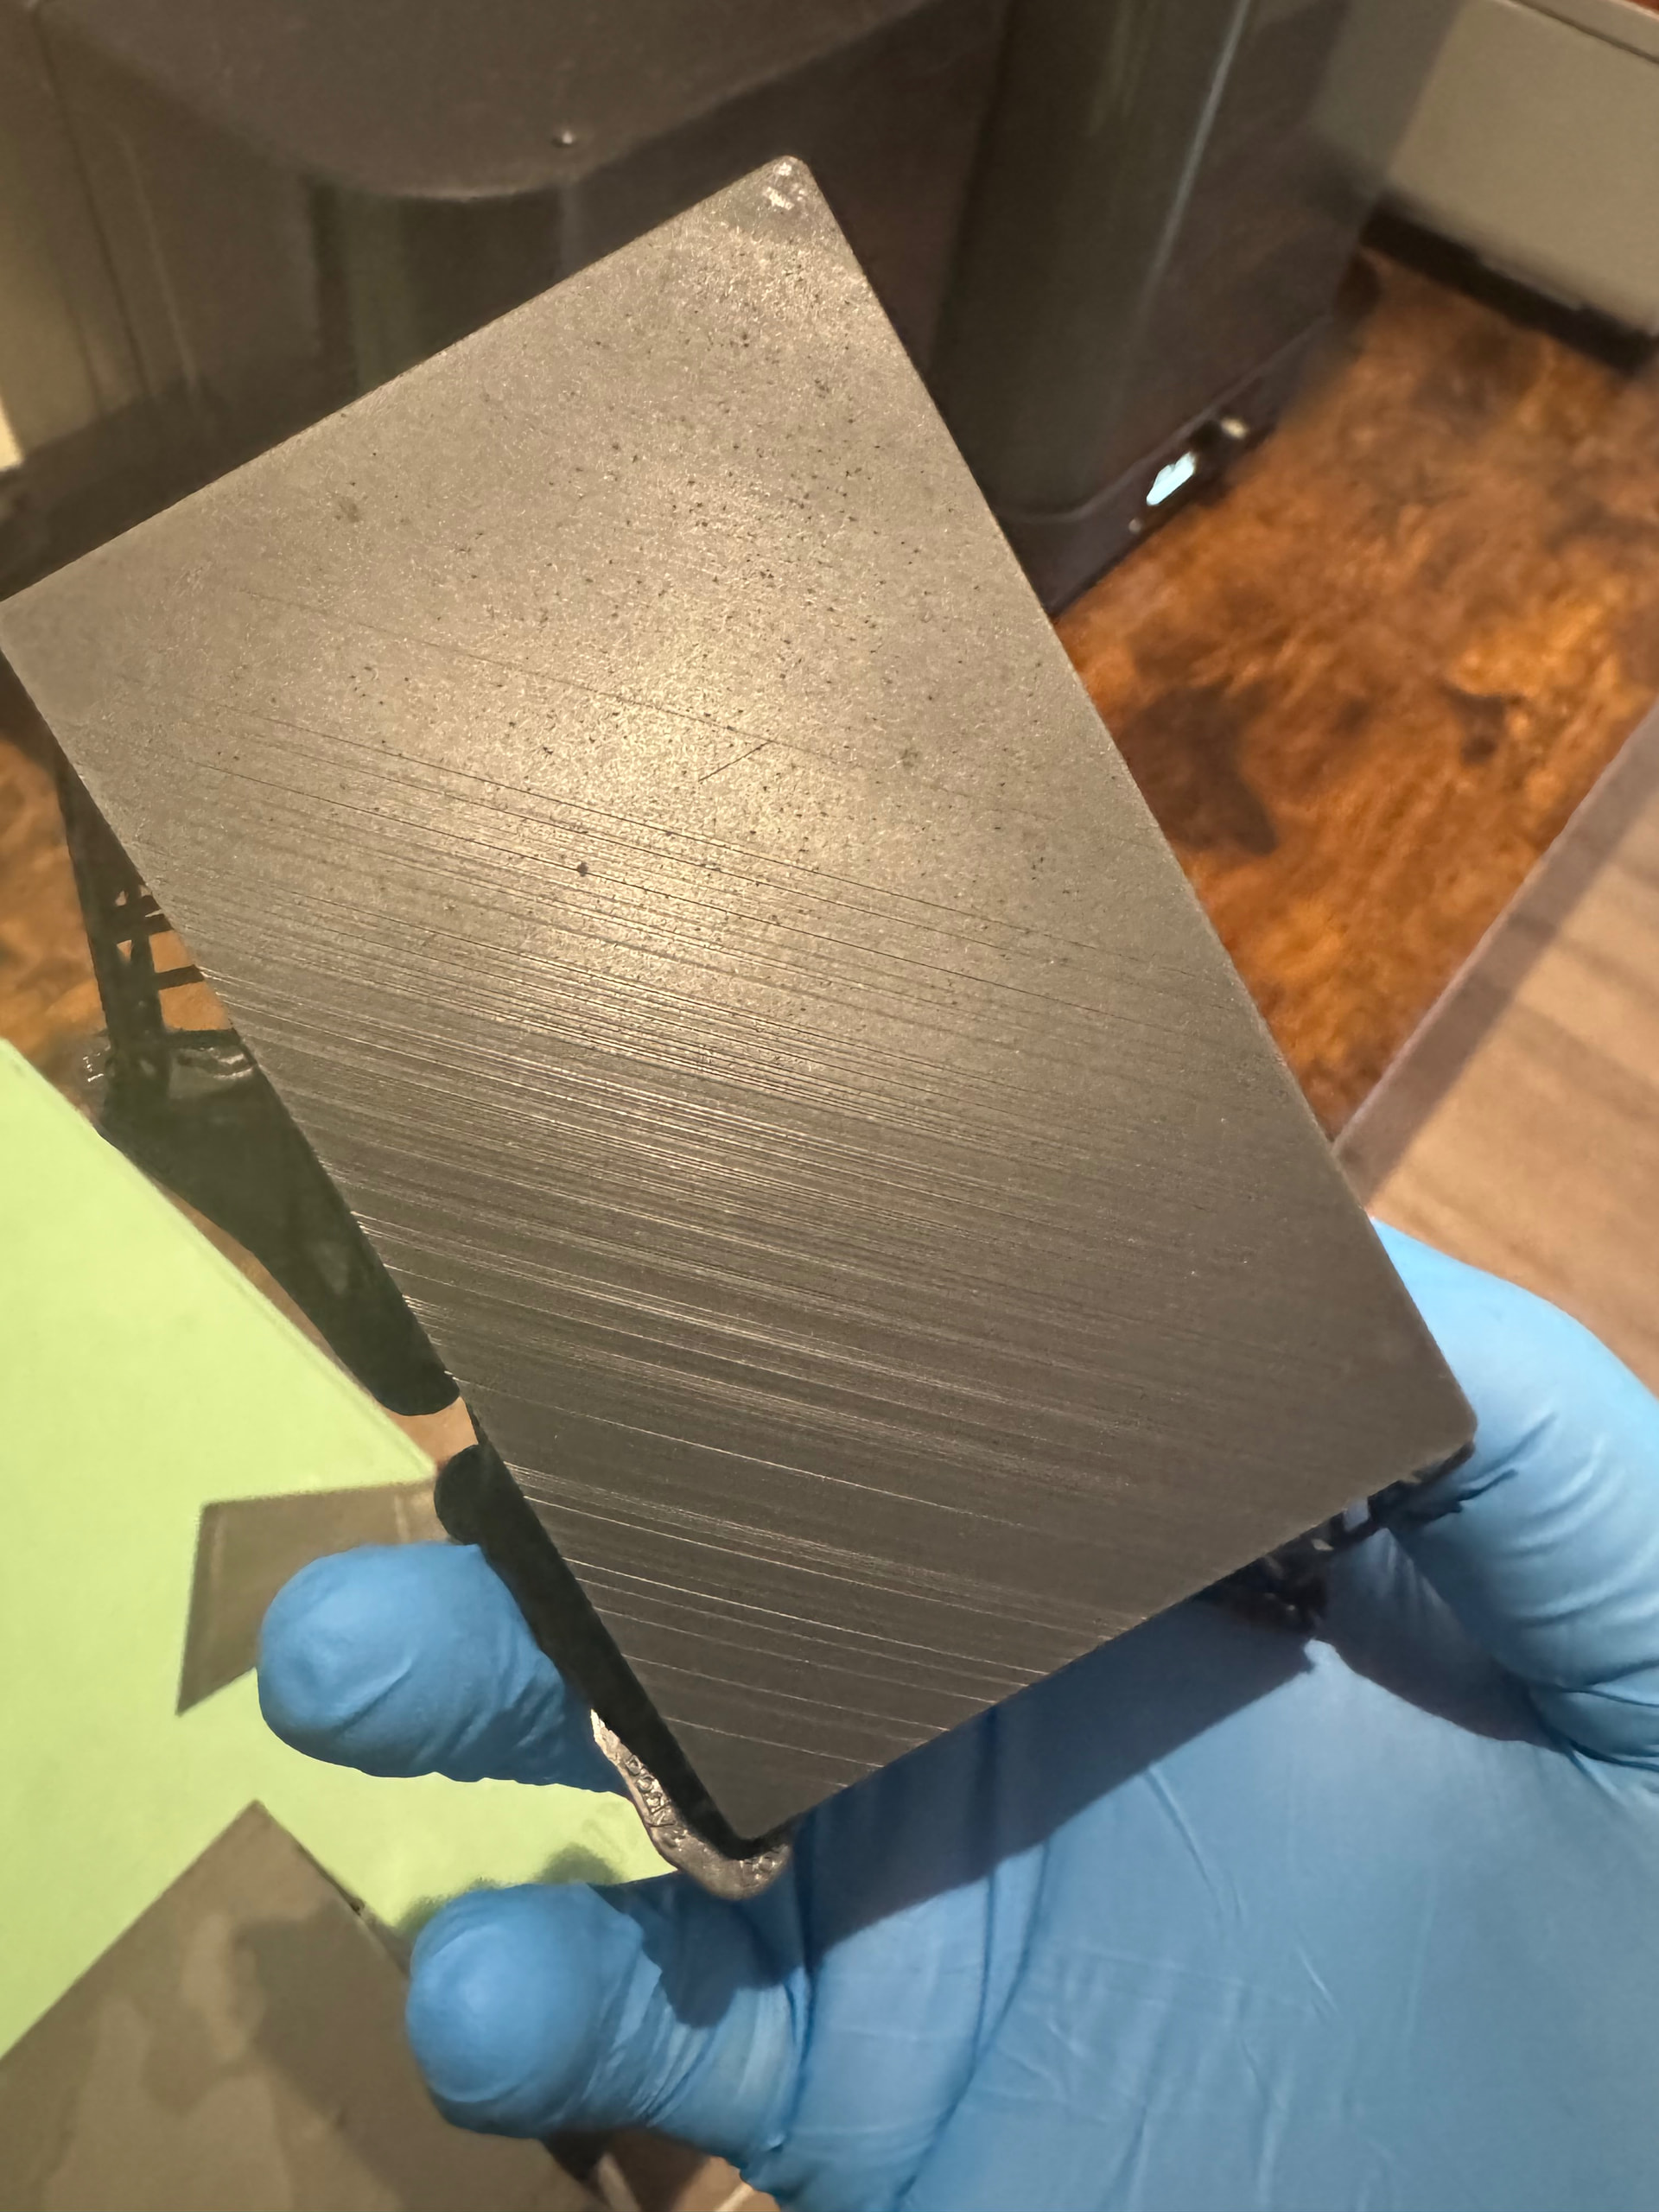
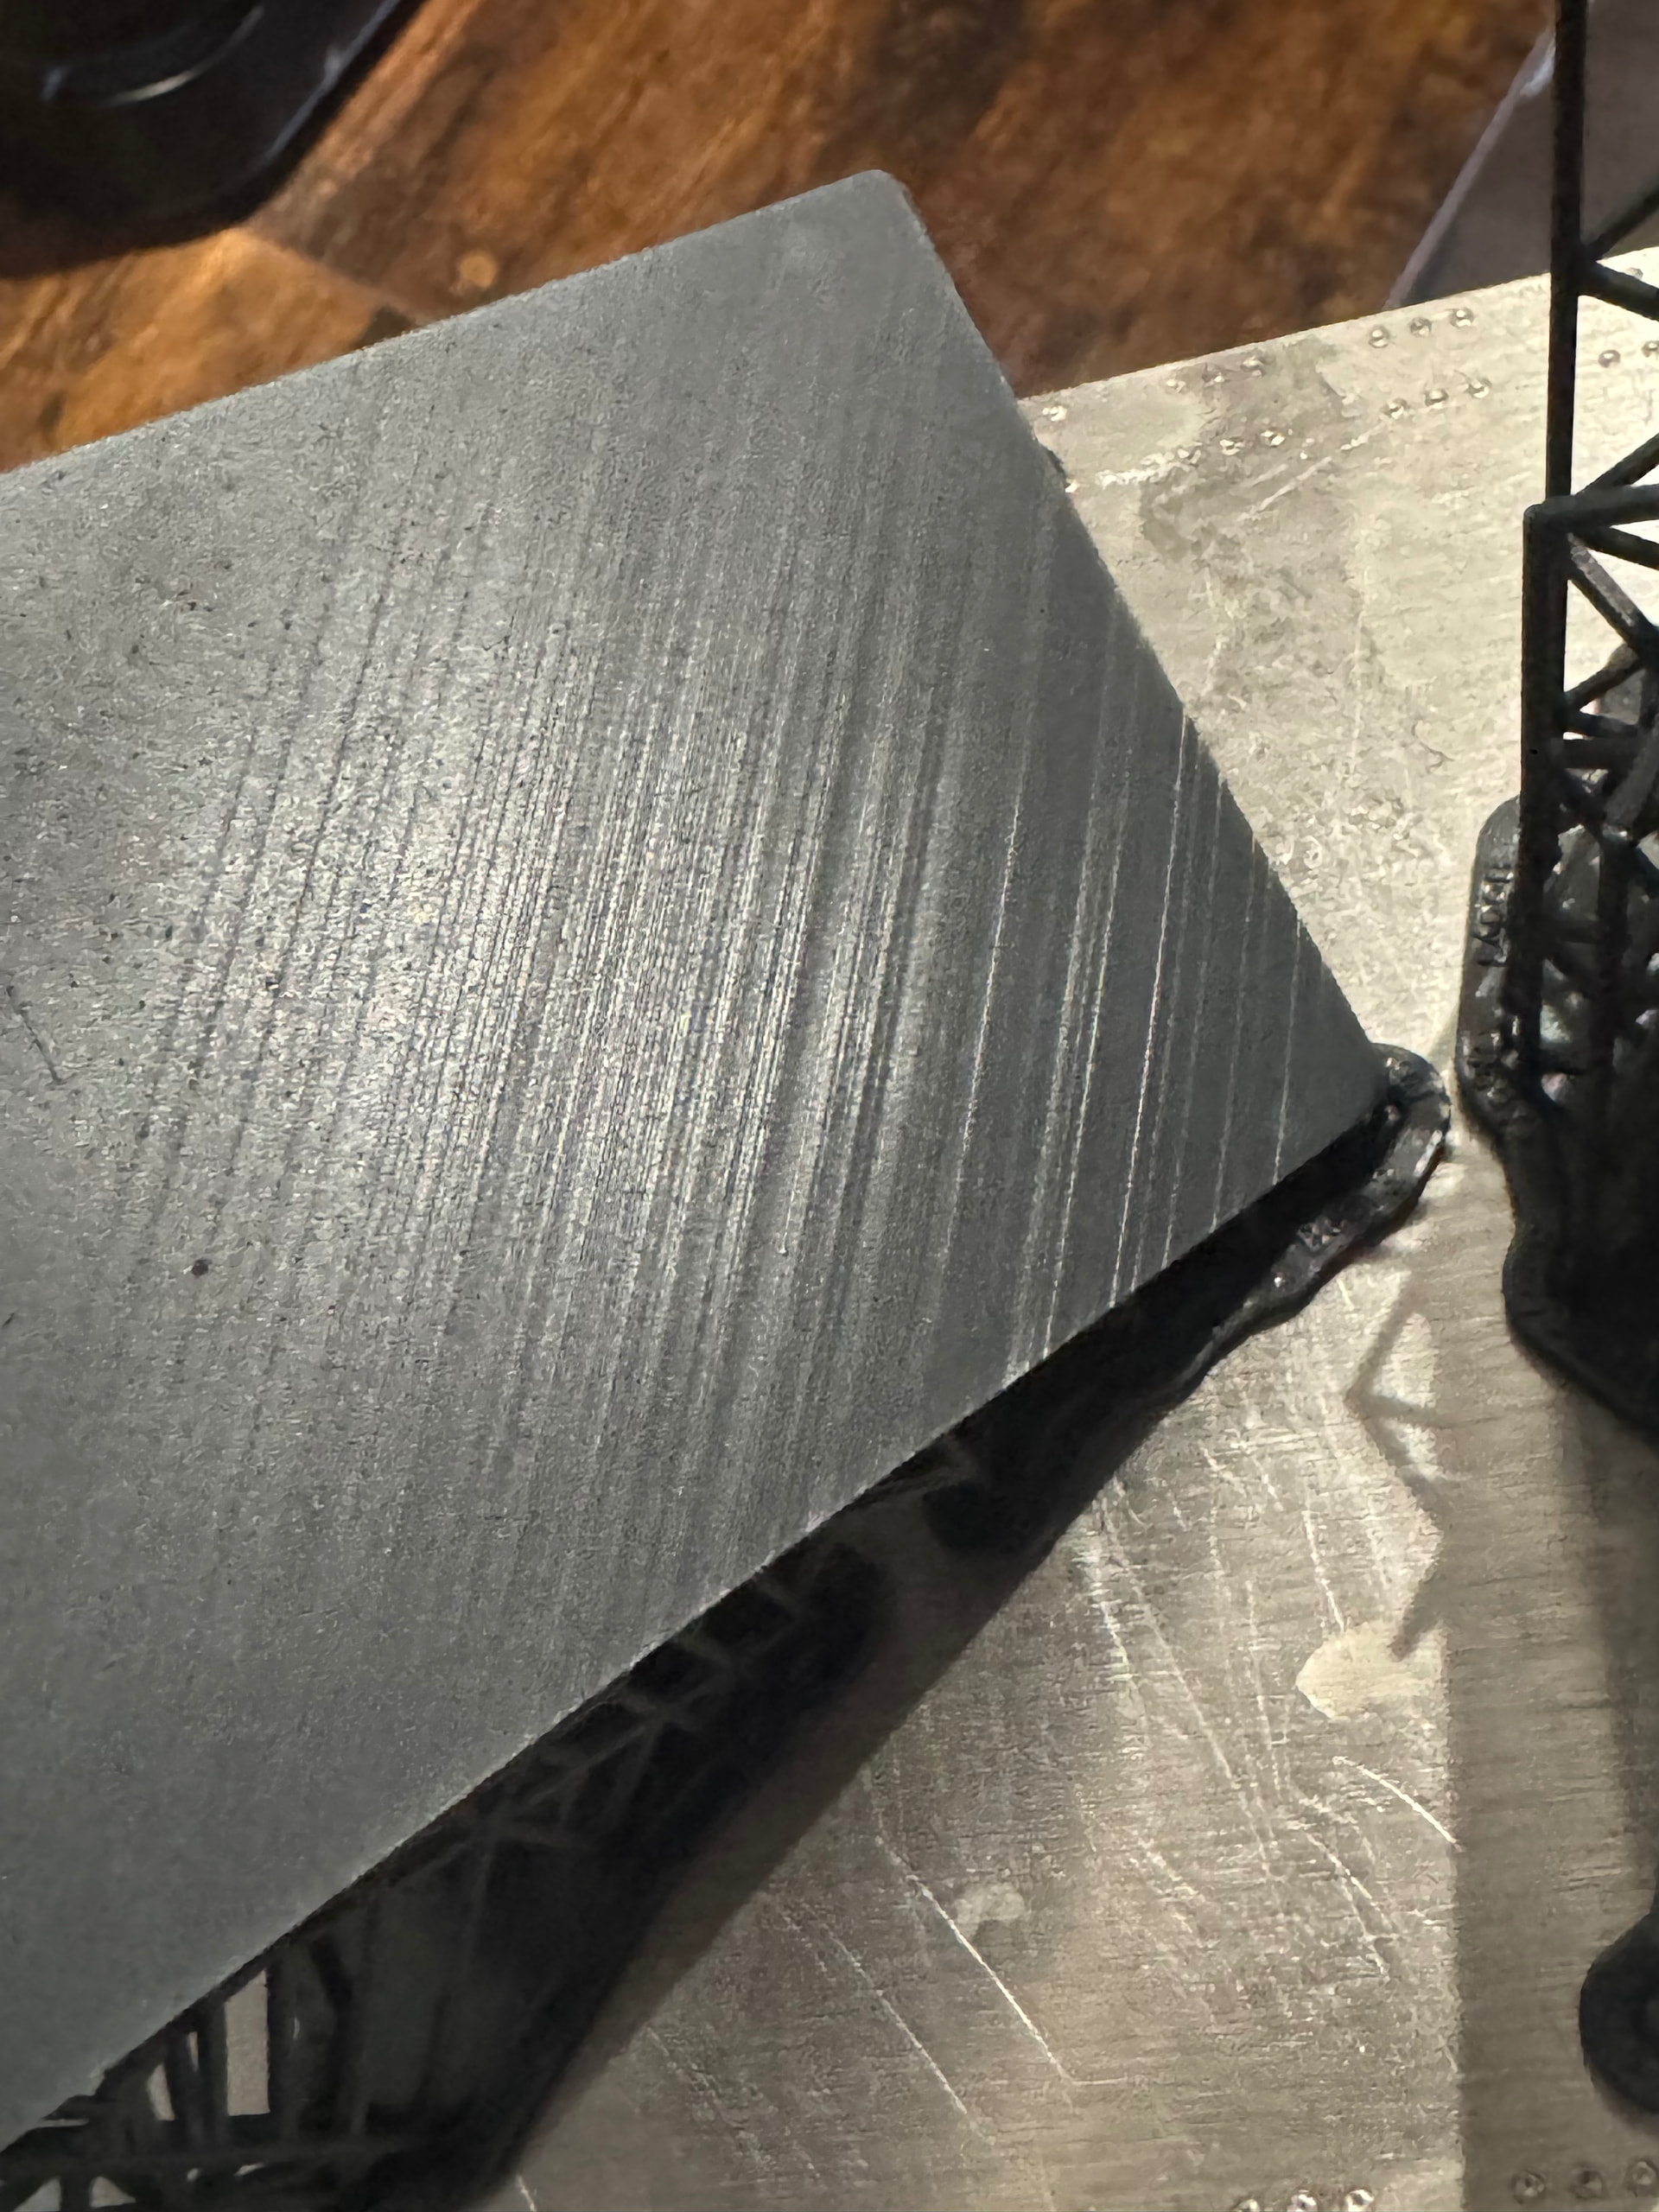
I have tried two ‘version’ of the orientation you suggested. See below:
The one model was tilted 45 degrees on all axis. The second was tilted 45deg on X and Y and the slightly tilted on its ‘back’ to allow for the v-shaped support.
The results are what I have seen many times and a concern I raised from then I got the machine. The layer lines are very prominent, even more so than on FDM printers. See below:
Unfortunately my early reporting of this was attributed to incorrect orientation of the parts. however, this time I followed your advice and it yielded the same results.
This was printed on a flex build platform, Standard resin and fairly new tank, less than 10k layers printed.
1 Like
These kinds of parts with tough resin can be challenging. There are three things you can do to improve your results
1 - cure without heat for 3x the duration. You won’t get to maximum mech properties but you’ll be somewhere in between green and cured on the datasheet. This is the easiest solution to this problem if you cannot do the steps below.
2 - dehydrate your parts for 3 hours at ~10C below the HDT of the material or make sure you air dry them for at least 24 hours (can be shorter if you have convection). I’ve spoke about this many times but IPA absorption in resins is one of the greatest contributors to warping
3 - hold down the parts flat with a heavy UV transparent object so it doesn’t curl up if/when curing with heat. For example, a heavy glass bowl or something. Flat, long geometries will inherently want to warp when heat curing and this is kind of the only way to prevent it from happening if you’ve already done #2 properly
Follow my recommendations above and you will be able to print these parts successfully. Different print orientations will tend to change the way internal stresses build up and increase or decrease warping, but I’m 100% confident you can make these work.
3 Likes
I will also go out and say that parts like this are actually better off FDM printed in my opinion. Faster, cheaper, less warping issues, and better mechanical properties. With quality you can get now on Bambu or similar priced machines, these simple flat geometries are often much better suited to FDM unless you have other specific requirements that force your hand to SLA.
2 Likes
Hi @leonhart88
This is kind of the point I have been trying to determine and address. I have some UM printers (fairly certain the new Bambu printers are even better now in terms of print quality) and have been using them mostly for these kind of prints. The disappointing thing is I bought the Form4 (as assessed to other cheaper resin printers eg. Uniformation) Formlabs was the only printer demonstrating printing functional parts.
In my case the fact is that 3D printing is not my core business, product and PCB design is. So if I need to spend hours post processing prints, it might be better off just outsourcing the prints. My hope was that this would allow me to provide client that has a niche product and maybe require small batch products with the complete product in house, but so far this has not been the case.
2 Likes
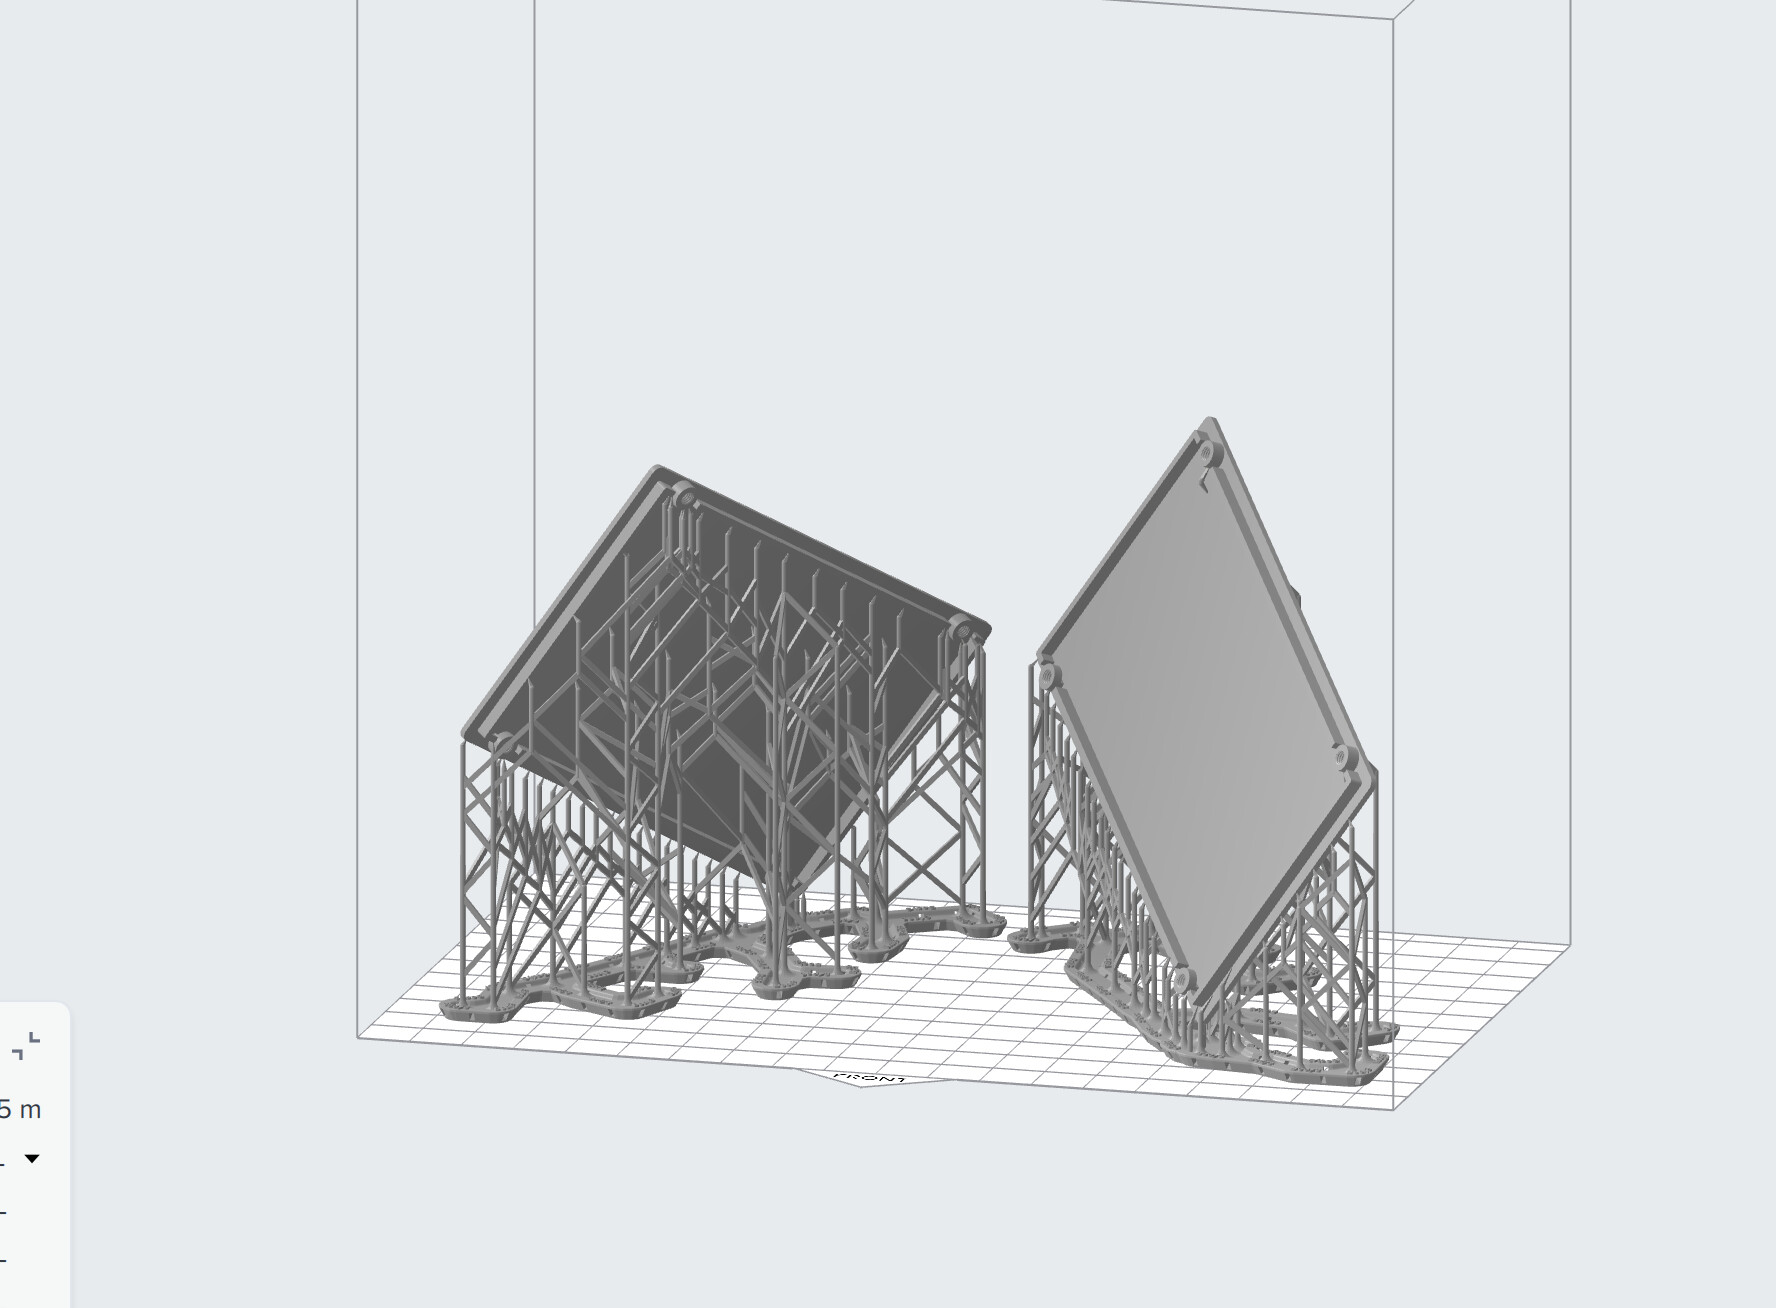
To be fair, I also asked Claude.AI which orientation it thinks is best suited for this geometry. It proved a 30deg angle between base and the longer side of the part and then a 15-20deg tilt along the Z-axis.
This was printed with standard resin again and using smaller touchpoint setting. I kept the 30deg along the longer side of the part in both prints, but tilted is in different directions in the Z-axis. So one back leaning and the other forward leaning.
they appear to be flat (for now at least) and of course has the visible marks where the part attaches to the supports. This all I can understand but the layer lines is unacceptable to be. I am not sure why these are so prominent.
This is why I prefer printing on the platform directly but the warping was a problem. I will follow your advice above, but to be honest, If I need fat start clamping down parts before curing, the workflow to make parts work is simply not a feasible one for me. I will most likely then look to offload the printer and accessories and rather invest in better FDM and maybe CNC.
thanks for your feedback, it is much appreciated!!!
2 Likes
Totally understand your frustrations here.
If that part was printed in standard resin (V5), that looks really bad. Based on prints I’ve done I don’t think I would see the same problems.
I would almost bet there’s something wrong with your machine. It looks like something is moving when it shouldn’t (eg. Build plate not locked down, tank moving, etc.)
I would ask support why this is happening, demand them to print the same form file in house and then maybe ask for an RMA.
1 Like