Major warping on models using Tough and Standard Grey resins

After having used various print services for resin, SLS nylon, metal and owning my own high-end (as they go) FDM machine, I bought a Form2 a few months ago to be able to do finer parts and to cut down on the need for post-processing.

However, I am experiencing major warping on most models, printing in the Tough and Standard Grey resins. I think the models correspond with the design limitations- they certainly don’t contain any “extreme” geometry compared to some of the other things I’ve seen the Form 2 being able to handle (especially since the “Tough” resin is aimed at engineers). I’ve tried varying print orientations, adding and/or moving supports, but nothing helps. I’ve also just submitted a support ticket but figured I’d post here in case anyone else has similar issues

. (Note: I can’t share the actual STLs openly here, but support will get them if they need them.)

2 Likes

these are weird.

I get some minor warpage… but most of it I can trace down to two basic causes… changes in material thicknesses creating differential shrinkage of cure… and significant changes in ambient temperature during long term prints.

I have also noticed that warpage is worse with part thickness… with tough I try to keep part thickness uniform and below 3mm

Your warpage seems confined to the first inch or so of print.

Some minor warpage I can trace to inadequate support at initial build… when very few supports are attached and the sheer action can easily shift a layer on peel… but this usually results in a tear, or a shifted section of model with a step.

what you are getting is a smooth curving deformation of an otherwise correctly layered part.
That is- if the walls were moving when peeling… or shrinking on cure… then i would expect the subsequent layer to NOT line up with the layer that got deformed, as the laser should be hitting the correct spot on each subsequent layer.

this suggests that either the laser is being deflected… and because the part is inclined, when the laser is not shining thru whatever is deflecting it it straightens out…? Or the warpage is happening after the part is printed… in post cure or something.

I would be interested to see a warped print fresh from the printer with its supports still attached… to see if the supports are warped in the same way. That would indicate an optical path issue.
I see some muddiness in the sharpness of some of the parts that implicates optical path.

Have you measured if the parts are any less warped fresh from the printer? that is- does post cure exacerbate the warpage?

@JoatrashFX

Hello there! Thanks for your thread! The pictures definitely do a lot to help illustrate the issues you’re seeing.

I have a couple suggestions for simple things to try, so if you’ve done these things already please feel free to ignore my advice. You’re already speaking to our support team which is the best way forward to get more in-depth help.

Firstly, I would make sure you’re printing at 100 microns, the largest layer height. The reason for this is that this layer height consistently produces the best dimensional accuracy with the less impact than you might expect on small details.

The next thing that can help is simply beefing up your support structures. This means slightly larger support touch points and/or more dense supports overall.

Lastly, this is more of a question than additional advice, but @Sculptingman asked just the right thing, which is whether this we’ve confirmed this warping is happening during the printing process or during the curing process afterward. This is good to determine because it can dictate the troubleshooting steps needed to proceed.

I hope that helps! I’m sure we’ll be able to get this resolved for you relatively quickly.

First off, thanks for the replies! Now, onward…

That as kind of my suspicion at first, since it starts printing at 30-odd degrees C and I have seen it go up to around 45. The actualy machine gets pretty hot was well… haven’t measured it, but I would guess around 40-45-ish after 5+ hours. The ambient temp in the room was around 27-28 max at most when these prints were done. (We have a crazy heat wave here in Sweden right now, 30-32+ indoors so I haven’t printed anything in a couple weeks.)

Some part areas that I have printed VERY thick, 10-20mm, have not been warped at all. And since Tough is aimed ad engineers for functional parts, needing to restrict to a 3mm shell (virtually impossible) would be kind of useless.

Exactly, it’s always the first 1-2" closest to the build plate. It’s even consistent when I laid the cylindrical model almost horizontal… the whole thing went banana-shaped! Maybe the laser isn’t curing properly… and the subsequent layers are “post-curing” earlier layers, and that is affecting it over time?

Completely vertical prints have been the best so far, but even on that one I posted, the piece closest to the build plate is bent. The warping is definitely happening during printing. It was one of the first things I looked at. It was kind of hard to see in between some of the supports, but there is a small possibility that the warping became worse during curing, but it was absolutely present before washing.

I don’t recall seeing any bends in the actual supports… but I didn’t really focus on them and was trying to look PAST them.

See above… I’m not sure if it got worse, but it was definitely there fresh from the printer. I have noted that the Tough resin can be forced to straighten out during the cure process.

[quote=“DKirch, post:3, topic:19857”]
Firstly, I would make sure you’re printing at 100 microns,
[/quote] I can confirm that I almost always print at 100. All the warped models were done at 100.

[quote=“DKirch, post:3, topic:19857”]
The next thing that can help is simply beefing up your support structures.
[/quote] I’m mostly printing with the 0.7mm thickness on Tough, which usually leaves quite a few gouges in the surface (not just dimples), even when using a very fine cutter gauged for fine electronics. I have, on some prints, added a LOT of supports along the areas that were warping… sometimes maybe 3-4X more dense in those areas. And in on instance I even inserted vertical and horizontal “bars” in the actual mesh of the mode. in order to try and stabilize it. Nothing helped.

As stated above, I absolutely saw warping right after printing.

I am currently running the XY scaling test. Should be done in a couple hours. I’ll post the results both here and in my support e-mail.

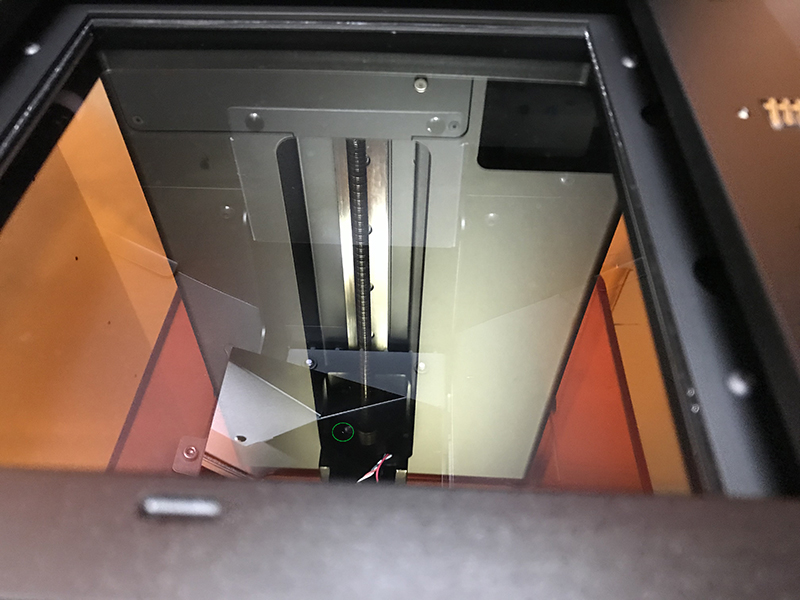
Oh, and one more thing… probably not enough to cause this large effect… but I think I noticed what looked to be a spec of dust on the mirror inside the machine when changing trays once. (The interior of the machine with the galvanometers has, of course, not been opened. I DID however, after consulting with support, have to remove the outer aluminum case to spot check the belt drive that pulls the wiper, since it was squealing a lot.) I’ll have a look and see if I can spot it again.

You’re going to struggle to get any sort of clean straight edge if that edge has supports-material doesn’t move as much around the supports and can cure from the laser going through the next layers.

Well, the warping occurs with few supports and with lots of supports. The supports don’t seem to be affecting it, only proximity to the build platform.

As an experiment, I tried once to raise the model higher up above the build platform, but it can only go 10mm… not enough to clear the warping zone.

As promised, here’s what the test file looks like right after a 10 minute IPA bath. It has not been post-cured and even at this tiny level, there IS a slight warping (which is not due to lens distortion of the camera), both on the sides and on the top. But realistically, this model is so small that it doesn’t come close to reaching the level where the major warping appears to begin.

Angle the majority of the part at 30-45 and try not to run any major edges parallel or perpendicular to the tank as that can increase peel forces.
Put supports on the least critical, easiest to clean surface.
Keep supports on during post curing if you are using IPA. This should stabilize the part.

This should help.

I haven’t measured precicely, but I think that most of the prints above were done at around 35-30 but I’ve tried all kinds of angles. All recommendations I’ve seen say to print longer models standing up to minimize peel forces. The one time I did try to print the “tube” file above, the warping became worse, as it was able to spread throughout more of the model, since more of the mode was closer to the build platform. At this point I would be very surprised if the print angle was at fault. (Or even user error for that matter… the amount of warping just seems too extreme.)

Support placement does not seem to affect the warping. I’ve put them inside, outside, along edges, in the middle, moved them around, added, subtracted. The results are the same.

[quote=“KenCitron, post:8, topic:19857”]
Keep supports on during post curing if you are using IPA. This should stabilize the part.
[/quote] Warping is occurring during the print, not during curing, and I have always post-cured with supports. Well, except for that one time when a model was so stuck to the build platform that when I finally got it off, the pop was so extreme that it was send flying, separating the model from the supports! (It survived though.)

Is the model distorted right after printing before cleaning with IPA, after cleaning with IPA or after post curing?

I personally don’t use IPA and use Yellow Magic for my parts because many of the parts I print are small and flat and found IPA would warp them badly.

Trace the steps down.
If it warping after printing then you need more beefier supports, tweak the angle.
If it’s the IPA then keep the supports on or use something else.
If it’s the post cure keep the supports on and trim later.

[quote=“KenCitron, post:10, topic:19857”]
Is the model distorted right after printing before cleaning with IPA, after cleaning with IPA or after post curing?
[/quote] I’m not completely certain whether I checked before or after the IPA bath. I am almost certain it was before the bath. The warping is there PRE-cure.

We don’t have yellow magic here in Europe, and using it instead of IPA in the Form Wash would probably void the warranty at any rate. And if the manufacturer specifies to only use IPA, then the device really should work with IPA

I’ve done all that already, as stated above. Supports/angles/position have been tweaked all to hell and back. Warping is there pre-curing (and even though it’s a moot point, the supports stay on until the whole cycles is completed). There really isn’t an alternative here to IPA (expect maybe anti-freeze alcohol as I’ve seen some use) but I’m not going to put that in my Form Wash unless Formlabs tells me to, haha.

Formlabs now have results of an optics test, XY test and detailed photos of the optics/glass… so we’ll see what they come up with.

But just to put the “supports” tweaking to rest, here is an image from the optics test. Note how the model looks in Preform and how it looks out of the printer.

These Optical Test print results are actually not indicative of part warping in this case. This is not to say you’re not seeing warping elsewhere, but just with this part in particular. We expect to see a little slope like this on printers that are functioning without any issues.

Basically this optical test does its job by forcing the printer to do more passes with the laser as you move further up the tower. More passes means more chances for light bleed off the edges of the model. Around the first number it’s just one pass, and by the time you get to the top of the model I believe it’s doing 8-10 passes with the laser.

A printer working the way it should produces a test print much like the results you got. However, if there is contamination along the optical path(dirty mirrors, dirty optical window etc) the effects of this light bleed will be much more pronounced, and you’ll get a significant “mushroom cloud” effect as you work your way up the pillar.

Again, this is not to say you’re not also seeing warping, but this Optics Test result isn’t super representative of any warping that I can see. I’ve attached a photo below of a particularly rough one so you can see one that looks like.

Aha. Good to know, thanks.

As for my optical glass, it’s pretty clean. I’ve only had the printer since May and have been super-careful not to get anything on it- no resin spills, fingerprints or anything else. I’ve never had to clean it so far. There IS definitely a spec of dust inside on the large mirror though, which is weird as I have (of course) never opened up the machine aside from checking the wiper belt as per Formlabs instructions. I can’t see that it would be causing the warping anyway, but it’s there nonetheless.

I can also see, in some angles, what looks like a slight, slight “clouding” on certain areas of the glass. It’s proving almost impossible to photograph because it seems to be on the INSIDE of the glass, so the outer reflective surface of the glass keeps diffusing it. You can just barely see it in one of the photos here.

glass|666x500

Dust spec…

Ahh sorry I didn’t see the above images. That does look like the optics are out of whack. Never seen that issue before, guessing FedEx got some HS Football players for summer help when they are shipping these units :slight_smile:

This part looks to have about the normal amount of warpage that I see in pretty much all prints… across 5mm, about 4 hundredths of a mm
the warpage is, as i would expect, most noticeable where the block is wider- as greater mass results in greater shrinkage.
in its longer lateral axis, the curvature is more pronounced because of its greater length.

But I do not think this is the same effect you are showing with the dramatic warp confined to the lower inch of so of large prints.

Again- I would like to see a picture of a part fresh from the printer with the supports still in place… are the Supports printing dead straight? or are they curved in the same zone of 1/2" to 1 1/2" above the build plate?

The weird thing is that the warpage seems so confined to a specific zone and then lessens with layer height.
If the vertical supports that connect higher up have a “wave” in them down at the same height the model is most severely warped- and then straighten out, then the issue is definitely something to do with the printer… it could be some form of lateral movement in the platform as it lifts… like a slight dent in the guide rails. About the only thing I can think of that would account for the strange and repeating curvature on parts in the same zone is if the platform is following a track, or driven by a screw, with a specific bend at that height.
that is, the laser is hitting the right spot every time… but the platform is at a different height for each layer, and the platform is shifting or rotating relative to the optical path.

i am unfamiliar with how the Form 2 isolates the platform in x and y - but it definitely uses some form of rail… or box channel. if you can check in there to see if there is dirt or debris, or an physical bend in any of the parts where the platform interfaces with the Z motion…

The small test blocks look normal to me- but the n they are printing BELOW the zone you are seeing most sever warping in. A test you could run would be to run a part you have gotten warpage on before- but alter the model such that you add a little pole to the end close to the platform.

the idea is to cause the support structure to LIFT the part of the model you want to be accurate ABOVE the zone you are seeing the curvature in… and then run the print.

See if this nets you a part with better tolerances. ( there is no printer that gets zero warpage )

If so- then I would conclude that you definitely have a platform that is repeatedly shifting in a back and forth or rotational motion, due to some issue with the guide rail or drive screw on Z height. The screw is likely not the culprit as any bend in the screw would be averaged out as it turns. But a bump on either side of the rails, or a bend in the rails would pivot the platform around the screw.

to verify that this might be a bent z rail… print 2 copies of the same problem part on one build… with one copy rotated 90 degrees on Z relative to the other. And both copies as close to the front of the platform as possible.
if its a bent or bumped rail, then this should amplify the warp as its furthest from the screw.

If the direction of the most severe warpage on each part is approximately 90 degrees to each other… then you definitely have a platform that is shifting laterally as Z increases.

Possible to have a worn ball screw? Something I would see on a mill or lathe.

It’s usually hard to get a photo of that since the supports are blocking the warping. I actually don’t remember if the supports were warped as well, but the next time I run a part tall enough I’ll check.

[quote=“Sculptingman, post:18, topic:19857”]
to verify that this might be a bent z rail… print 2 copies of the same problem part on one build…
[/quote] At this point, I’m going to wait with doing more prints until the Formlabs support forlks are done looking at this. Each one of the “tube” prints cost me about $20 to print, and at this point I’ve spent several hundreds of dollars on resin trying to figure this out.

I did however, check the print orientations of a couple earlier builds. The warping seems to be going in one direction on at least the “tube” models. However, the scope mount I printed seems to be slightly different in the warping.

I also keep coming back to the idea that the warping is occurring during peeling… it’s pulling in that direction.

I’ll have a look when the printer is done. (Running another small test right now.) HOWEVER, now that you mentioned the lateral movement, I remembered something. The first week I had the printer, the wiper was making a lot of squealing noise. Formlads concluded the screw holding the belt might be a tad tight. Areound the same time, a few days later, I was printing a slightly thicker model than the previous ones and I noticed that when the build plate came back down to start a new layer, there was a deep “grinding” sound as the plate descended to the last few inches and decelerated.

I recorded a video of it here: https://www.youtube.com/watch?v=4eS5KT0_xQM&feature=youtu.be

Formlabs said that sound was normal: “Regarding the sound the Z-motor makes during peeling - this is normal. Such knocking sound is particularly common when printing with suction cups geometries or prints that have a high print layer surface.”

I haven’t heard that sound since then… maybe there’s something to it.

That’s a good idea… I’ll try that when I get the chance! The “tube” model print with the least amount of warping is the one I printed perfectly vertical- the only real warping that copy has is on the “pin” that is below it… the rest of the model was higher up.

No idea how I’d check for that!