could you show one piece of your casting results of formlabs’ resin please?
if possible
PeterG
I will be casting tomorrow so I will take a picture of the rough casting.
1 Like
Peter, years ago my parents bought me a small casting setup that was inexpensive, and I could cast jewelry in the kitchen. It was a VERY simple vacuum setup. The kiln did not have precise temperature control (it was a dial), so now I have a small burnout kiln with a digital controller (Paragon SC2). Click on the link above to see the instructions from the kit.
I have not sent out waxes for casting; I cast them myself, but have not done a lot of them. I have a KayaCast vacuum casting machine like this…I have found the vacuum table does a great job of removing bubbles from the investment. I use Kerr’s Satincast investment (casting with wax only so far).

I don’t use an electric crucible for melting metal, but instead use an oxy-acetylene torch with sterling silver. I understand that there can be problems with overheating metal, which results in porosity. I have not had a problem with it. The castings I get from wax look much cleaner than what I’m seeing people post up here from casting houses, but I have not yet tried the Form castable resin. I just got my machine today.
I do have a few posts on my blog about casting with the KayaCast to show what’s involved for someone who hasn’t cast before. Click here if you’re interested.
5 Likes
Okay, it’s an exciting day! I got my Form 2 yesterday, and it included version 2 of the castable resin. I whipped up a quick flower pendant to test. The image below is NOT cured yet, but you can see the difference in the transparency of the resin. Another thing I noticed…when I take the picture and blow it up here, you can see lines in the photo…these are VERY minimal in person, and could be easily buffed out.
I AM curious about the more prominent line running through a couple of the petals, though…anyone know what might have caused that? User error? I also noticed that there seems to be a bubble on the left-most flower, which appears to be on the same layer as the deeper line. Regardless, in person, this is quite acceptable, and I should have no problem buffing those out in the final finishing of the cast part.
Also, this was printed at the recommended 50 micron setting instead of 25 micron. I was a little skeptical about printing my first job with a lower resolution.
I’m headed out in a few minutes to pick up a UV curing unit, so I’ll post another photo of it cured later.

2 Likes
That prominent line is explained by Konstantin_Dani here. See the photo at the top of the thread.
I got exactly the same line at the same height.
1 Like
I’m about to start using a very similar machine, the PerCast. I have a separate vacuum chamber as well though so I can do more flasks in one go. Thanks for your blog link, really interesting & great work.
1 Like
Hi Have a Per-cast and although I don’t use it any more since i now have a Asiga-Galloni inert gas shielded Vacuum induction machine I keep the Per-cast as a back-up. I have one tip - since the Per-Cast machine is unshielded, casts are prone to fire-stain. As you pour the metal into the mould play a bushy pure fuel rich yellow gas flame over the mouth of the crucible and mould which will help consume the oxygen in the air and protect the hot metal from reacting with it.
2 Likes
Many thanks, I’ll give that a try!
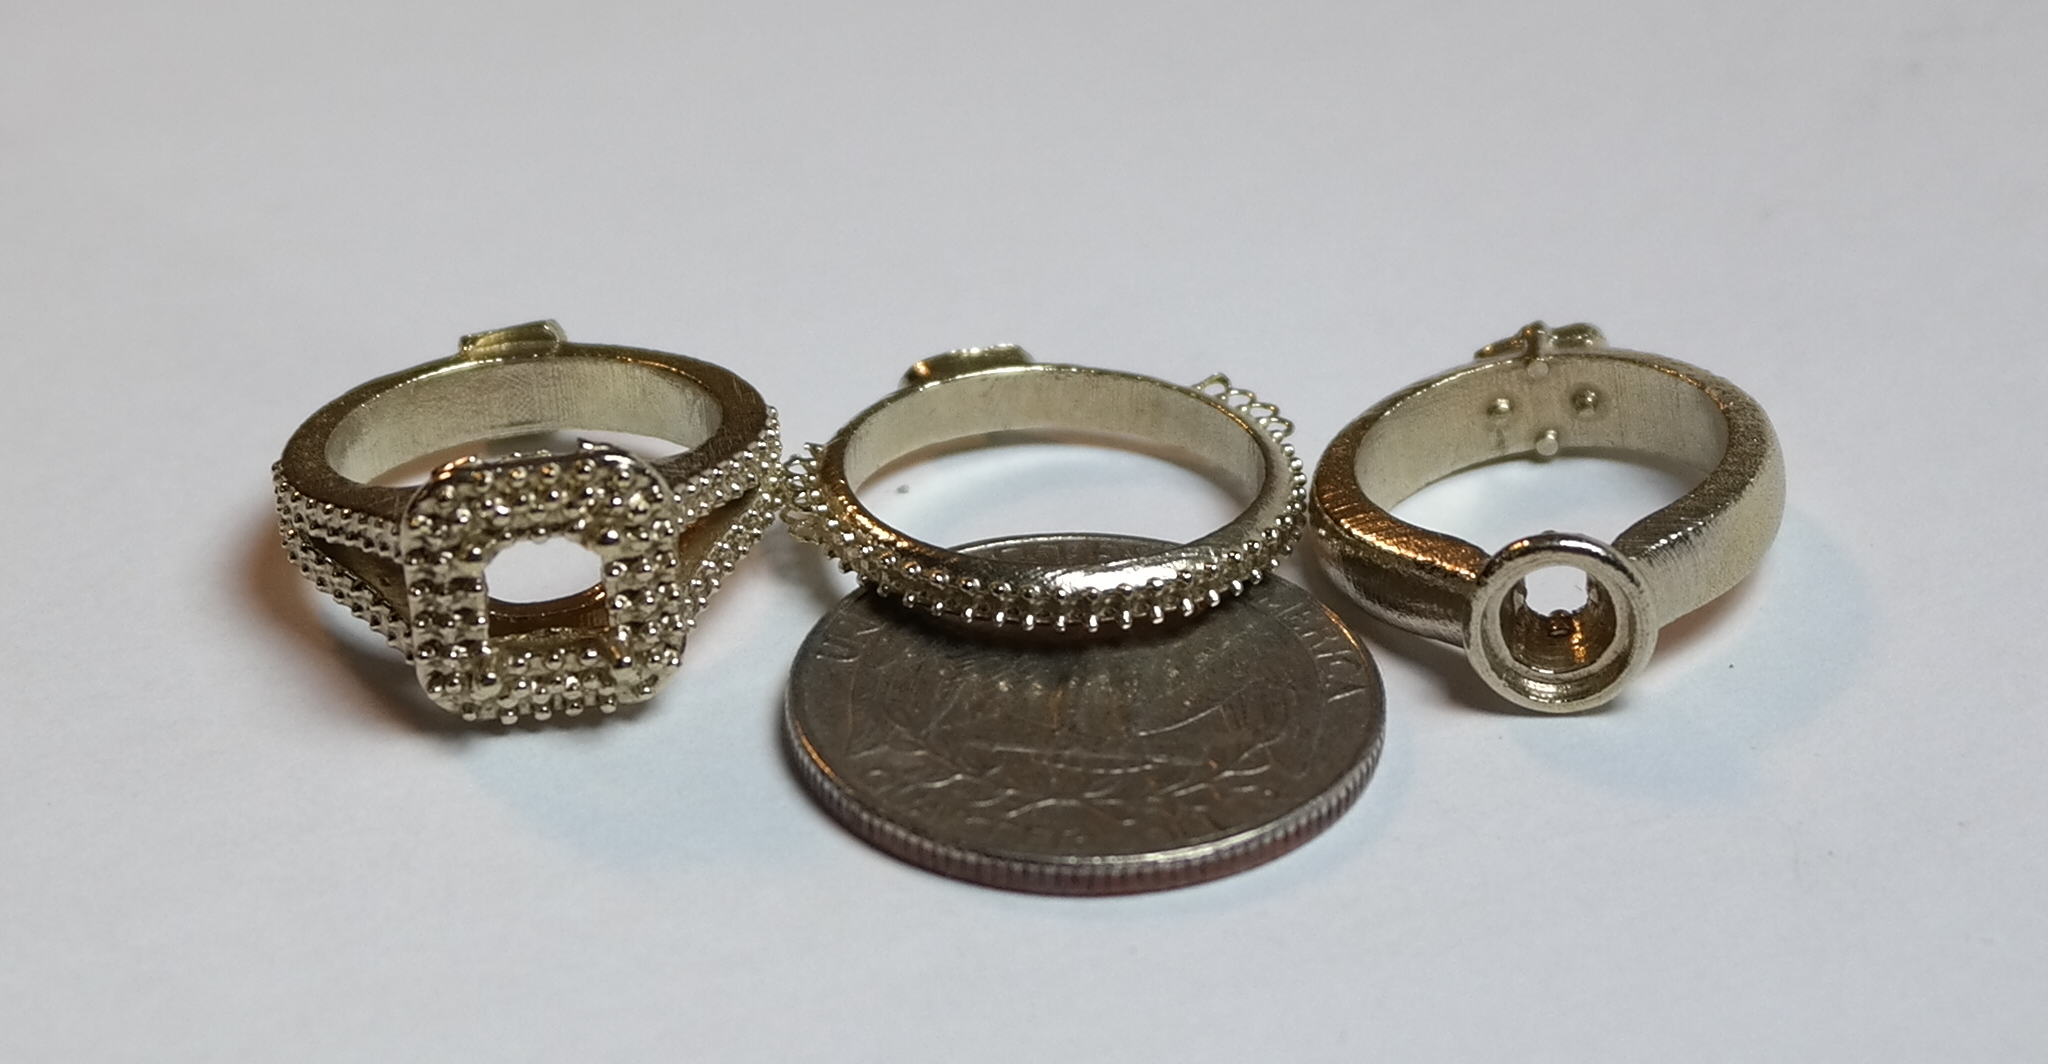
I received my first pieces today done with the castable resin. I’m quite happy with it. The silver is pretty good.

I did another cast in Pd 950.
It seems that the mould had some cracks, but it’s no serious issue.
I’m fairly pleased with the surfaces.

4 Likes
Thanks for the tip 
Peter:
It is hard if you do not do your homework. After that it just takes practice. The best book I have ever seen is:
Just follow his directions. It is very complete. Despite what Amazon says, it covers the basics very well.
Bill Box


Updated photo of Castable resin v2 after curing for about 8 hours. In the photo, you can slightly see lines, but when this is actual size they look like they will buff out easily. Much shinier than expected, not as transparent as the original. I’m using Zbrush modeling software, should be casting tomorrow with Kerr Satincast.

1 Like
Very nice.
Very smooth. AWESOME.
Can’t wait till I start using castable v2.
Thanks for sharing your results.
1 Like
looking forward to seeing your casting results … like the fact that these change color to show cure
How long did it take you to cure and how’d you cure them?
Thanks!
your silver casting result is Very good.
This is what I like and want to achive.
What kind of casting machine do you use to get such good effects?
How much time of post-curing did you applied?
So it looks like it is better to to learn casting inhouse, than send to casting companies
(if they don’t know how to cast this resin exactly)
@katkramer
Thank you Kat for your sharing of your casting machine and knowledge.
Happy to hear that machine Form2 has been arrived recently to you.
Your tips are very valuable, thank you.
Waiting for your casting pieces to see.
The new colour of resin is very different from previous one.
I am wondering of new resin’s properties. Maybe it is better to cure.
@bbox
Thakn you for book, i will purchase it for sure.
@Evert_Gonzalez
I like your castings. They are quite clean and good looking.
Well done. Setting the stones on them, will be a pleasure for you.
Thank you for sharing your results.
best regards
Peter
I left them in the UV curing unit for about 8 hours, some for more? I just stuck them in there and left them. I am now experimenting with different curing times.
I am looking for expertise on the supports.
I’ve been printing quite a bit this week, and noticing that PreForm adds a lot of supports. When I removed them, they leave little bumps on the model. I’m wondering about the best way to handle these. Should I cure the models, then scrape the bumps off with an X-Acto knife, which leaves a rough area? Can the rough area be cleaned up? Should I leave them, cast them, then remove the bumps with files or sanding sticks? Or make my own supports?
Okay, this will be my first test with my own supports. Some of these pieces warped with PreForm’s supports and the pieces at an angle. I also had a lot of floaters because of the angle and the inset logo on the back…I spent a lot of time orienting to avoid the floaters. Also, there is no layout I can find in PreForm where it doesn’t want to add supports to the side with my logo and mess up the logo…I can move them, but then I get floaters.
So I’m going to run a test…I added extra material at the bottom of all pieces that can be filed down after casting, the pieces on the right are on stilts, the square on the left has no points at the bottom, and the “boat” pendant has no front/back supports. Printing now.

Positioning on the base looks good.
For example I used to add part of sprues for casting.
More easy to remove from the base (and sprues become as printing supports in some precentage) but print takes longer.
Yes, you are right, bumps are easy to remove with sanding paper after casting.
interesting project
1 Like
HI Is anyone else having problems printing with FLCABL02 that is the second version of castable resin? I got 8 good prints then it just stopped working. The bases are not sticking to the build plate after the first 2mm builds up they come off the build plate. I have tried straining the resin through 190 mesh. cleaning the tank, cleaning the build plate, using a new tank and a new build plate. But the result is always the same. I now have 11 failed prints and no idea whats causing the resin not to stick after the first 200 layers or so. I have some urgent jobs to get cast and I would appreciate any suggestions anyone has.
The printer is printing clear resin perfectly.