I’ve been printing a custom chess set for a friend. I ran into some issues.
This is my first time printing with Tough 1500 on my Form 3. I used a new tank, a new cartridge. Previous prints were all using really old, expired Model resin (which actually worked just fine). However, using newly purchased T1500 has caused issues.
First issue (no pictures) I printed a test print of two pawns. One printed perfectly. The other, in the center of the build plate, printed such that each layer printed, but none of them stuck to each other. If you can imagine, I had about 700 little sheets of 50 micron-thick resin chunks floating in the vat. It… was awful.
So I drained and strained the tank, removed as many of the little bits as possible (there were soo many), cleaned the platform, and did a Z-axis check. Then, I made a test print of something I didn’t really need, but could populate the build platform just to identify any problematic spots.
And everything turned out fine.
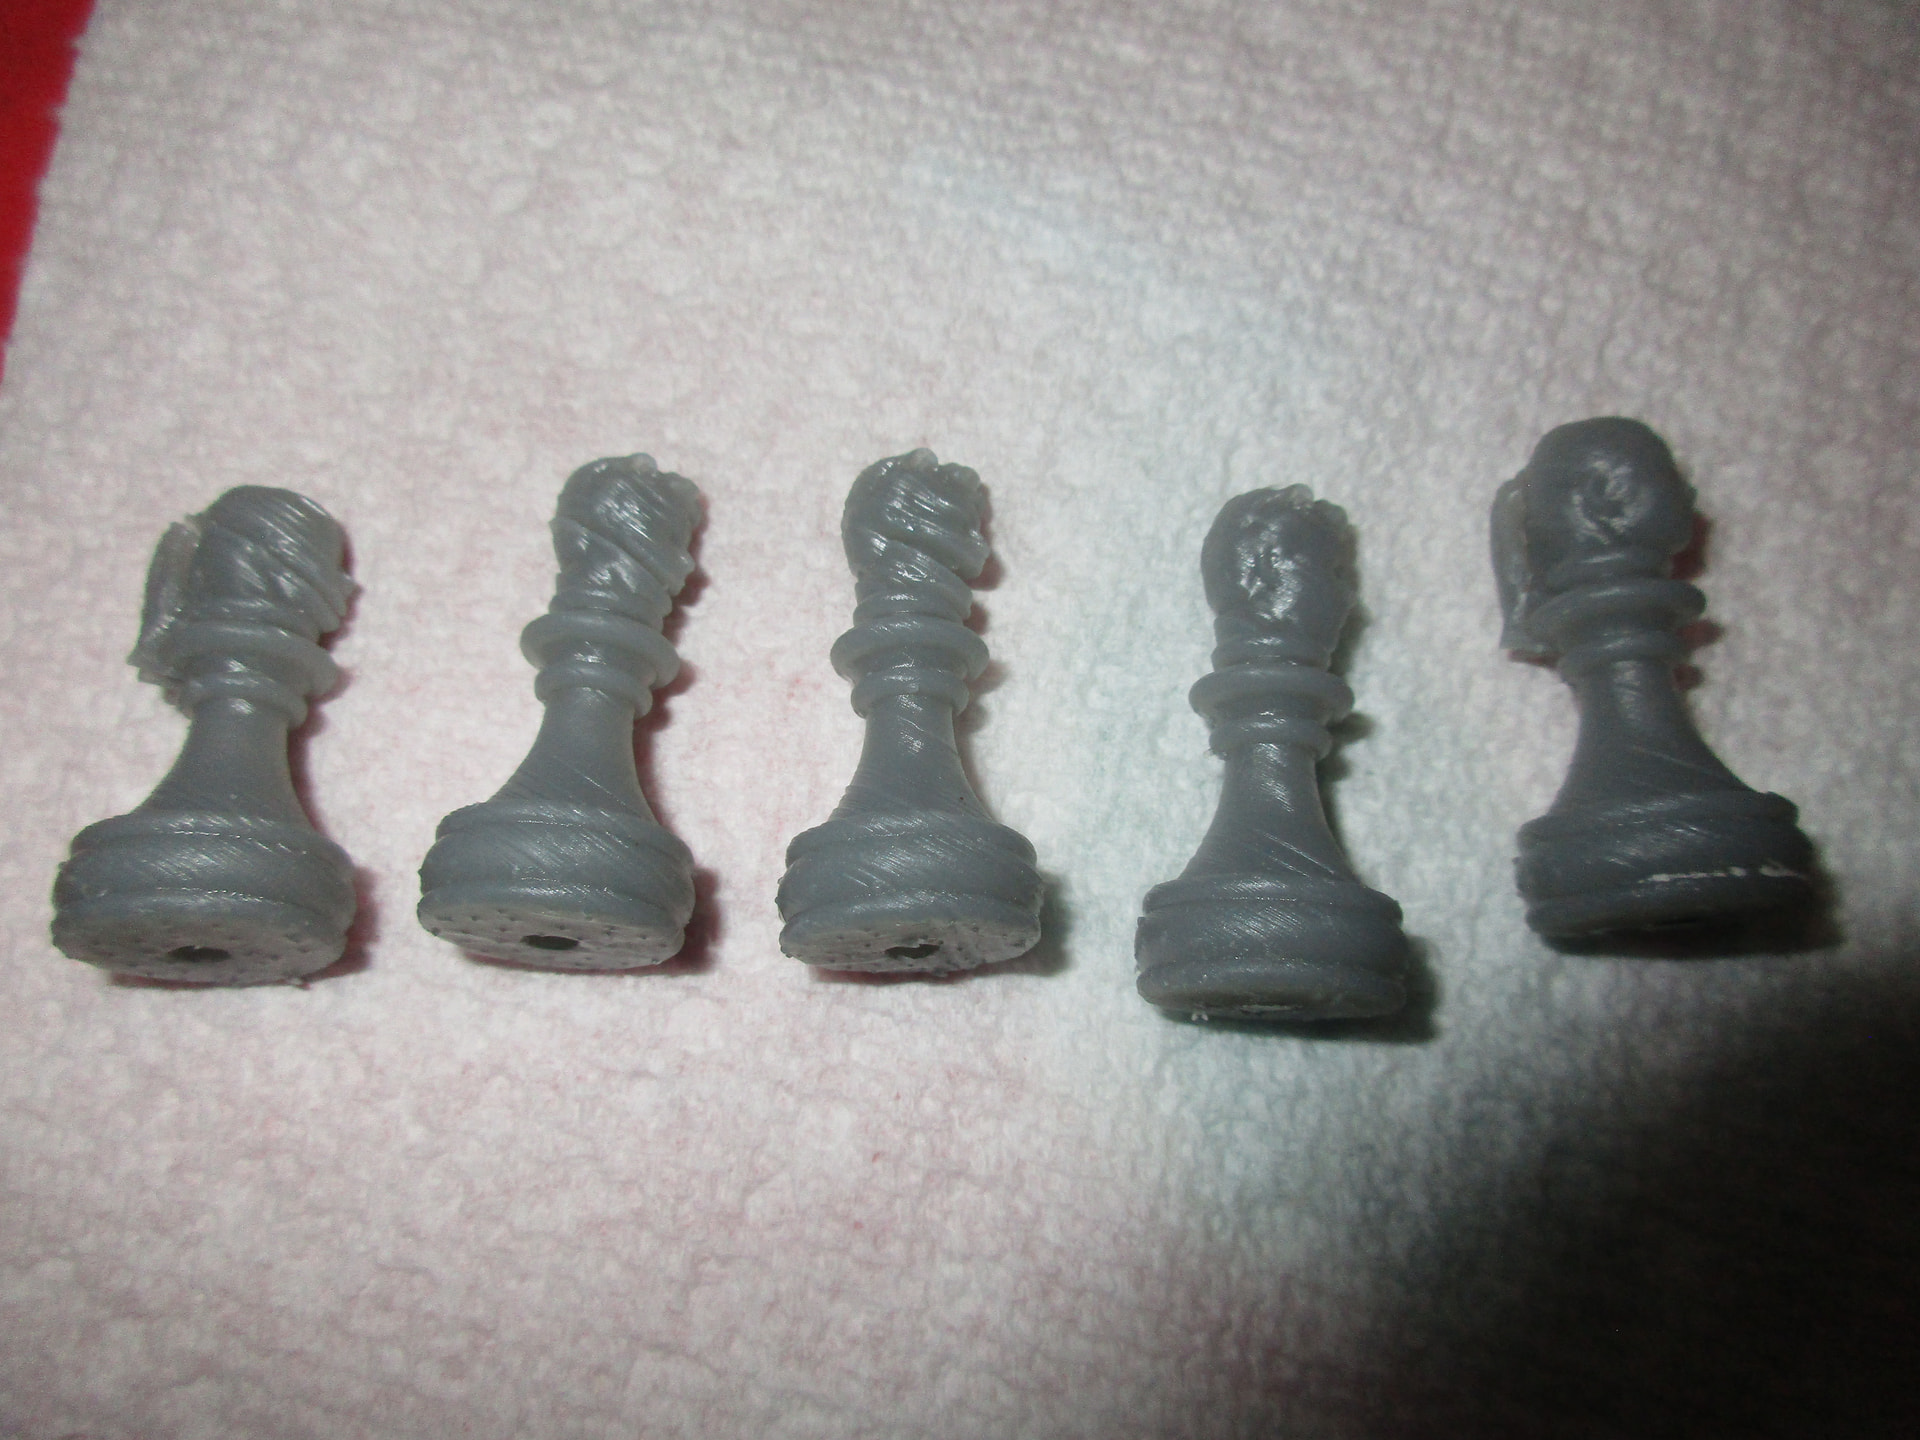
So, I go back to printing my chess heads, and I get this unusual horror-movie inspired failure. Of the 16 pawns printed, 6 of them have either poor-quality layer line issues or this creepy Glasgow Smile issue.
So… what is causing this? Are the separations due to excessive suction to the tank? Or is it because there are still some little resin sheets floating around in there that I missed?
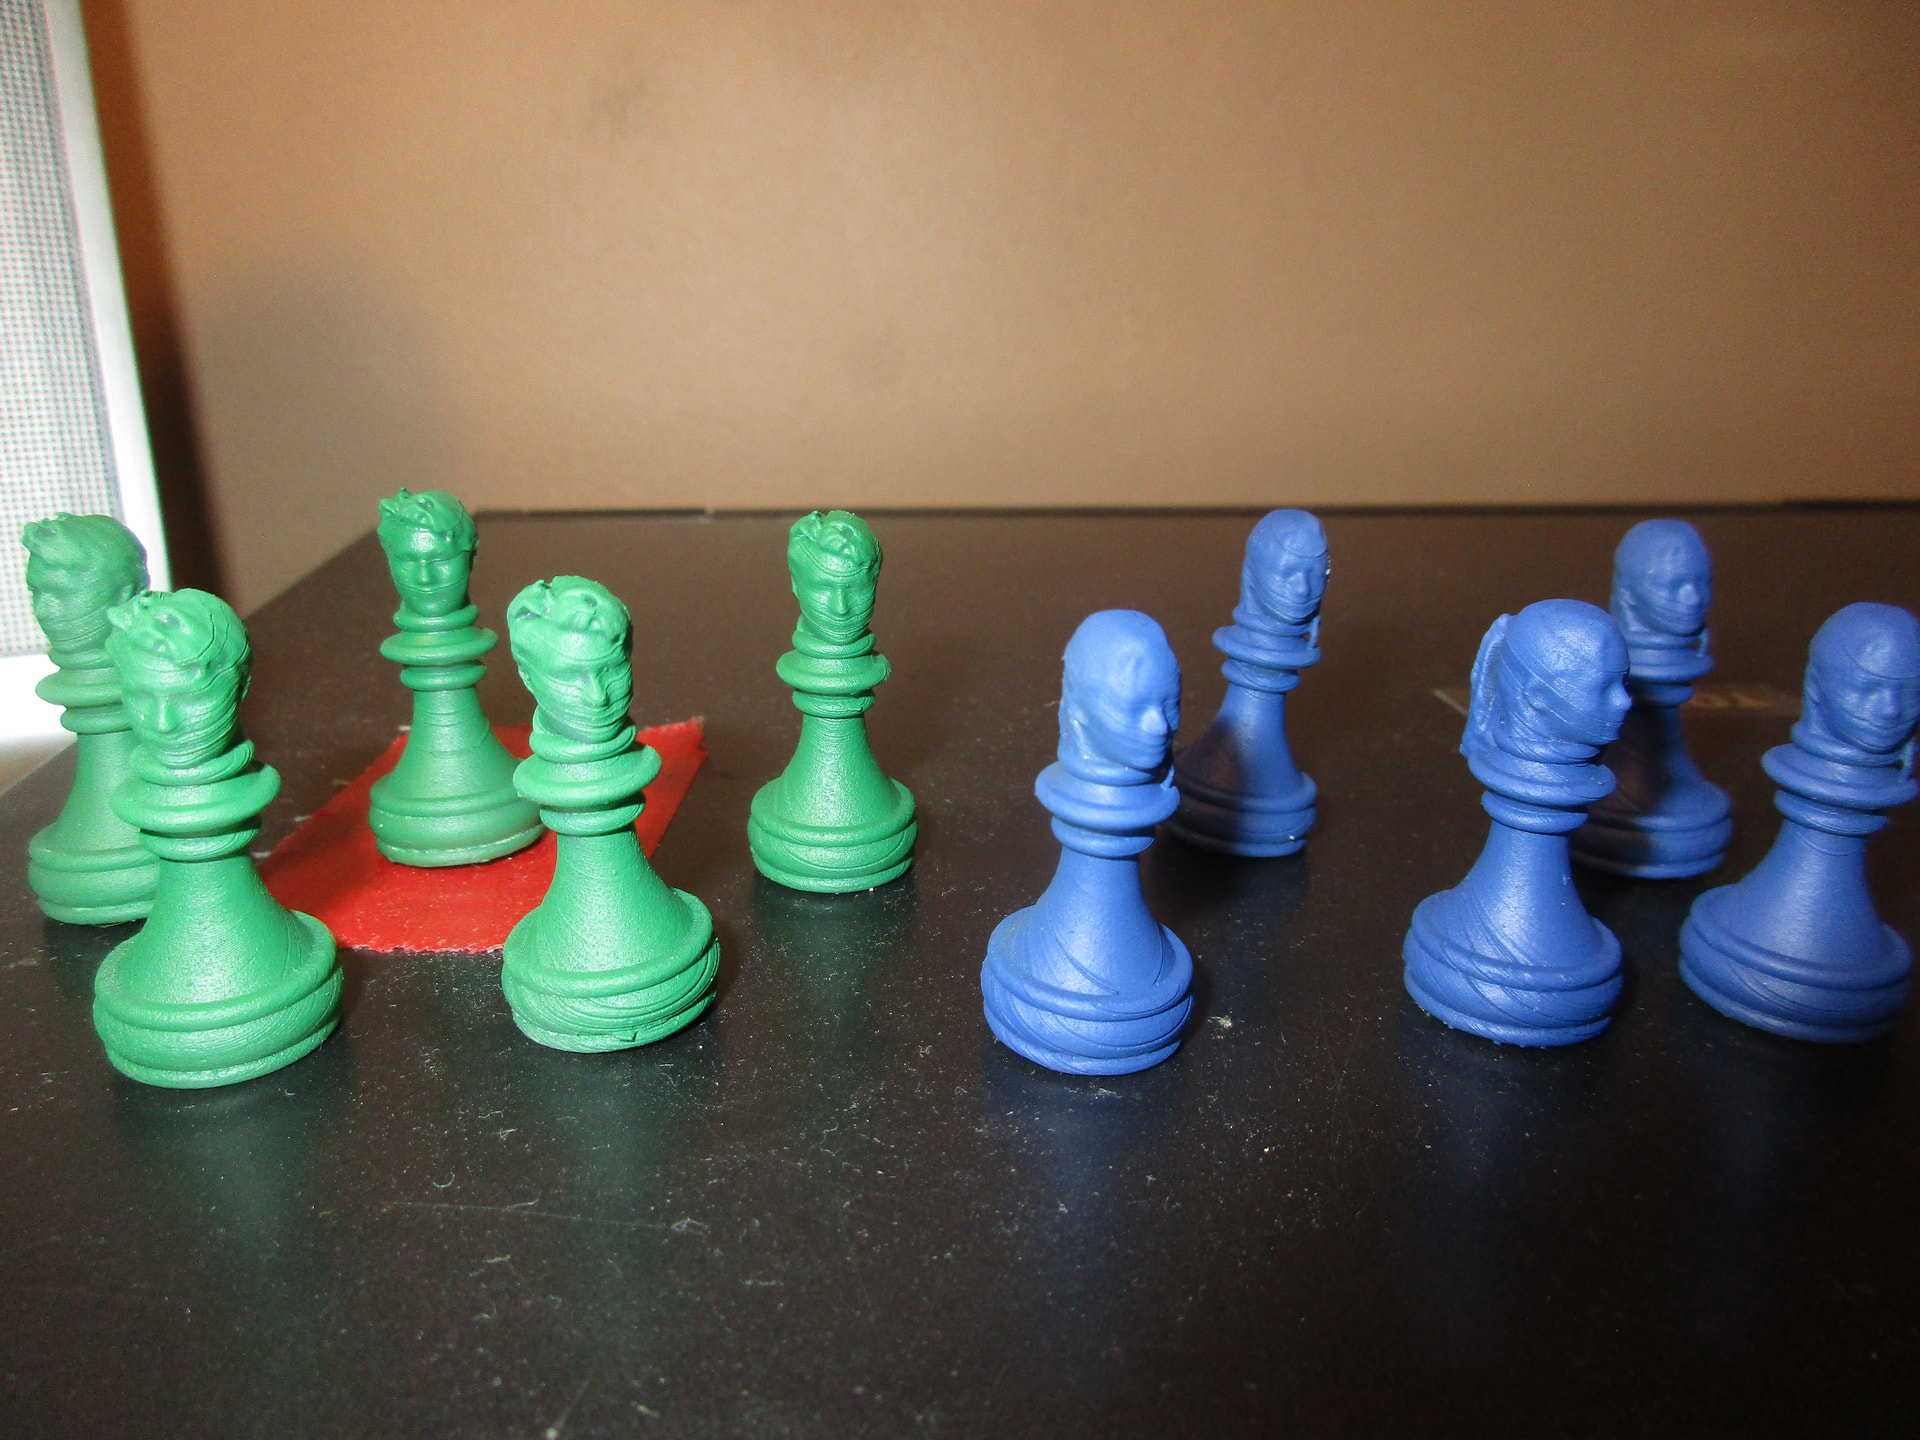
On the right, some decent-quality prints of the brother and sister pair. On the left, a handful of creepy print failures.
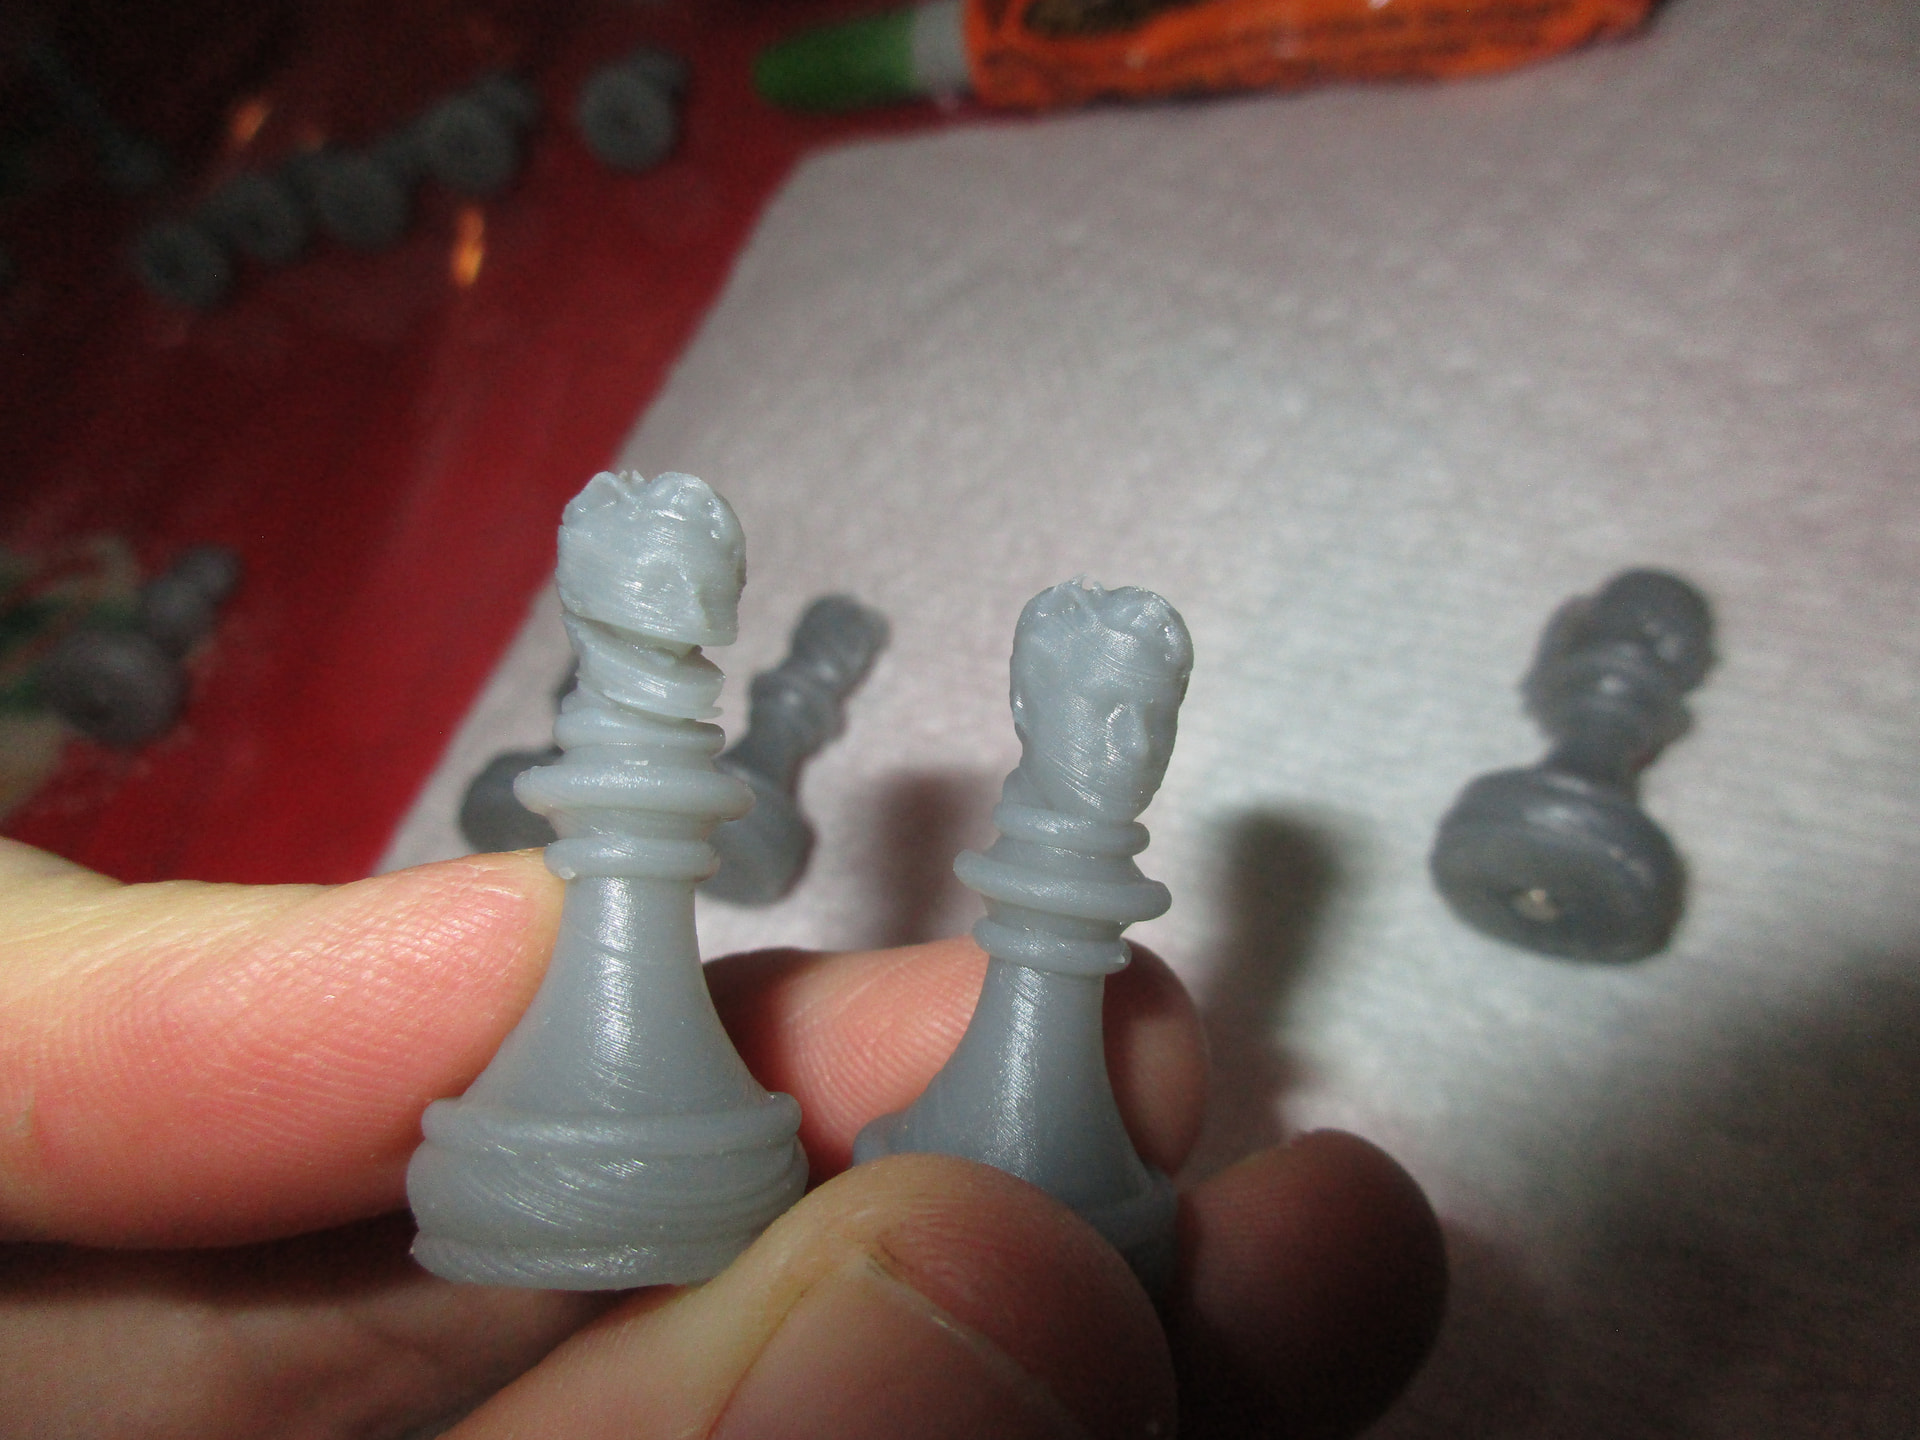
I can’t tell if my friend’s son has been turned into muppet or is some victim in a Scottish act of torture.