Hey! I’ve made a few clear resin projects for socials over the years:
Kitchen glass replica
Snow Globe
Putting a Benchy in a Bottle
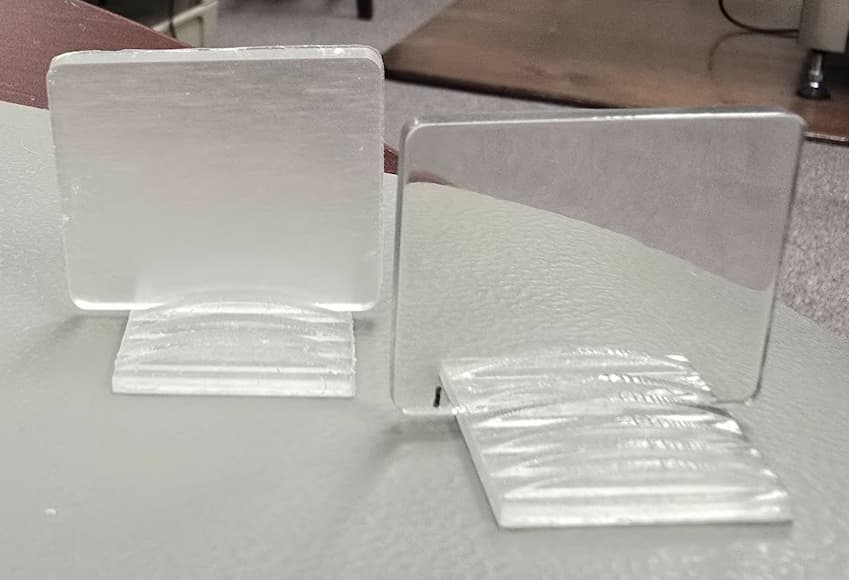
For clear parts, I do a two-stage buffing and polishing process using a polishing lathe, first a wet cutting/buffing step with a pumice substitute, then a dry polish with a tan high-shine bar. After that, I either apply a clear coat or wipe it down with mineral oil, depending on the final look I’m going for. Mineral oil is great for making parts look good in photos, but it dries up over time, so for a more permanent finish, I’ve tried a million different ways. For large flat pieces, I use a palm sander, going from 100 to around 800-1000 grit to smooth out surface artifacts, then either buff the outside with cutting compound and a car buffing wheel or apply a self-leveling clear coat. For small parts, I use a rotary tool with scotch brite abrasive and polishing bits. You can play around with different compounds, I’ve had good luck with the dental workflow of pumice substitute and tan high shine compound, but I’ve also experimented with the 3-step Novus acrylic polishing system, as well as Meguiar’s car compounds for cutting, buffing, and polishing, and have had great results.
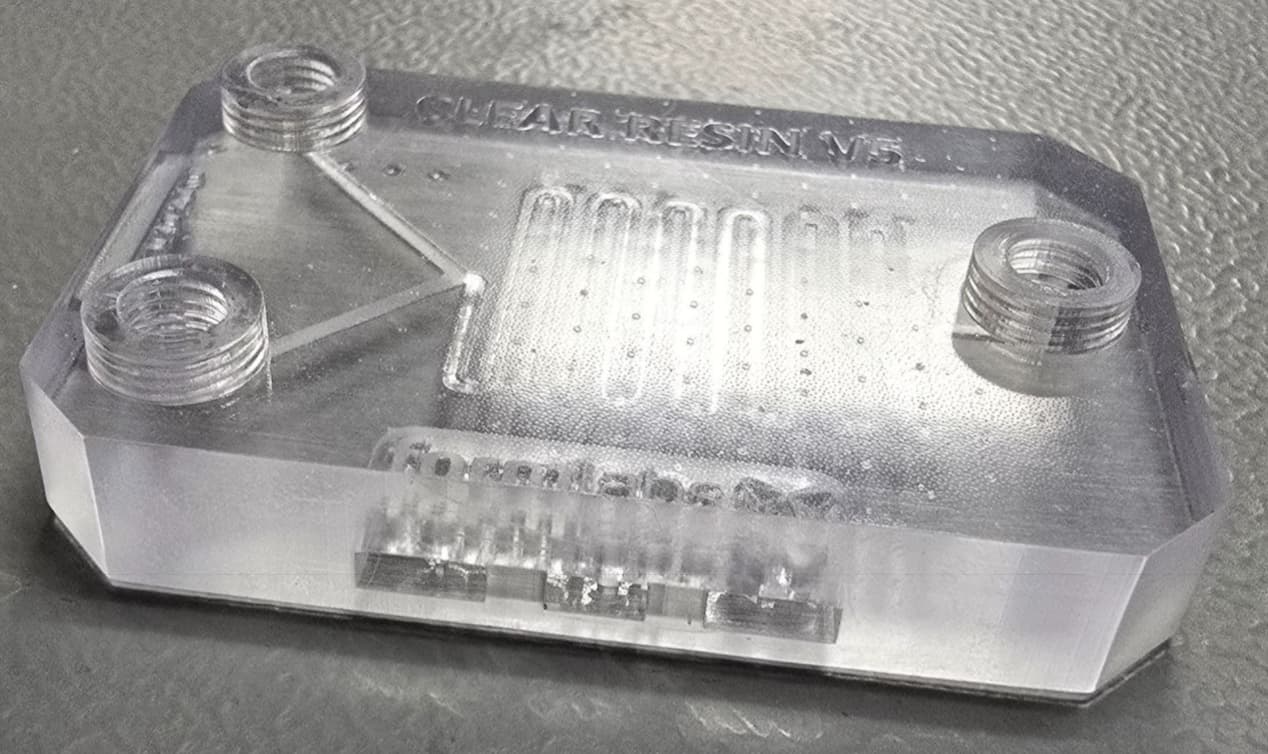
For the photo of the microfluidics sample part, that part’s top surface is naturally glossy from the tank’s film, so there is no polishing done, just flushing out the channels and curing. You could get it clearer on all the faces with the standard 2-stage polishing process outlined above on a polishing lathe. It’s relatively quick and easy, but you can achieve higher levels of clarity with other methods as well, like @MattRForerunner mentioned.
Another trick is using UV-cured clear resin (not for 3D printing), rubbing it into the surface, and curing it under UV light, kind of like mineral oil but without the residue. It really depends on what the part geometry is and what level of clarity you’re going for. I’ve experimented with so many different processes that there isn’t one singular one, but that’s the general path I go down.
In terms of preventing yellowing from ambient UV over time, you can kill two birds with one stone by spraying a clear printed part with a UV resistant spray clear coat. I’ve found most cheap ones work well, but automotive ones are a little more expensive and are better with a smooth glossy self-leveling finish.
For non-engineering (purely aesthetic parts): An important note that I would like to emphasize when I saw people trying to recreate ones like the bottle, when you export your model, make sure you really increase the polygon count when exporting. Seeing facets really kills the magic. The way I got this bottle to look so realistic, is I exported the perfectly revolved bottle from Fusion into ZBrush, dynameshed it to 3M+ points, and sculpted in a lot of imperfections and “wobbliness”, to replicate how blow molded bottles are not perfectly consistent in thickness all around, and have slight warping and defects. A perfect CAD model will not have the same effect. Good luck!