At the Formlabs offices, a majority of the printers have been released of their typical duties and instead pump out holiday decorations and gifts for friends and family. We suspect many of you are doing the same and want to give you the opportunity to win more than just the appreciation of your family and peers with this holiday contest.
To enter, post images of the holiday themed decorations or gifts that you’re printing this year as well as a brief summary of your process for making them. We’re keeping this first contest vague to gauge participation and community interest for more of these in the future. So long as your entry is holiday themed and uses components made on a Formlabs printer, you’ll be good to go.
Assemblies and interesting finishing techniques are a plus and at the end, we’ll gather the entries and have a hand-picked group of Formlings decide on their favorites. We’ll be judging based on technical difficulty, creativity, and presentation and the contest will run from today, December 12th to just after the new year on January 7th.
1st Place Prize: 1L Standard or Engineering Resin of your choosing and a Standard Resin Tank
2nd Place Prize: 1L Standard or Engineering Resin of your choosing
Let me know if you have any questions and we’re looking forward to seeing your entries below!
I have a couple gift Ideas I’m working on for christmas, are multiple entries accepted or should I choose just one to submit?
Thanks! This should be a lot of fun to see everyone’s ideas.
I’ll get this started. Here is a Christmas ornament I designed in fusion 360 and printed in Clear v2 two weeks ago. I really like the way the lights on the tree shine through. As you move around it appears to change color depending on what lights are behind it.
And here is a little gif of the design process:
Brief summary of my design process in F360 and PreForm:
Sketch one ‘side’ of the snowflake
Circular pattern 6 times around a center point
Connect all 6 sides
Use ‘pipes’ for one of the sides to generate a 3d model
Fillet the edges if a rounder, more fluid, appearance or don’t for a more crystalline appearance
Circular pattern the 3d model around the center point
Add a bail/loop for hanging from the tree
Save as SVG or send directly to printer through F360
I oriented nearly vertically to minimize material use and make support removal easier, at the expense of longer print time
Process:
CAD Modeled in Solidworks 2017
Printed on a Form2 using Grey V3 Resin
Molded using Silicones Inc GI-1000 and Casted using Smooth-on Smooth Cast 325.
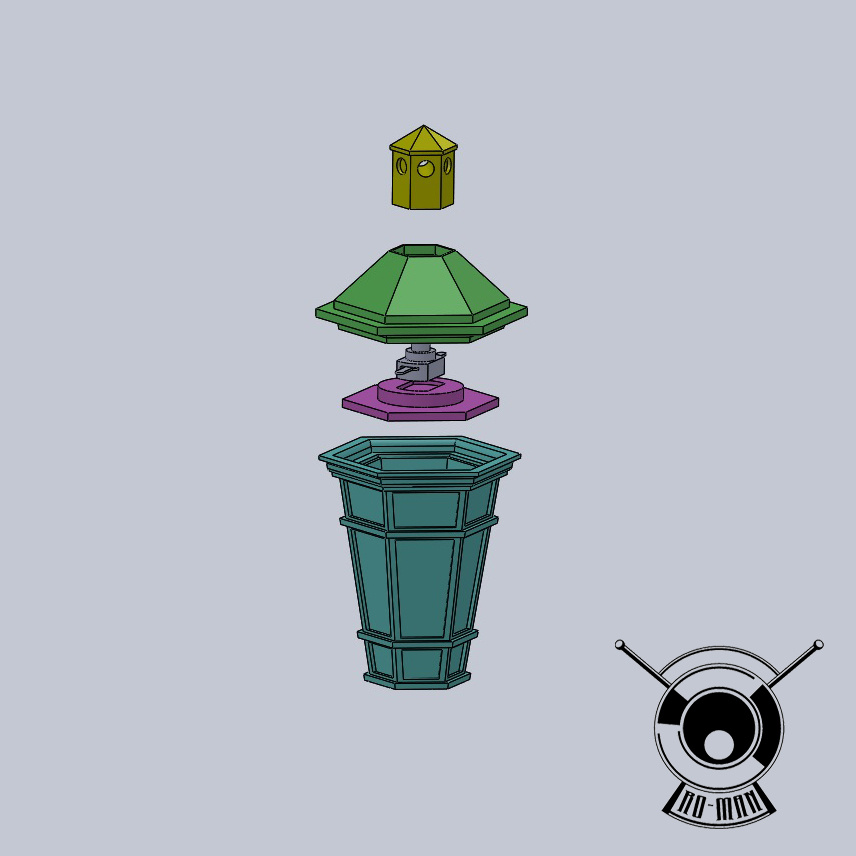
Painted using Cel-Vinyl Paints.
Inside the lamps include 24awg wiring, mini momentary switch, 2032 cell battery case and led hookup.
LEDs can be interchanged with holiday colors.
All work start to finish by Richard Lafarga from Ro-Man Studios.
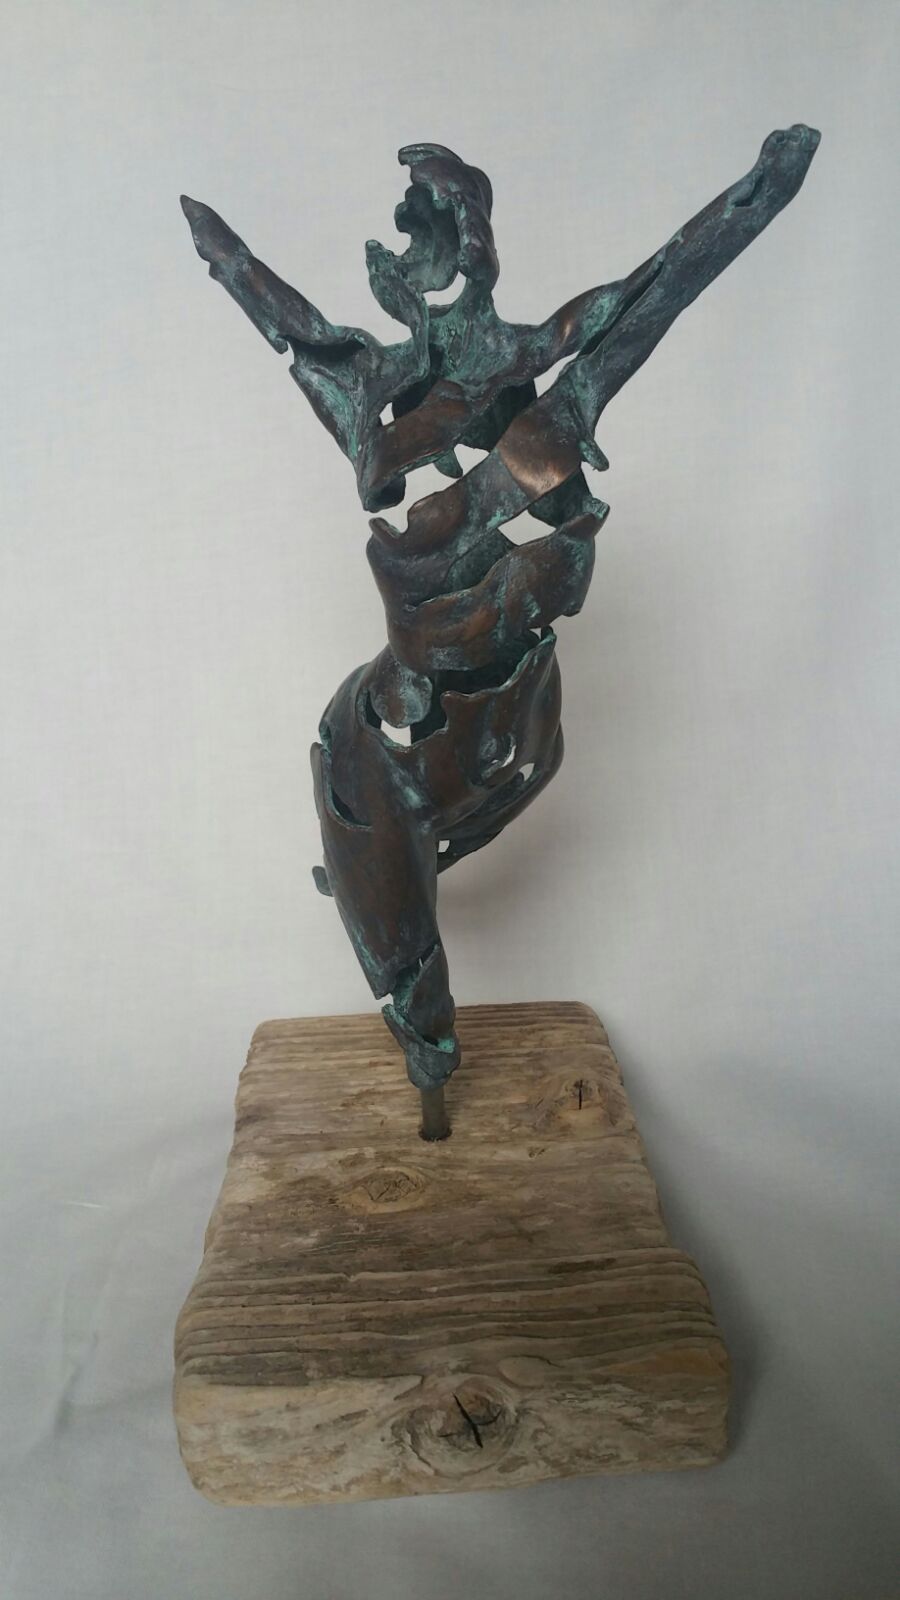
I made my mum a little statue as a christmas gift and wanted to go for a bronze effect look that looked as authentic as possible. I modeled the statue in Zbrush and sliced it into two at the stomach area and then added a structure to connect the two halves well with a bit of glue, adding some extra thickness to the base of the leg to take a thread. After glueing together I painted with a few good coats of a bronze paint that has fine metal powder and a hardener that when fully cured can be sanded and buffed to look reasonably like bronze. But even better is it will react and patina in the same way also. So when the paint was still wet I doused it in an acid salty solution to bring up a nice green blue patina and when fully dry just rinsed and buffed with 000 steel wool. I threaded a bolt into the foot and attached to a chunk of driftwood! She was happy with it at least!
It was from sculpt nouveau, I found a few others but this was the only one with a hardener. They also do a copper paint which seems to be good. It needs to be put on fairly thick, so surface detail will be lost somewhat.
I also printed a nefertiti for my dad and a Peter cushing/tarkin sculpt sculpt I did a while back for my friend who is a star wars fan!
Thank’s! Yeah it’s definitely one solution, one thing I would say is that the patina sells it more than the buffed polished surface, that part doesn’t quite work as well as say electroplating, but caswell do some electroplating kits if you need something even more convincing!
Here is my design for a gift this Christmas.
To realize it I was inspired by the pendulum of Mermet. In it you can introduce something symbolic of what you want to find. It has a screw closure that works very well with Durable resin
I did a slightly different take on the leg lamp from “A Christmas Story”, I used Sally’s leg from “The Nightmare Before Christmas”. I turned the whole thing into a ornament. The pictures of the piece aren’t that good but I think the renders came out nice. Maybe I will get the chance to paint it soon! I used Matrix to design it which is a jewelry design software and the same to render it. Then I just throw the whole thing on the Form 2.
Last minute entry. Today I made this snow globe. I have been wanting to try this since a discussion in September here on the forum. My goal was to make a snow glob entirely with the 3d printer. I made the model in Fusion 360. I decided to split the dome in half to make support removal, sanding and clear coating the inside easier. The base is one piece that features a house, tree and fill hole. The base was designed to be printed flat to eliminate any visible support marks. While it was printing I started cutting up support material from previous prints into tiny pieces. After the print finished, I washed the parts and removed supports. Then I wet sanded the dome with 320 then 600 grit sand paper. I clear coated it with Rustolium Triple Thick Glaze. After 40 minutes it was fairly dry (I should have given it a few hours) and I sanded off the clear coat from every connecting edge. I glued the dome into one piece by wiping a little resin around the edged that would meet. Holding the pieces together with one hand I used a blue laser pointer from amazon to cure the resin. Then I placed the cut up support material inside and glued the base to the dome again with resin and the laser. I injected water into the fill hole with a syringe then glued the hole shut with resin. And it was done. I made the model in f360 last week but started the print today around 12pm and finished the project around 9pm. If I were going to do it again I would have done a few things differently. First I would have moved the house and tree into the focal point of the dome. I forgot how the refraction of the water would change the view. Second I would have given the clear coat much more time to dry. I was still tacky and I left a few finger prints.
TL:DR It is made entirely with clear v2. The “snow” inside is support material clipped into small pieces. All of the pieces were “glued” together with clear v2 then cured with a blue laser pointer.
Here is the form file if you want to give it a try.
I took some photos of the progress throughout the day but their file size is too large to upload.
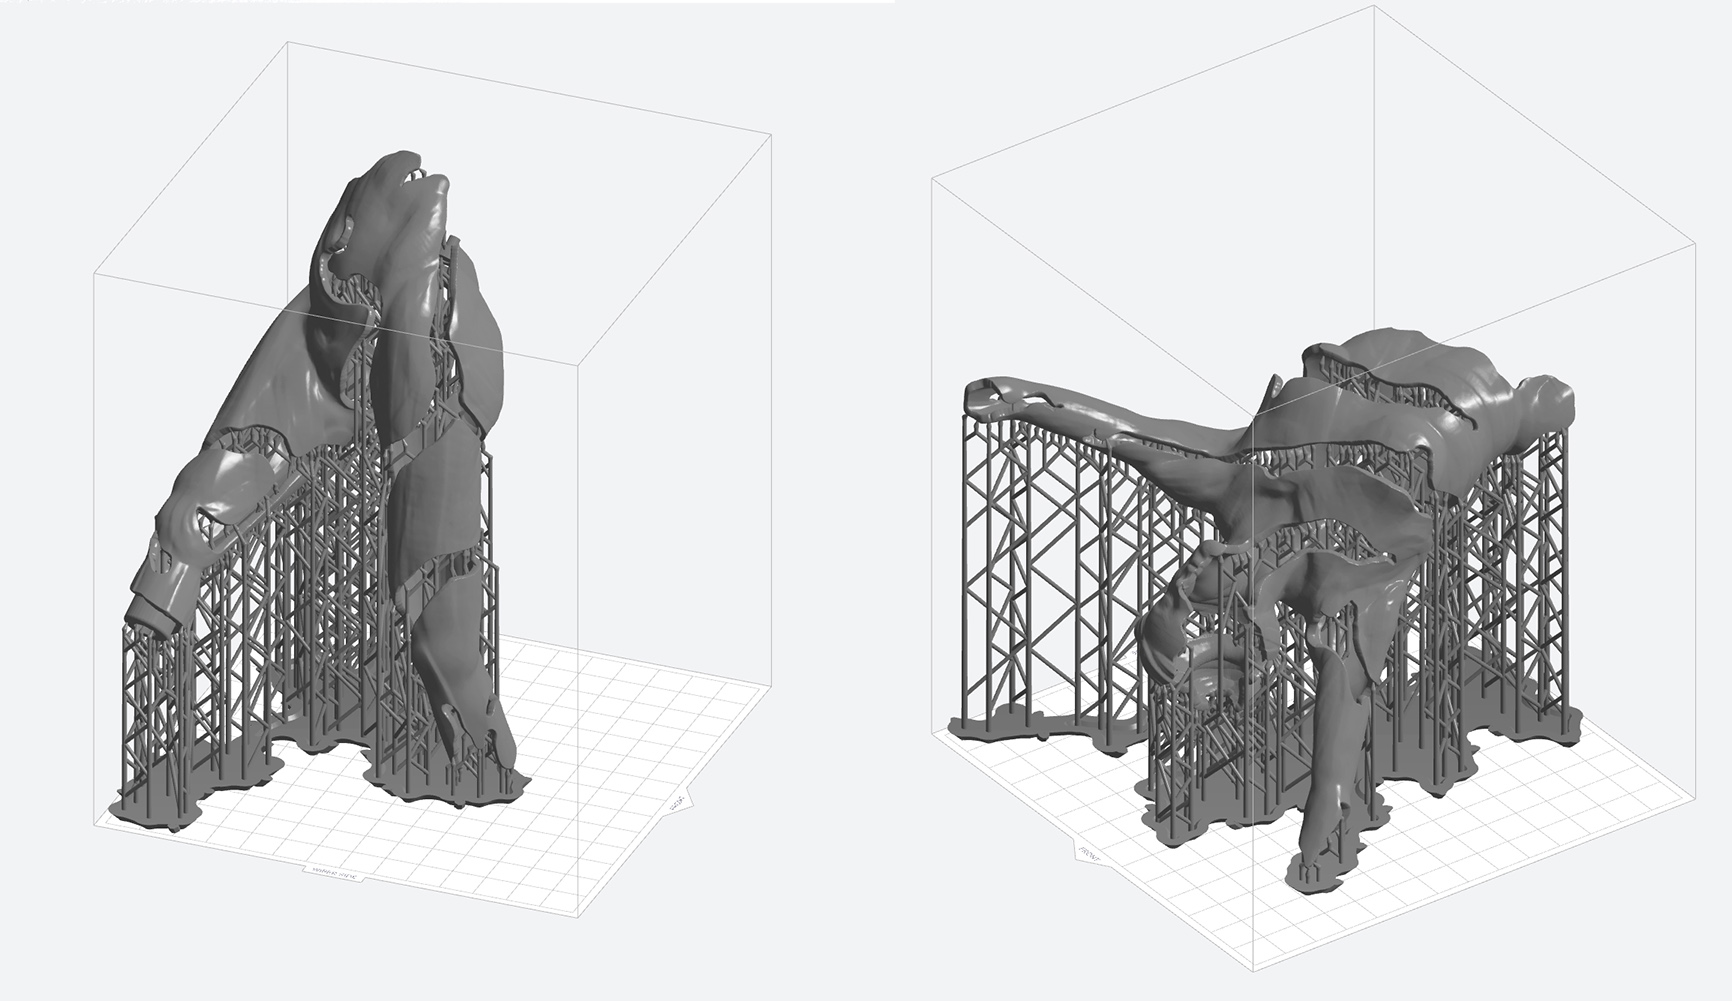
I created a couple 3D characters for my sister to celebrate the first children’s book she got published. It was a gift for Christmas.
I modeled the robot in Solidworks and had a friend sculpt the ballerina in Zbrush. Parts were grown in grey resin, sanded, and then painted using automotive-grade paints. Unfortunately I had a mishap where the ballerina fell off the paint stick just before clear coating and I was unable to finish it for Christmas due to several snow storms and delays. An arm and the two pigtails broke off and a hand had to be grown again due to lost fingers. I drilled holes in each limb so metal pins could be placed before gluing back together to add more strength.
I’m providing a Google drive Link for photos as I’m not near my computer this weekend. Let me know if the photos are viewable!
I had trouble trimming the resulting STL after merging it with the frame I modeled in Autodesk’s Fusion 360. In the end, I exported the two pieces as a single STL, and then mechanically removed the corners with a Dremel.
The result turned out well against the Christmas tree lights.
In the link, I show what the ornament looks like with a spotlight flicked on and off. The best view is straight on while most of the pics are at a slight angle. With it dangling free from a string, the ornament seemed a little shy for the camera. However, the effect is great when you don’t know what to expect as it looks like the ornament spent a little too long in the attic and melted into a blobby mess. The reveal (turning the tree lights on) shocked everyone.
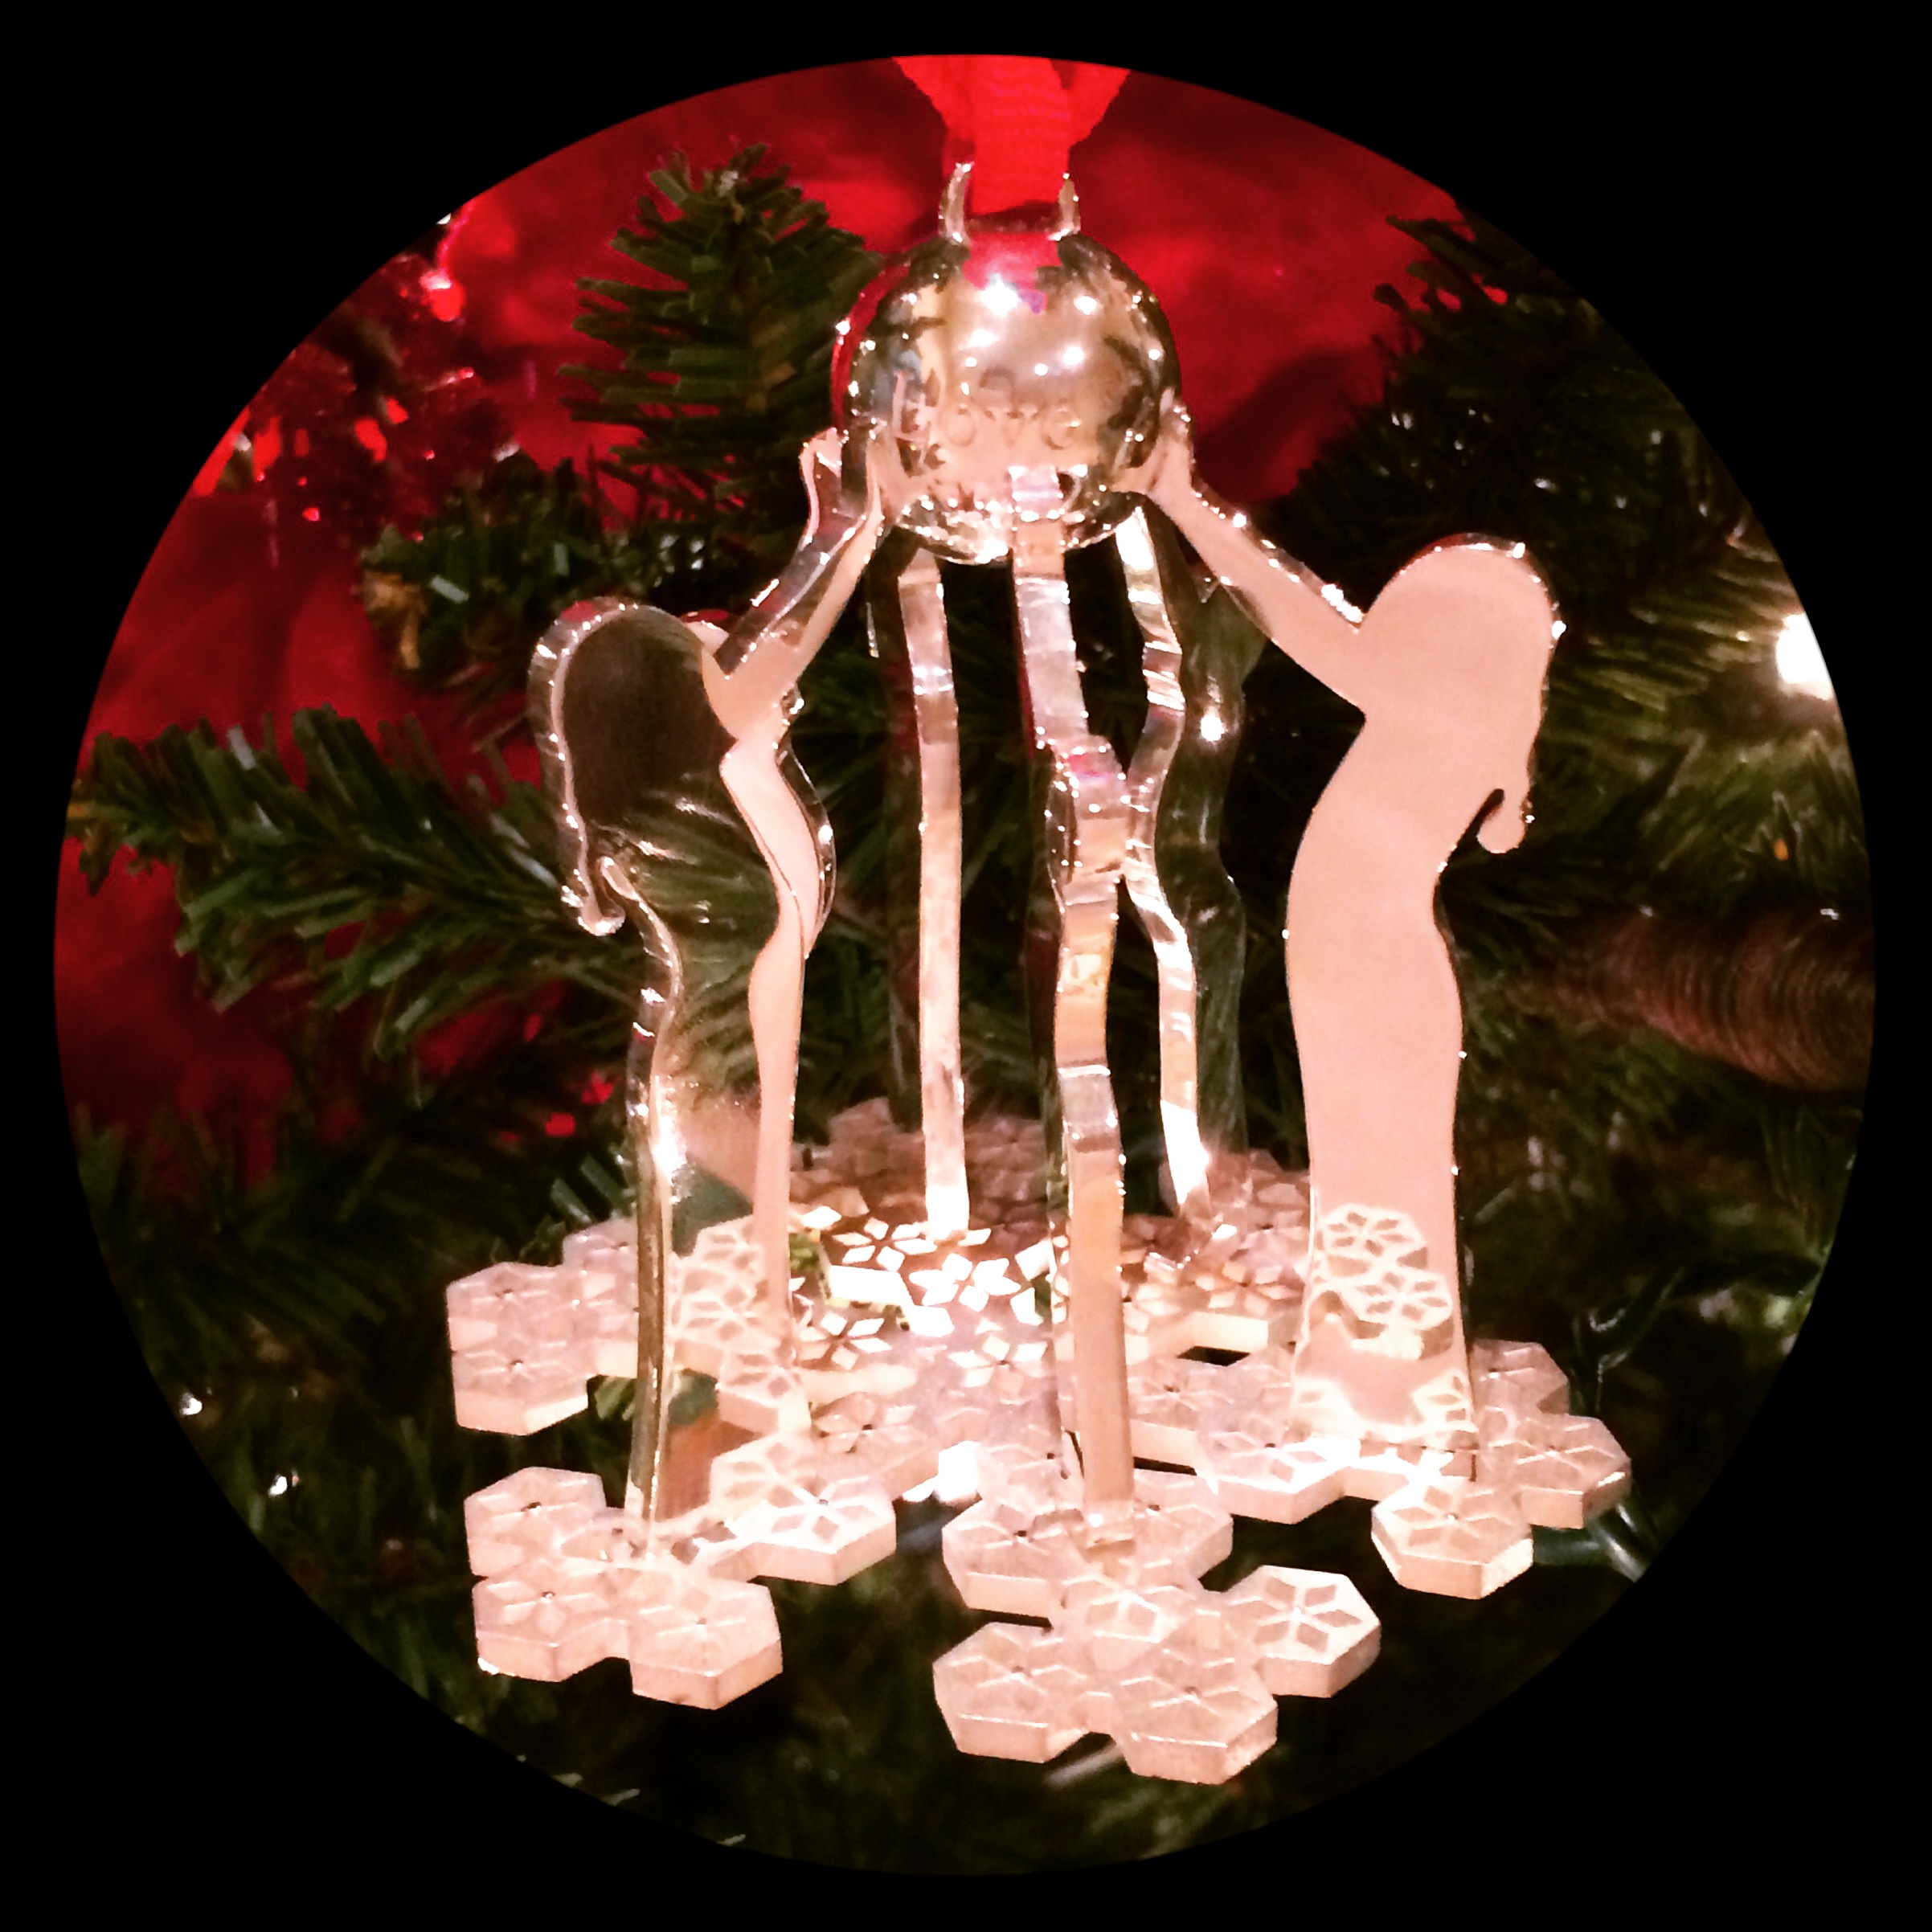
Here my inspiration for the Christmas ornament are my kids, snow flakes, and the bell in the Polar Express. No two flakes or people are alike, the kids are holding up the bell of Peace, Love and Joy of which we should believe. I took the silhouette of my kids holding a basketball, I researched flakes through the lenses of NASA and everything else is obvious. Printing the hollow is the most complicated! It kept warping. I only had a tad bit of tough resin left, which is why the print is a little messy but in the end, the final product is stunning!!! I make custom designs for customers of their children and I’m making jewelry of the bell alone.
These entries are each pretty fantastic and we’re closing this contest to further entries. We’ll likely do more of these in the future, and I’ll be sending out an internal poll to decide on the winners. The two winners will be announced here by the end of the week so stay tuned!